1991 Chevy C1500 RCSB Version: I Have A Problem

Disclaimer: Links on this page pointing to Amazon, eBay and other sites may include affiliate code. If you click them and make a purchase, we may earn a small commission.

Nick_R_23

I'm Awesome
Joined
Dec 13, 2020
Messages
153
Reaction score
292
Location
Alaska
Alright, so an actual update on the truck itself. I spent a few days just looking it over and fixing little things to be able to drive it home from Anchorage. This is the few things that were fixed or replaced:

• Replaced bad throttle body gasket
• Replaced bad gauge temp sensor and pigtail
• Found ECU temp sensor completely missing, installed a new one
• Fixed ECU and headlight harness grounds
• Replaced leaking thermostat gasket and sticking thermostat
• Repaired chaffed wires throughout harness
• Replaced missing transmission mount nut
• Repaired multiple brake line fitting leaks
• Replaced damaged TV cable
• Fixed all exterior lights
• Repaired damaged alternator charging wire

I also found some evidence of previous crash damage, which is fairly minor for the most part. The core support is damaged, as is the frame mount on the passenger side. Bumper brackets are bent, but the bumper has been replaced…with one bolt holding it. I’ll find some straight pieces from another frame.

Even after replacing the gauge sensor and pigtail, the temp gauge was still pegged all the time. I picked up another (earlier) cluster to rob the gauges from. I like the ‘finned’ style over the ‘open’ style gauges, I feel like it’s more of an upscale appearance. Swapped the gauges over to the ‘91 unit, and everything works perfect!

You must be registered for see images attach


New gauges installed in the old cluster

You must be registered for see images attach


Cluster installed in the truck!

You must be registered for see images attach


The radio and A/C units were functional, but in pretty bad shape, so I found a cleaner pair to replace them, and also a little bit better radio unit.

You must be registered for see images attach


New pair!

You must be registered for see images attach


I also found a new core support, rear bumper, and an extra set of TBI heads to drop off at the machine shop.

You must be registered for see images attach
 

mjordan

Newbie
Joined
Jan 20, 2018
Messages
22
Reaction score
13
Location
Texas
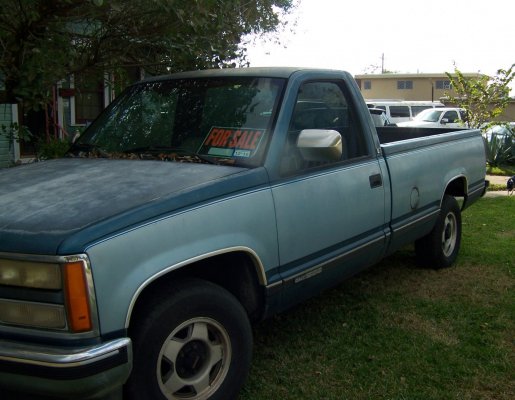
Picked this pile of a truck up the other day for $1200 to keep my other 7 trucks company. 1991 Chevy C1500 RCSB, 350, 700R4. Higher miles and rough around the edges, but has a clean title and isn’t rusted out. I’m just stupid enough to drop several thousand bucks on this nearly 300,000 mile truck and say that it’s a great idea. It definitely isn’t pretty, and I can’t say that it’s a burnout machine because we all know a TBI 350 isn’t worth **** in the power department, so we’re just going to say that this build is some deranged version of fun! :lol:

You must be registered for see images attach


So no screwing around, I dove right in! Cleaned out the local Napa, and bought a 1.25” front brake conversion (calipers, rotors, pads, hoses, bearings, seals), oil change kit, fuel and air filters, new distributor, Iridium plugs, spark plug wires, TBI rebuild kit, thermostat, and new oil pressure sensor and both coolant temp sensors. Also ordered a McGaughy’s 2/4 drop kit with rear shock extensions, and a Summit catback dual exhaust kit, although I’ll probably swap out the muffler for a Magnaflow. Not ordered but planned on are American Racing Torq Thrust D’s in 15x10 with 3.75” BS/+44 Offset, and Cooper Cobra 275/60R15’s. Yes, all four corners! ;)

Engine needs a headgasket but runs okay. Depending on if the block is setup for a roller cam or not, it may or may not get pulled. If it is, it’ll get a full roller cam setup, block decked, honed, flattops, MLS gaskets, and mild head work. If not, a cheap rebuilder gasket kit and run it ‘til I scatter the rods on the Highway.

You must be registered for see images attach


You must be registered for see images attach
Let us know when you get the drop kit in. I have the same 91 truck and just can't decide on the 2-4 drop kit or leave it alone. Would love to see what it looks like on yours
 

Attachments

  • 100_9831 (2).JPG
    100_9831 (2).JPG
    288.3 KB · Views: 7

Nick_R_23

I'm Awesome
Joined
Dec 13, 2020
Messages
153
Reaction score
292
Location
Alaska
Some of these aftermarket parts so far have not impressed me. The grille and turn signal lights have been the worst at this point.

The grille is from Amazon and was molded too thick in certain places - namely anywhere the retaining tabs need to be clipped in. There is an issue with the corner lights too, and while I feel like the issue is with the grille, I haven’t verified yet.

I used a sanding disc on a Dremel tool to remove material:

You must be registered for see images attach


The next issue was the corner lights, made by Anzo. Overall, they’re built pretty decently, but they have a flaw that needs to be addressed. I found this out when tightening the screws during a test fit - the corners break off very easily:

You must be registered for see images attach


You must be registered for see images attach


The reason for this is obvious and due to a poor design. The inner and outer housing corner tabs do not match up when the lights are assembled, leaving a gap between the two surfaces that gets pinched when the screws are tightened.

You must be registered for see images attach


My solution was to fill the gap with a hardening, fast drying epoxy (JB Quick) to fill the gap and add strength to the corners, and not allow the outer lens to be pulled in and crack.

You must be registered for see images attach


My tires also came in, Cooper Cobra 275/60R15 for all four corners!

You must be registered for see images attach
 

Nick_R_23

I'm Awesome
Joined
Dec 13, 2020
Messages
153
Reaction score
292
Location
Alaska
Alright, another update! I’ve been taking care of some other projects and slowly moving back to this one. Some of you may have seen the other 1997 RCSB I picked up as a parts truck, intending to build a 454SS clone. I decided I don’t need two trucks, so that one will be parted out the rest of the way, with the good parts going to this truck, including the frame, at a later date.

That said, I had picked up a real 454SS rear axle for that truck, which will now be saved for this truck. Eventually, I want to swap something better in this truck, so whether that ends up being a 454 or LS in the future remains to be seen.

You must be registered for see images attach


You must be registered for see images attach


Also took some better pictures. Drivers door is a little rough, but fairly clean body otherwise.

You must be registered for see images attach


You must be registered for see images attach


You must be registered for see images attach


Somewhere along the line, I scored a blue cupholder for it!

You must be registered for see images attach


With the heads being close to ready at the machine shop, I decided to check out the engine and see if I could track down the misfire it has and gauge the overall health of the engine, and also see if there were any cylinders I needed to keep an eye on once the heads were removed. Well…turned out there was definitely one! This is the #1 cylinder.

You must be registered for see images attach


I performed a leak down test, but couldn’t accurately pinpoint where the air loss is coming from. The crankcase won’t pressurize, and neither will the cooling system. Cam/rockers have good range of motion, and I can individually push on each valve and lose air. Additionally, I scoped the cylinder, and although my older camera doesn’t fit through the spark plug hole, from what I could see of the valves and piston, there were no readily apparent issues, so I‘m interested to see what the issue turns out to be.

Also, I did happen to notice that the head gaskets had been RTV siliconed by a previous owner - not starting off with a great sign here!

You must be registered for see images attach


Anyway, I picked up the heads from the machine shop yesterday, and they turned out great! It wasn’t ideal to drop $800 on restoring a set of TBI heads, but with parts shortages and shipping to Alaska, it was the best way to go. They were mag’d, surfaced, received all new guides, all new valves, 3 angle valve job, milled for Vortec seals (now good for .500” lift, even though I won’t utilize that), Comp single springs, and offset keepers. Basically, I can throw in an LT1 cam in the future and not have to worry about clearance issues.

Most expensive set of stock TBI heads you’ve ever seen:

You must be registered for see images attach


Fancy springs and new style seals

You must be registered for see images attach


Prepping for paint.

You must be registered for see images attach


Shot with two coats of black. I’ve been using Ceramic caliper paint from Napa on engine parts lately. It’s a few bucks more, but it seems to be a lot more durable than regular engine paint.

You must be registered for see images attach


Ready to install!

You must be registered for see images attach


You must be registered for see images attach
 

sewlow

Bitchin' Stitchin'
Joined
Jun 22, 2011
Messages
12,435
Reaction score
5,813
Location
Abbotsford B.C., Canada.
What ratio is that SS diif? 3.73 or 4.11?
Buddy here has a couple of those rear ends. Both ratios. He'll sell one. If you don't mind me asking, just for comparison sake, what'd you spend for that one?
No prob if you want to keep that under your hat.
 
Top