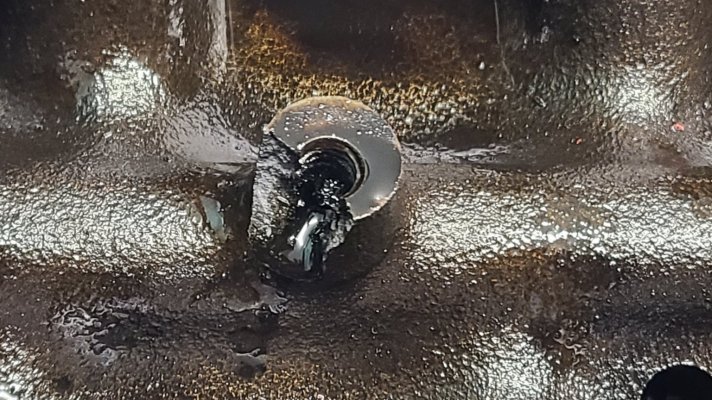
So how would one go about about fixing this one? Took the one hand approach to tightening down these bolts, this one must have had some kind of gunk down in it because it had a little extra resistance until SNAP. Am I just screwed yet again?
That little boss might be subject to quite a bit of vibration from feedback of constant lifter motion., the trick is not to bugger it up further, sometimes there's only one chance left.
Hello again Majorslayer,
Hipster is on the money when he says that the trick is to not bugger it up further. But
when I am operating under the 'last chance cloud', sometimes the extra stress just seems
to mess with me. So I find that by making sure that I already have a 'next level' fix in my back pocket,
only then can I destress a bit and give the situation my very best repair effort on the 1st try.
So even though I have fixed similar boo-boos by substituting a stud & nut for a bolt, let's say that
you tell me that you routinely run your motor into the rev limiter, and this truck is going to be
entered into the next Baja 1000?
No problem, I have a next-level robust fix lined up as a backup strategy. You see, people who really up
their valve spring pressures but for whatever reason want to stay with pressed in studs (instead of
upgrading to screw in studs) ...they instead pin them in place.
And when they are done, it looks like this:
You must be registered for see images attach
(credit:
https://www.thirdgen.org/forums/tech-general-engine/239311-pinning-rocker-studs-my.html)
And here's the results of a quick search so that you can get a better idea of what exactly
is involved in the pinning process. (
GOOGLE SEARCH FOR ROCKER ARM PINNING KITS)
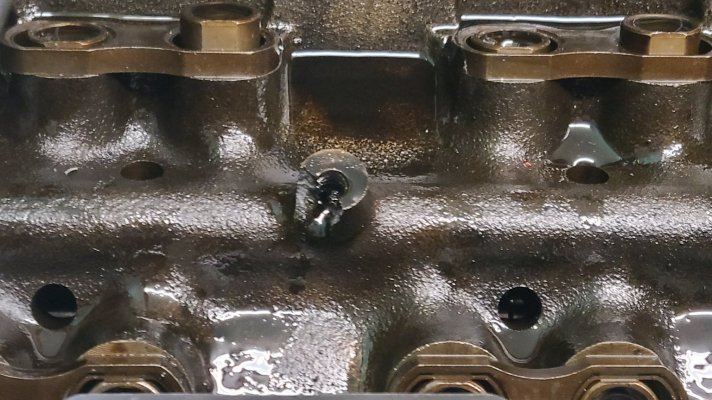
For what it's worth, I looked pretty carefully at your photo, and there looks to be adequate
room to perform this operation. Whether you would be comfortable doing this in situ or
not is a judgement call I can't make from over here in the Finger Lakes region of upstate NY. :0)
Slippery Slope Alert:
I don't know where you are with this particular project, but *if* you were planning on pulling
the motor anyway, then if you take the engine to a good machine shop they could deal with
this while performing other machine work to the engine. Given my own experience with
pinning rocker arm studs, this should absolutely be a 'forever fix', even for the Baja Bobs
out there. :0)
On the other hand, if you are trying to button this up so that you can commute back and forth
to work in order to feed the kids, then the stud/nut combo + 2-part epoxy into the properly prepped
block attachment point should work just fine.
Note: I've used a combination of cleaning solvents (lacquer thinner + a small torch + more lacquer
thinner, repeat until perfect) to get a spot of cast iron cleaned up beyond the 'clean enough to eat off of'
gold standard.
With a focused recovery effort, I'm thinking Crisis Averted...one way or the other, you got this.
Sending forever-fix vibes in your general direction.
Cheers --