How to; Overhead console recover.

Disclaimer: Links on this page pointing to Amazon, eBay and other sites may include affiliate code. If you click them and make a purchase, we may earn a small commission.

Maroon96

I'm Awesome
Joined
Jan 2, 2019
Messages
197
Reaction score
107
Location
America
@sewlow

Used this thread to redo an overhead console a few years ago and feel like it came out pretty decent for my first upholstery project, so thanks for the instruction. Now I've got another one that needs redone and tossing around the idea to do it in leather. Would it be much harder? Is there foam backed leather for this sort of thing or would a person glue foam on first like you mentioned earlier in this thread? Or would it need foam at all, being leather vs fabric?
 

sewlow

Bitchin' Stitchin'
Joined
Jun 22, 2011
Messages
12,435
Reaction score
5,812
Location
Abbotsford B.C., Canada.
When covering with leather or vinyl, I'd use a 3mm (1/8") closed-cell foam. Also called Neoprene.
Because that foam is more dense than the poly foam that's bonded to the original style of H/L fabric, it doesn't compress like poly. The closed-cell will accept a heavier coating of glue as it won't saturate the foam like it will on poly foam.
It's also less forgiving, so any flaws or deviations in the cutting of the foam around the edges will telegraph through the leather/vinyl. Wavy edges.
Because the neoprene is so slick, take a piece of 80 or 100 grit sandpaper & give the surface of the foam being glued to the console a quick cross-hatch scuff before gluing it to the plastic. No need for a lot of hand pressure. Just dragging that course grit across the surface is enough. The surface needs to have the outer skin of the foam broken up a bit for the glue to have some grippage.
Once it's stuck to the console, smooth all the cut edges with the sandpaper so they're nice & even. Don't get too carried away though. Kinda hard to replace remove foam that's been sanded off. Just needs a couple of long strokes the length of the edge to smooth it out.
Before wrapping with the leather/vinyl, take that same piece of sandpaper & give the foam a light scuff. Same cross-hatch method.
 
Last edited:

sewlow

Bitchin' Stitchin'
Joined
Jun 22, 2011
Messages
12,435
Reaction score
5,812
Location
Abbotsford B.C., Canada.
The closed-cell is somewhat stiffer than the other stuff. It won't roll over as easy. Sooo...
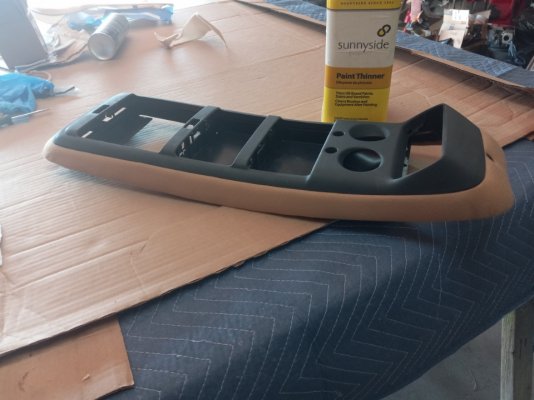
I'd cut the foam on the roof side flat to the way that the console fits to the roof. That'll leave a fairly sharp corner on the foam.
Then soften that edge with the sandpaper so that corner is nice & round.
For where the plastic center goes, (the inner? the insert?) cut the foam so there's about a 3/8" extra & then drop the that center into the console. Doesn't have to be attached with the screws.
Hold it in place firmly & with a new blade in a razor knife, cut the foam following around the outer edge of the inner insert.
Don't saw the blade back-n-forth, up-n-down. That leaves jagged edges.
Try to do one length in one steady cut. That's why the new blade.
Once the vinyl/leather is wrapped that edge will have a nice square transition where it meets that inner insert plastic panel center part piece. Whatever it's called.

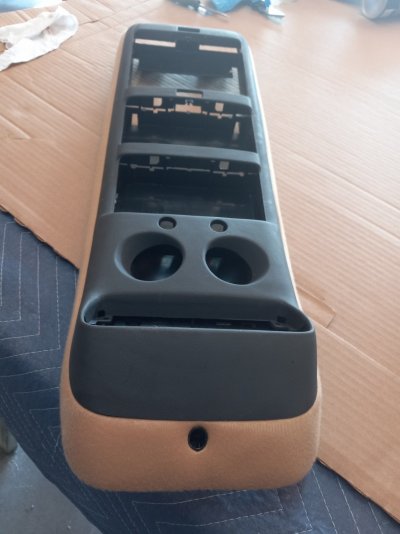
My '98's H/L & console. Done with the closed-cell & perforated vinyl.
I added a piece of piping around the perimeter just as an accent. Same piping as the seats. Most never notice.
It was a PitA to do, getting it to lay right.
IIRC, I still wasn't happy with it & after this pic I redid it over. Again.

Scuse the crud pic. Dirty lens.
...& the ugly visors. Has Escalade ones now. Just not done with the perf'd vinyl yet.

You must be registered for see images attach
 

Hump

Newbie
Joined
Dec 21, 2018
Messages
8
Reaction score
9
Location
Indianer
I realize that this write up is several years old but I just wanted to give sewlow a big thank you for his post. I got this overhead console out of a 97 Tahoe and will be installing it into my 94 GMC 1500.
It laid around the shop for several years not knowing what I was going to do with it for sure and then when I took my headliner out to recover and I noticed the truck already had all of the mounting holes for the console I thought what the heck.
Very happy with the results. Thanks again sewlow!
 

Attachments

  • Overhead Console  2.jpg
    Overhead Console 2.jpg
    178.3 KB · Views: 7
  • Overhead Console 1.jpeg
    Overhead Console 1.jpeg
    392.1 KB · Views: 7
Top