Greetings fellow GMT400 enthusiasts,
Just about a year ago I heard through the motorhead grapevine that
an unusually clean (for upstate NY) older Chevy pickup was being
offered for sale.
I didn't get my hopes up, because it seemed that other people's
definition of 'clean' didn't seem to jibe with my own...by a long
shot! FWIW, my personal Prime Directive for buying my next
ride can be simply stated in 2 simple rules:
1) Don't care about the miles or the current state of the
mechanicals, but it has to be rust free.
2) it has to have a manual transmission!
Rust is bad juju. While I've been fortunate in buying
a series of low-cost vehicles that have given me more than they
have gotten...I eventually lost every single one of them
to rust. Not the outer surface cosmetic issues, but
the no-kidding showstopper stuff. (ie: the unibody where
the lower control arm is supposed to connect to is MIA.)
Of course, getting rid of a car that broke your piggy
bank and gave you nothing in return is always pure
joy to jettison. But when you lose a faithful
traveling companion that would run for you even
when it shouldn't have...that is the very definition of
sadness. (No doubt anyone reading this in an old
truck forum is picking up what I'm putting down. :0)
...but I digress. If you go here you can see a brief
description of the '99 C2500 drivetrain in my
Introduction thread.
But when I saw the truck in person, the truck just exuded
a quiet, heavy duty minimalism...the zen of a proper
work truck. (!) When the big block fired right up and
rumbled like Niagara Falls, I knew that this was going to
follow me home. :0)
Like my favorite aircraft (F-106 & SR-71) the GMT400
series has the same kind of classic 'form follows function'
styling that never gets old -- I actually prefer this less
busy look to today's offerings?
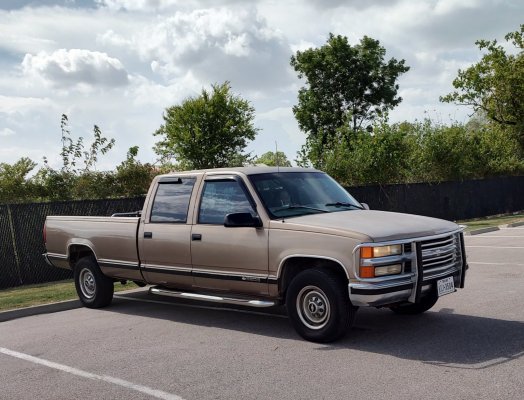
Finally -- enough of the setup. First, here's the truck after
a good cleaning / wet-sanding / machine polishing using
the Meguiar's Mirror Glaze product line:
But in order to truly appreciate what a (relatively) rust-free unicorn
that this truck is here in Salt City, take a look at three other trucks
still on the road that I picked at random, all within 5 minutes of where
I'm typing this in:
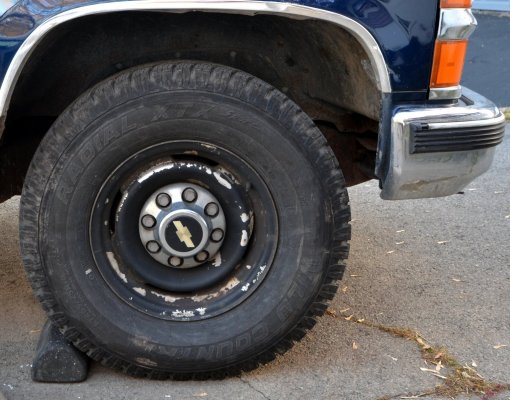
Mechanic's daily driver at my favorite tire store. (Note: Photo taken late November '22 -- a frosty commute)
Local Plow Truck:
(Neighbor's newer lashed-up pickup)
The Moral of the Story? Anything > 10 years old in Syracuse
is rarely seen. And almost always, if seen they aren't clean.
So...if my following posts seem to show successful old truck
ownership as an unrelenting focus on stopping rust before it turns steel to dust...
remember that I have no fear of mechanical issues, but at the same time these photos
definitely keep me up at night. :0)
Who'da thunk? Neil Young was right...
Just about a year ago I heard through the motorhead grapevine that
an unusually clean (for upstate NY) older Chevy pickup was being
offered for sale.
I didn't get my hopes up, because it seemed that other people's
definition of 'clean' didn't seem to jibe with my own...by a long
shot! FWIW, my personal Prime Directive for buying my next
ride can be simply stated in 2 simple rules:
1) Don't care about the miles or the current state of the
mechanicals, but it has to be rust free.
2) it has to have a manual transmission!
Rust is bad juju. While I've been fortunate in buying
a series of low-cost vehicles that have given me more than they
have gotten...I eventually lost every single one of them
to rust. Not the outer surface cosmetic issues, but
the no-kidding showstopper stuff. (ie: the unibody where
the lower control arm is supposed to connect to is MIA.)
Of course, getting rid of a car that broke your piggy
bank and gave you nothing in return is always pure
joy to jettison. But when you lose a faithful
traveling companion that would run for you even
when it shouldn't have...that is the very definition of
sadness. (No doubt anyone reading this in an old
truck forum is picking up what I'm putting down. :0)
...but I digress. If you go here you can see a brief
description of the '99 C2500 drivetrain in my
Introduction thread.
But when I saw the truck in person, the truck just exuded
a quiet, heavy duty minimalism...the zen of a proper
work truck. (!) When the big block fired right up and
rumbled like Niagara Falls, I knew that this was going to
follow me home. :0)
Like my favorite aircraft (F-106 & SR-71) the GMT400
series has the same kind of classic 'form follows function'
styling that never gets old -- I actually prefer this less
busy look to today's offerings?
Finally -- enough of the setup. First, here's the truck after
a good cleaning / wet-sanding / machine polishing using
the Meguiar's Mirror Glaze product line:
You must be registered for see images attach
But in order to truly appreciate what a (relatively) rust-free unicorn
that this truck is here in Salt City, take a look at three other trucks
still on the road that I picked at random, all within 5 minutes of where
I'm typing this in:
Mechanic's daily driver at my favorite tire store. (Note: Photo taken late November '22 -- a frosty commute)
You must be registered for see images attach
Local Plow Truck:
You must be registered for see images attach
(Neighbor's newer lashed-up pickup)
You must be registered for see images attach
The Moral of the Story? Anything > 10 years old in Syracuse
is rarely seen. And almost always, if seen they aren't clean.
So...if my following posts seem to show successful old truck
ownership as an unrelenting focus on stopping rust before it turns steel to dust...
remember that I have no fear of mechanical issues, but at the same time these photos
definitely keep me up at night. :0)
Who'da thunk? Neil Young was right...
Last edited: