95 Suburban rear heater hose questions

Disclaimer: Links on this page pointing to Amazon, eBay and other sites may include affiliate code. If you click them and make a purchase, we may earn a small commission.

1998_K1500_Sub

Nitro Junkie
Supporting Member
Joined
Jan 28, 2019
Messages
2,267
Reaction score
3,467
Location
Rural Illinois
Could the hose be pushed over that bead that the hose is pushed against as a stop….Thanks!

I considered the same thing... in fact I tested the idea by cutting a couple slits in a hose and sliding it over the fitting so that the slits engaged that "bead" and would hold the hose captive after applying the clamp (it's not really a "bead" in the pipe is it(?), but I don't know what else to call it... it's the pinch in the pipe that retains the press-to-fit quick-connector). You might try the same and see if you like the outcome.

One might alternatively abut the hose against the "bead" in the pipe and then drape the elastomeric clamp over the end of the hose and "bead", so as to capture that "bead" and thus retain the clamp / hose assembly.

$0.02
 

KansGeo

Newbie
Joined
Oct 16, 2023
Messages
5
Reaction score
4
Location
Liberal, Ks
Nitro I haven’t taken one apart yet … want to have a good plan before I order parts. Notice in the mid section photo, one end of each hose connects to where there was a quick connect fitting. The other hose end connects to the tube where the old hose had a factory crimp connection.
I like both of your ideas. From experience does anyone know if the hose could be pushed over the bead without splitting? Have seen some suggestions to use standard flare but tend to think that might create a sharp edge? Thanks!
 

1998_K1500_Sub

Nitro Junkie
Supporting Member
Joined
Jan 28, 2019
Messages
2,267
Reaction score
3,467
Location
Rural Illinois
From experience does anyone know if the hose could be pushed over the bead without splitting?

While I don't remember, I'm pretty sure tried to push a hose over the "bead" and didn't like the outcome... perhaps I didn't like the "visual" outcome, perhaps I didn't like the "functional" outcome, or perhaps it was simply "too hard to do" and I gave up on it.
 

KansGeo

Newbie
Joined
Oct 16, 2023
Messages
5
Reaction score
4
Location
Liberal, Ks
For reference for anyone, the hose will slip over the “bead”. I will probably use two spring clamps, one on each side of the bead.
I did get a new hose/tube assembly that routes from underneath the mid-vehicle to the “heater T’s “ in the engine compartment from EBay for about $80 (after market GM 15961911) .
This is on a 1994 GMC C1500 Suburban.
 

Attachments

  • IMG_0908.jpeg
    IMG_0908.jpeg
    247.2 KB · Views: 12
  • IMG_0907.jpeg
    IMG_0907.jpeg
    324 KB · Views: 12
Last edited:

BurbanMadness

Newbie
Joined
Mar 11, 2024
Messages
3
Reaction score
1
Location
Apollo Beach FL
Ok, this is probably the last update for this one, barring an unforeseen disaster.

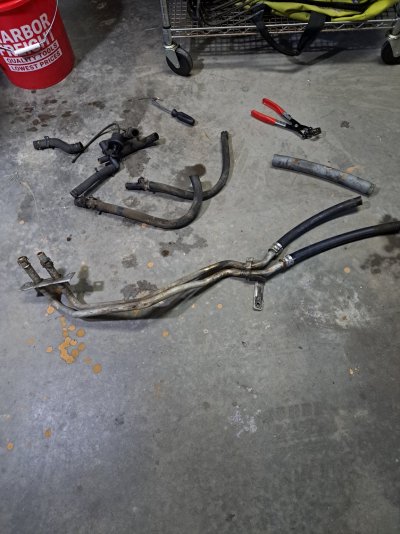
Parts list...I only replaced the aux hoses. The ones for the front heater looked almost new, they can't be more than a couple of years old. So I only went from the splitter in the engine bay to the rear of the truck.
On my truck, all the hoses were 3/4". I saw some conflicting information out there about that. Dorman 800-411 is the quick connect that fits that hose and the metal lines; you'll need four of them. I used just shy of 6' of hose...if you're replacing the front hoses, you'll need more. I didn't replace any of the metal lines.

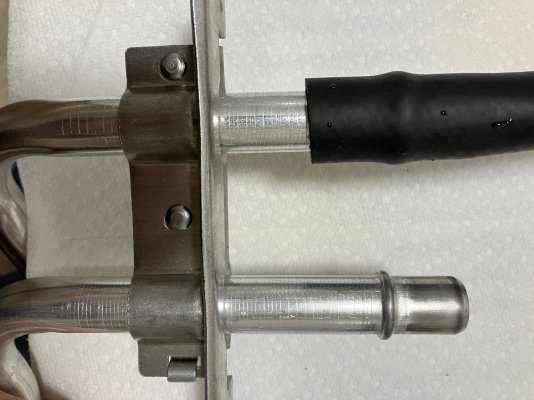
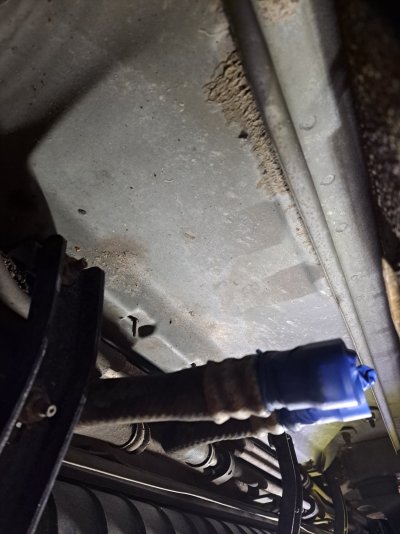
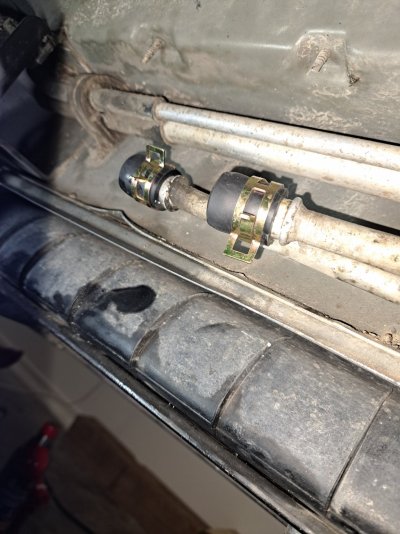
A clearer description of how GM set this up: Beneath the air intake box on the passenger side of the engine bay, you can't miss the splitter. From there you can follow the hoses to the regular heater core, and to the engine and radiator. You'll see the two quick connects next to the exhaust manifold, and the hoses they're crimped to are wrapped in some thermal protection stuff. The hoses head downwards and aft, and just out of your reach they are crimped onto aluminum tubing; the two tubes are clamped together in a couple of locations. That aluminum tubing is pre-bent to fit around the frame, with a small bracket that bolts to the inner side of the frame near the front wheel. You can easily see it from beneath. Then the tubes continue just behind the front wheel and bend outward and poke through a hole in the frame, with another bracket that bolts to the frame where they poke out. From this bracket all the way to those plastic quick-connects, both lines, is one assembly. If you can find it, buy it. If you can't, you should be able to take it apart and re-use all the metal parts and just replace the hoses, plastic connects, and the heat wrap. Note that my parts list above does NOT include this, so that's 2 more connects and more 3/4" hose. Shockingly, the assembly is not difficult to maneuver out of there. You'll end up spinning it about 180* and shoving it further back, then getting the front end free first. Installation is the reverse. I expected this to be the worst part of the whole thing, but it took about 2 minutes to actually get it out, and less to slide the new one in place.

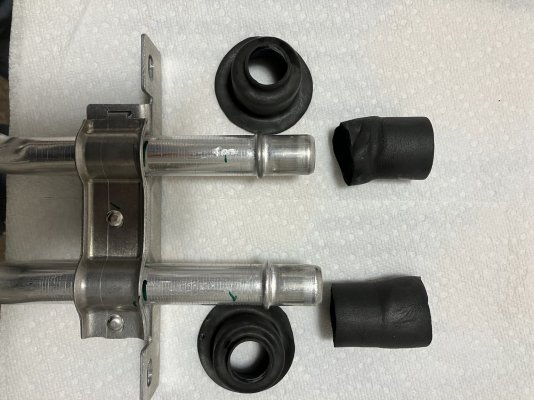
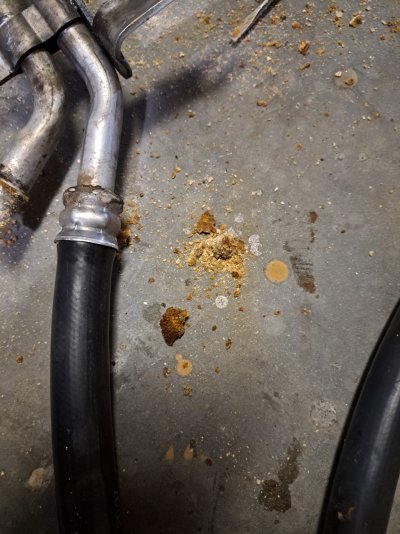
From here I'll only mention one line, but both of them are virtually identical and run alongside each other. The only differences is a couple of inches of rubber hose just based on bending radius. At the connection point poking through the frame, there's a quick connect hidden under a boot (the front assembly comes with the boots, and I wish I could've found them to use on every connection), then 6-10" of rubber hose crimped onto more aluminum tube. I didn't mess with that tube at all...it's well mounted and in good shape. It's prebent to go all the way back and over the rear axle. At that point, another crimp to a rubber hose that makes a large bend (make sure you don't kink the hose), then a quick-connect into the aux heater core. I'll be wrapping these quick-connects in electrical tape or something...the boots GM used elsewhere really made a difference in being able to remove these things, so I want to do something to protect them and keep crud out in case I ever have to mess with them again.

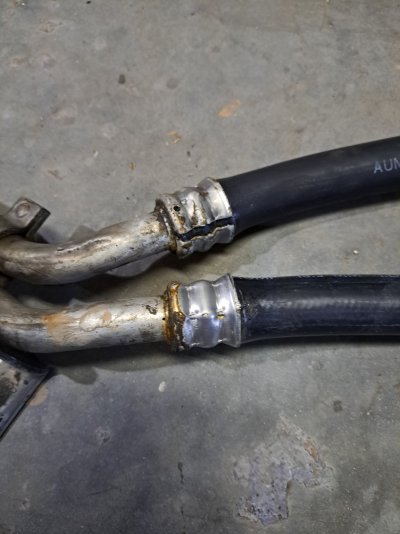
Here's the FSM diagram, which isn't of great help. On View B, you can see the vertical quick-connects plugging into the core, then the large loop of rubber hose terminating in those wide crimps (a dremel works great, just be careful not to go too deep). Everything else in that diagram is just aluminum tube running forward. A couple more feet and you'd see the next section of rubber hose right behind the front wheel, which bends inward to the frame-hole-connects.

Hopefully this helps someone at some point. The part numbers are probably the most useful.

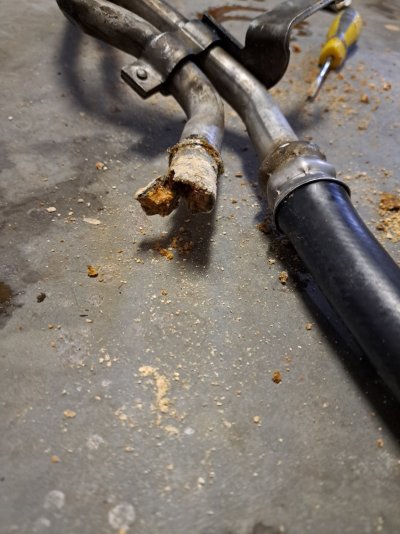
Edit: I forgot to mention, if you do find that front assembly make sure you compare the new to the old after you remove it. The small bracket on my new one was roughly backwards compared to the old one. I didn't compare before trying to install and the bolt hole was like 3" out of position. I removed it again and compared, and realized it was never going to be able to line up so I had to swap brackets. Not a big deal, but a minor hassle. You can see the difference in the photo. Otherwise the fit was perfect.
Thanks Godholio for posting this and the pictures. I found it very useful.

I have a 99 k1500 suburban. I had a coolant leak and the rear heater had stopped working. I removed all the heater hoses, tees, control valve etc. out from under the hood. Then I finagled out the double aluminum hard-lines out that flow the coolant to and from the rear (the assembly you show in the picture). I messed with this for quite a while and couldn't get it out. I then came back and re-read your comments and did exactly what you said you did - after unbolting the retainer brackets I rotated and then shoved the assembly backwards (it got caught on the mesh covered wiring of the O2 sensor, which limited how far back I could go), but this gave me enough room to yank the front side down from the engine bay and get the front out. Then I was able to wiggle the rear portion forward and out under the truck.

Now I can clearly see the aluminum crimp on one of the rubber hoses that connects to the aluminum assembly has split all the way down (see pic). This is where I believe the leak was coming from, as it was right under there that I could see coolant seeping before I took it all out. I was not able to see the crimp was cracked while it was all still in place, since the rubber sheath over the hose concealed the crimped part. I just knew there was a leak coming from somewhere inside the sheath.

After taking off the split aluminum crimp fitting, I found the aluminum tube to be completely blocked (see pic). I then started digging out the gunk (see pic) and broke the aluminum tube opening (see pic)… it broke extremely easily, with little force applied. So now I need to make the decision – do I cap off the rear heater hoses under the body??? This way, I could just not use the tees I bought, and just put the plumbing back in for the front heater (which I know works), or do I buy the new aluminum assembly and put the whole shebang back together???

I'm leaning toward doing it the cheap/easy way. Our kids are grown and we live in Florida at the moment...
 

Attachments

  • 99 Suburban cracked crimp fitting on rear heater hose and tube assembly.jpg
    99 Suburban cracked crimp fitting on rear heater hose and tube assembly.jpg
    202.5 KB · Views: 6
  • 99 Suburban front portion of rear heater aluminum tube assembly.jpg
    99 Suburban front portion of rear heater aluminum tube assembly.jpg
    334.5 KB · Views: 4
  • 99 Suburban solid gunk from blocked rear heater hose and tube assembly.jpg
    99 Suburban solid gunk from blocked rear heater hose and tube assembly.jpg
    316.4 KB · Views: 5
  • 99 Suburban blocked rear heater hose and tube assembly.jpg
    99 Suburban blocked rear heater hose and tube assembly.jpg
    260.8 KB · Views: 6

Godholio

OBS Enthusiast
Joined
Jun 10, 2020
Messages
51
Reaction score
53
Location
South Carolina
I don't know how much use you'll get out of it in Florida, or how likely it is you'll end up somewhere it'll more useful. I will say that when I've had to use the heater it's been really nice to have both going. It takes a while for just the front vents to get that barn-sized truck warmed up inside.
I lived in Las Vegas when I went through this, but I routinely drove up to northern Utah where they actually have legit winter so the heater came in handy.
 

BurbanMadness

Newbie
Joined
Mar 11, 2024
Messages
3
Reaction score
1
Location
Apollo Beach FL
Thanks Godholio for posting this and the pictures. I found it very useful.

I have a 99 k1500 suburban. I had a coolant leak and the rear heater had stopped working. I removed all the heater hoses, tees, control valve etc. out from under the hood. Then I finagled out the double aluminum hard-lines out that flow the coolant to and from the rear (the assembly you show in the picture). I messed with this for quite a while and couldn't get it out. I then came back and re-read your comments and did exactly what you said you did - after unbolting the retainer brackets I rotated and then shoved the assembly backwards (it got caught on the mesh covered wiring of the O2 sensor, which limited how far back I could go), but this gave me enough room to yank the front side down from the engine bay and get the front out. Then I was able to wiggle the rear portion forward and out under the truck.

Now I can clearly see the aluminum crimp on one of the rubber hoses that connects to the aluminum assembly has split all the way down (see pic). This is where I believe the leak was coming from, as it was right under there that I could see coolant seeping before I took it all out. I was not able to see the crimp was cracked while it was all still in place, since the rubber sheath over the hose concealed the crimped part. I just knew there was a leak coming from somewhere inside the sheath.

After taking off the split aluminum crimp fitting, I found the aluminum tube to be completely blocked (see pic). I then started digging out the gunk (see pic) and broke the aluminum tube opening (see pic)… it broke extremely easily, with little force applied. So now I need to make the decision – do I cap off the rear heater hoses under the body??? This way, I could just not use the tees I bought, and just put the plumbing back in for the front heater (which I know works), or do I buy the new aluminum assembly and put the whole shebang back together???

I'm leaning toward doing it the cheap/easy way. Our kids are grown and we live in Florida at the moment...
OK, I went with the option to disconnect the rear heater and just plumb up the front. The front is now simpler, without the tees. I just test drove it and it all looks to be not leaking now and the heat works great in the front. The new thermostat also looks to be working a charm too, as it seems much more quick to activate now.

On the rear disconnect, I just kept the double aluminum hard line assembly out of the truck (it is toasted anyway) and didn't reinstall it. I then cut the two middle fingers off some harbor freight rubber gloves and put them over the ends of the rubber hoses that are underneath, mid-frame, on passenger side (see pic). I was going to leave it at that, but then I decided to splurge and buy some Dorman heater hose caps (see pic). I used a rotary tool to cut through the aluminum crimps on the rubber hoses attached to the rear hardline and discovered that the end of one of the hard-lines has corroded away (see pic). So if I decide to reinstall the rear heat at a later date, I will address that. I did do a flush of the rear lines and got a fair bit of crud to come out. If I reconnect it, I will use CLR or a specially formulated radiator cleaner and maybe run it through a pump to circulate through the rear input and the output lines to give the rear core a good clean before reusing.

That's it for now on this fix. Next up is replacing the transfer case with a remanufactured one.
 

Attachments

  • 99 suburban heater hard line with corroded flange.jpg
    99 suburban heater hard line with corroded flange.jpg
    196.6 KB · Views: 4
  • 99 Suburban rear heater hoses mid frame with harbor freight glove fingers on.jpg
    99 Suburban rear heater hoses mid frame with harbor freight glove fingers on.jpg
    240.3 KB · Views: 4
  • 99 suburban with dorman heater hose caps on rear heater hard lines.jpg
    99 suburban with dorman heater hose caps on rear heater hard lines.jpg
    284 KB · Views: 4

BurbanMadness

Newbie
Joined
Mar 11, 2024
Messages
3
Reaction score
1
Location
Apollo Beach FL
I don't know how much use you'll get out of it in Florida, or how likely it is you'll end up somewhere it'll more useful. I will say that when I've had to use the heater it's been really nice to have both going. It takes a while for just the front vents to get that barn-sized truck warmed up inside.
I lived in Las Vegas when I went through this, but I routinely drove up to northern Utah where they actually have legit winter so the heater came in handy.
Agreed. It is a nice feature and when we have the third row in, the people in the back seem to relish it. We might move at some point, so I will come back around to it and probably buy the front aluminum hose assembly. I like the look/sound of those Gates heat-shrink clamps that 1998_K1500_Sub used on his rebuild. In the meantime, I probably won't even need the heat now for the rest of the year here... but at least I won't have puddles of coolant on the garage floor every day.

 
Top