Decided to build a garage. Now the fun begins.

Disclaimer: Links on this page pointing to Amazon, eBay and other sites may include affiliate code. If you click them and make a purchase, we may earn a small commission.

Road Trip

Supporting Member
Supporting Member
Joined
Jul 8, 2023
Messages
1,163
Reaction score
3,353
Location
Syracuse, NY
You absolutely cannot run on those floors though. If there's any water or oil they are incredibly slick, even with grit mixed in for traction. I've Scooby-Doo'd way too many times just walking.
I share your dislike for the super slippery shop floor. The first couple of floors I did with my
buddies we gave ourselves the non-gift of a skating rink when wet. Especially when super-lubed
with spilled antifreeze/used coolant & a splash of ATF. :-(

Started adding grit to the finish and much improved in this area. (The embedded grit takes some
of the senseless beauty out of a visitor's first impression, but everyday usability trumped the
showroom shine decor.)

As for the hangar floor above, when they redid the floor some years ago, the new 2-part epoxy (I asked)
with grit wasn't nearly as slippery as the aged, old school super smooth epoxy that it replaced? It actually
was a nice usability upgrade.

Less-slip Tip: It really makes a difference exactly what floor finish system you use on your shop
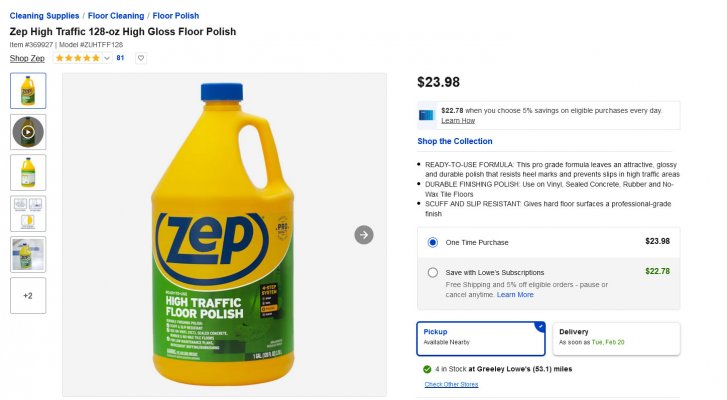
floor. (See attached.) I can personally attest that the Zep commercial finish lowers the slip-sliding away factor.
(I am sensitive to this -- hate focusing exclusively on walking around like the CIC when I'd rather
just get the task at hand wrapped up. :0) I don't know if Zep is formulated to help meet some obscure
OSHA spec?

Just like everything, it's always a balancing act...
 

Attachments

  • Zep High Traffic 128-oz High Gloss Floor Polish (no slip) in the Floor Polish department at Lo...jpg
    Zep High Traffic 128-oz High Gloss Floor Polish (no slip) in the Floor Polish department at Lo...jpg
    153 KB · Views: 3
Last edited:

South VA

K2500 454 Long Roof
Supporting Member
Joined
Nov 2, 2022
Messages
816
Reaction score
2,807
Location
Dinwiddie County, Virginia
Good points, @Erik the Awful and @Road Trip.

The two main reasons that I’m hesitant to go with epoxy over a penetrating sealer are the higher material cost and more challenging application (including prep). Paying someone to do it would make the cost difference even greater, but this will be a DIY project.

Being slippery when fluids land on it is yet another reason why it probably doesn’t make sense for me to go with epoxy. I don’t need the added risk.

Much as I’d like a John Deere Green epoxy floor, or something equally as cool, I’d be more than satisfied with a concrete floor that looks like concrete, as long as it’s reasonably easy to clean. My understanding is that a penetrating sealer will perform well in that regard. Maybe not quite as easy to clean as an epoxy floor, but good enough for me. :)
 

Road Trip

Supporting Member
Supporting Member
Joined
Jul 8, 2023
Messages
1,163
Reaction score
3,353
Location
Syracuse, NY
Good points, @Erik the Awful and @Road Trip.

The two main reasons that I’m hesitant to go with epoxy over a penetrating sealer are the higher material cost and more challenging application (including prep).

If I'm ever lucky enough to enjoy one more dedicated work space like the one
you are putting together, I would be saying the exact same thing to myself.

The epoxy floor is one extreme, and it's better than working on an unfinished floor
that's so porous that it looks new until the very first time oil is spilled on it. :-(

But in reality a better answer would be the penetrating sealer. And once the sealer
is all set, then apply the Zep over that? This way any spills can be blotted back up,
with no permanent stains left behind?

And when it's time for a good spring cleaning, use the following machine to take
care of business?

You must be registered for see images attach

(source: eBay ad)

An old HILD can be had for a fraction of the cost of the epoxy coating. And as long
as I clean as I go, then I won't have to bust this out very often at all. And with the
sealer plus cleaning as I go the floor should continue to look like new for as long as I
want it to.

That's my thought process. I do like the epoxy floors, but I'd rather spend that money
on some go-better bits under the bonnet. :0)
 
Last edited:

South VA

K2500 454 Long Roof
Supporting Member
Joined
Nov 2, 2022
Messages
816
Reaction score
2,807
Location
Dinwiddie County, Virginia
If I'm ever lucky enough to enjoy one more dedicated work space like the one
you are putting together, I would be saying the exact same thing to myself.

The epoxy floor is one extreme, and it's better than working on an unfinished floor
that's so porous that it looks new until the first time oil is spilled on it. :-(

But in reality a better answer would be the penetrating sealer. And once the sealer
is all set, then apply the Zep over that? This way any spills can be blotted back up,
with no permanent stains left behind?

And when it's time for a good spring cleaning, use the following machine to take
care of business?

You must be registered for see images attach

(source: eBay ad)

An old HILD can be had for a fraction of the cost of the epoxy coating. And as long
as I clean as I go, then I won't have to bust this out very often at all. And with the
sealer plus cleaning as I go the floor should continue to look like new for as long as I
want it to.

That's my thought process. I do like the epoxy floors, but I'd rather spend that money
on some go-better bits under the bonnet. :0)
Thanks. Penetrating sealer does seem like a good fit for my situation.

I hadn’t considered owning a polishing machine, but buying a used one, especially at that price, is definitely worth a look.

The Zep product also looks interesting, especially since it’s non-slip, or at least slip-resistant. Could be worth a try.

Now that the big stuff has been done by various contractors, the project is about to become a lot more labor-intensive - at least my labor.

The sealing job will be a major undertaking, what with moving everything out of the way and prepping the floor. I think it makes sense to have the area lights installed before I tackle the sealing job, and that will take awhile. Also, the sealer should be applied when the temperature warms up a bit, probably in another month or so. Which will give the slab that much more time to cure before sealing it.

I’m finally working on the electrical plan so that I can figure out what I actually need and where it all goes. No surprise; it’s taking longer than I expected. Fortunately, I know where the light fixtures will go, per the lighting plan, so I can hang those beforehand so they’ll be ready to plug in.

Once the electrical plan is done I can start wiring. Which will include digging that damned 80’ + trench through the garden and yard, from the house to the garage.

So much to do.
 

South VA

K2500 454 Long Roof
Supporting Member
Joined
Nov 2, 2022
Messages
816
Reaction score
2,807
Location
Dinwiddie County, Virginia
The lights arrived, apparently intact. They’re a bit smaller than expected, but plenty bright. The cords seem long enough to connect them together so that I’ll be able to power each bank of three using just one outlet.

Now to decide whether to mount them flush or hang them by chains.

You must be registered for see images attach


You must be registered for see images attach
 

someotherguy

Truly Awesome
Joined
Sep 28, 2013
Messages
10,141
Reaction score
15,068
Location
Houston TX
They appear similar/same to the ones I got. Cheap but bright. Compact, and very lightweight. About the only issue I found with them is the weight causes them to fight you when you start chaining them together with the power cords - the weight of the cord will pull them against the chains hanging from the ceiling. Not a big deal but a little frustrating getting them to hang just how you want. Overall they were a positive addition to my little garage as they deliver a lot of light for the money.

Richard
 

South VA

K2500 454 Long Roof
Supporting Member
Joined
Nov 2, 2022
Messages
816
Reaction score
2,807
Location
Dinwiddie County, Virginia
They appear similar/same to the ones I got. Cheap but bright. Compact, and very lightweight. About the only issue I found with them is the weight causes them to fight you when you start chaining them together with the power cords - the weight of the cord will pull them against the chains hanging from the ceiling. Not a big deal but a little frustrating getting them to hang just how you want. Overall they were a positive addition to my little garage as they deliver a lot of light for the money.

Richard
Thanks for mentioning that; I hadn’t thought about the weight of the cords. Since they’ll be mounted to the trusses, I figure I’ll use zip ties to attach the cords to the trusses, and take up any slack between the lights.

Mounting them flush would help avoid that problem, plus it might be a cleaner look on the open metal trusses. So that’s the way I’m leaning. I’ll have to try one out to see how secure it will be.

The four that I plan to use for task lighting along the back wall will have to be hung from chains, though, because they’ll run perpendicular to the trusses, which are 5’ apart. I’ll have to get creative with tying up the slack in those cords.

I’d like to start putting them up this weekend.
 

someotherguy

Truly Awesome
Joined
Sep 28, 2013
Messages
10,141
Reaction score
15,068
Location
Houston TX
Thanks for mentioning that; I hadn’t thought about the weight of the cords. Since they’ll be mounted to the trusses, I figure I’ll use zip ties to attach the cords to the trusses, and take up any slack between the lights.

Mounting them flush would help avoid that problem, plus it might be a cleaner look on the open metal trusses. So that’s the way I’m leaning. I’ll have to try one out to see how secure it will be.

The four that I plan to use for task lighting along the back wall will have to be hung from chains, though, because they’ll run perpendicular to the trusses, which are 5’ apart. I’ll have to get creative with tying up the slack in those cords.

I’d like to start putting them up this weekend.
Yep. I shortened the chains to get them closer to the ceiling (drywall) to lessen the drag effect of the cords. Been meaning to buy another 4-pack to round out the lighting in there. In fact maybe I'll go place the order now before I forget, again. :)

Richard
 

thinger2

I'm Awesome
Joined
Jul 6, 2019
Messages
1,597
Reaction score
4,042
Location
Tacoma
You absolutely cannot run on those floors though. If there's any water or oil they are incredibly slick, even with grit mixed in for traction. I've Scooby-Doo'd way too many times just walking.
They need to be quartz casted while they are wet.
Which is a horrible job but easy to do.
This is another reason why you need to time your mixes based on temp and humidity.
You quartz cast an epoxy floor by rolling it all out in a defined area based on the cure time and them some lucky guy puts on a set of golf shoes with steel cleats and walks all of the way into the far corner of the pour and broadcasts quarts sand really thick over the whole thing while walking backwards.
The epoxy when wet enough is self leveling so the cleat divots fill in as you walk backwards.
We used to call it the hooker walk.
you are basically walking like you are wearing high heels because wet epoxy is slick as grease and falling on your ass in curing epoxy while holding a bucket of sand really, really, really, really sucks.
You also need two other guys standing by with golf cleats in case you go down on your ass.
That is so they can come in and rescue you without wrecking the pour because you have about a minute or two to get all of your clothes off and wash your ass with isopropyl alchohol.
when it starts to cure alchohol wont work anymore so now you need to switch to MEK.
Or have a chemical burnt ass.You quartz a floor in small sections at a time and use duct tape as the limits of that pour.
Again, timing is everything but duct tape when pulled in a linear way and with the right timing has low adhesion to clean and dry concrete but high shear strength.
When that section cures, it will have way to much sand on it. Which is the whole idea.
Whatever sticks is the non-skid.
Sweep off the excess quartz and re-use on the next pour.
The ideal situation is to roll out a pour and broadcast the quartz in between expansion joints.
And just like any chemical mix prep is everything.
Rent a floor scrubber and degrease the whole place several times and then absolutely flood it with water.
Floor sqeweegies and water. and beer.
Let it dry.
Acid etch the concrtete with a mild mix of muriatic acid
swimming pool acid.
Hose the floor off and let it dry overnight.
Read the instructions. You want it etched but you dont want it to turn into powder.
Buy a paddle mixer and a good half inch corder drill and 30 five gallon buckets and do it.
It sounds complicated but it really isnt.
Ive never met a glue sniffer with a PHD.
I did have an employee pass out and epoxy his head to the floor.
The epoxy flooring business at the industrial and commercial level is not some group of professionals.
It one or two guys who are making a **** load of money by herding temp service employees.
They sniff glue for a living and they quit when you try to make them wear a respirator.
Either wait and do it yourself which you can do and if you have any questions I will answer.
Or wait untill you are confident in the concrete pour and then hire a professional coating company.
I think they want you to pay for an "add" that really doesnt help you at all.
 
Top