The Official Vortec 454 Info thread

Disclaimer: Links on this page pointing to Amazon, eBay and other sites may include affiliate code. If you click them and make a purchase, we may earn a small commission.

Keeper

I'm Awesome
Joined
Dec 6, 2020
Messages
571
Reaction score
1,368
Location
Northern Virginia
LOL... I've got a dozen or so of the deep plano 3730's, but they all have fishing gear in them... my other passion that I'll get back into when the wife retires.

I drop a yellow post-it note inside the zip-locs with the details, and instructions, or cautions, or whatever, that future me may need. I like the zip-locs (freezer ones only) for easy storing... they seem to take up the least amount of space. JIF peanut butter jars are also very nice for storing, especially if I want to soak something. Great for paint projects too, with a nice resealable top. At the rate the dogs go thru peanut butter, there are always a bunch at hand. They are a strong plastic, clear, have a big mouth, have a screw on lid, and the label comes off easy. And to organize everything, I use the plastic bus tubs (that restaurants use for dirty dishes) to store everything in for a particular project... they're big, strong, stackable, slide on/off of shelves easy, and I can label the outside. They're like $5/each and last forever. My entire life seems to revolve around the dozens of tubs I have scattered everywhere. Tools, projects, everything. My wife uses the term "nerd alert" when she gets a peek at all the organizing. I would never be able to function efficiently without all of it though. Gray matter, shmay matter.
 
Last edited:

Road Trip

Supporting Member
Supporting Member
Joined
Jul 8, 2023
Messages
1,130
Reaction score
3,261
Location
Syracuse, NY
I'd be afraid that I'd end up with visible and rusty numbers on all my hardware since I scratched the coating off. I don't tend to lose hardware unless maybe I leave something taken apart for eons, but even then I tend to find everything eventually. I'll admit that I don't really know where my radiator shroud hardware is... it's one of the things stopping me from re-installing it.

At the time my main problem was intermingling -- ie: having too many long term projects opened up at the
same time in a finite space. (Not by design. One project would get stalled for parts, so you would start on
a second project, and after awhile all this too-clever project interleaving would create organizational chaos. :0)
And this was compounded by never having enough garage/shop space to keep the projects physically
separated.

But I like the fact that you share the same rust-related concerns that I do. Here are my
work-arounds:

1) Depending upon where the bolt will end up (ie: visible vs. non visible) I will engrave the
smooth inside shank of the bolt between head & thread. Gently, just enough to read.
And just before the bolt is reinstalled, take a small amount of anti-sieze and cover the
shank for additional corrosion control.

* If the bolt head or nut is big enough, I'll engrave one of the 6 bolt (or nut) flats instead
of the visible center face. Just need a little hint, not a visual shout.

* One thing that used to disappoint me was an engine bay that looked factory fresh after
lots of effort, but after a couple of years of year-round use had passed the ancillary bits were
all patchy rusty or weathered on the leading edges. Since not using the vehicle as designed was
not an option, after some experimentation I came up with a pretty decent assembly process
workaround.

Simply put, as I am putting together the serpentine belt area of the engine bay, I will use a matte
clear coat, both when everything is disassembled, and afterwards a light top/sealer coat after it's all
bolted back together. Including the bolt heads as part of the unbroken paint film. (Note: In the military,
when this 'unbroken protective coating concept' was done inside some of the old Avionics black boxes like a
radar transmitter, it was called "tropicalizing". When you ran across this, you would troubleshoot/fix to
the component level, and then afterwards you were supposed to also restore any tropicalizing that you had
disturbed.)

...But I digress. In today's engine bay, assuming that you aren't constantly working/reworking stuff in the vicinity,
the area now stays much nicer looking long term yet still retains the stock look.

Note: Common sense applies. For example, serpentine belt pullies are self-cleaning, so those areas get taped off
to avoid goofing up the belt/pully torque transfer. And of course electrical connections are off limits, &
get taped off too.

****

To summarize, I try to give myself as many visual breadcrumbs to follow during the reassembly phase without also
introducing new ways to add rust to the engine bay. As a rust-belter, engraving the shank and anti sieze, or a number
on a bolt flat, or a spritz of matte clear after everything is torqued into place has worked for me for many years now.

And the simpler the engine bay, the less I engrave. Especially if form follows function, and it's intuitive how the
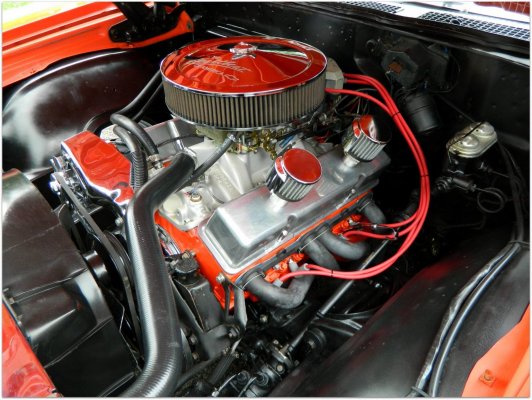
engine bay must go back together. (See attached for a minimalist engine bay where we used these rust-prevention assembly
techniques - and this still looks the same today here in upstate NY as it did when we put it together in the summer of '15.)

But I'll be the first to admit that a lot of today's engine bays are downright funky looking, with precious few recognizable visual
clues once the plastic modesty panels come off. (Especially if this is an introductory dabbling for yours truly. :0)

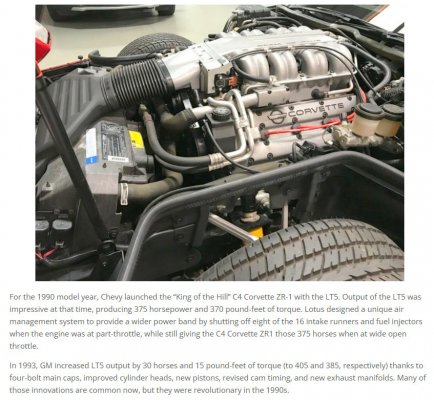
One last thought. If I were ever fortunate enough to get the chance to repower a vehicle with the old Lotus/Mercury Marine/Chevy
32-valve LT5, it would be a sin to use an engraver on the beautiful intake manifold or valve covers. That's what the camera is for.

But in the front, where all the unique accessory bracketry is hidden from view, and I want to be able to piece all that back together
after waiting for the new engine bits to dribble in and the machine shop to work their magic? I wouldn't hesitate to engrave some
discreet/unseen 'get out of jail free' hints to my future self.

****

Hope this clarifies my approach. Some engine bays get zero engraving...it's like riding a bike.

But in other engine bays the dissy process is punctuated by odd buzzing sounds. What can I say?
Old guys are famous for developing odd habits. Especially when they choose engine bays as a
primary source of entertainment. :)
 

Attachments

  • 70 Chevelle 383ci beauty shot.jpg
    70 Chevelle 383ci beauty shot.jpg
    338.3 KB · Views: 33
  • LT5 -- ZR-1 C4 vette -- Remembering The Lotus-Developed LT5 V8.jpg
    LT5 -- ZR-1 C4 vette -- Remembering The Lotus-Developed LT5 V8.jpg
    194.9 KB · Views: 33
Last edited:

454cid

Sooper Pooper
Joined
Sep 5, 2010
Messages
8,103
Reaction score
9,114
Location
The 26th State
1) Depending upon where the bolt will end up (ie: visible vs. non visible) I will engrave the
smooth inside shank of the bolt between head & thread. Gently, just enough to read.
And just before the bolt is reinstalled, take a small amount of anti-sieze and cover the
shank for additional corrosion control.

* If the bolt head or nut is big enough, I'll engrave one of the 6 bolt (or nut) flats instead
of the visible center face. Just need a little hint, not a visual shout.

I see, I was thinking you were doing it right on top of the bolt heads. I guess our GMT-400 bolts don't have much room for that anyway since they're marked with 10.9 on most if them.

Simply put, as I am putting together the serpentine belt area of the engine bay, I will use a matte
clear coat, both when everything is disassembled, and afterwards a light top/sealer coat after it's all
bolted back together. Including the bolt heads as part of the unbroken paint film. (Note: In the military,
when this 'unbroken protective coating concept' was done inside some of the old Avionics black boxes like a
radar transmitter, it was called "tropicalizing". When you ran across this, you would troubleshoot/fix to
the component level, and then afterwards you were supposed to also restore any tropicalizing that you had
disturbed.)

That's an interesting idea. I actually have a very old can (1970's copyright) of a clear coating for protecting things as you mention. I was actually going to try using the other day, and I couldn't get it to spray. I think the nozzle is plugged up. I think it's mostly aimed at electrical, but I like the idea of using it on non-electrical things. I may try that.
 

Scottm

I'm Awesome
Joined
Aug 24, 2021
Messages
303
Reaction score
227
Location
AZ
Nielsen you gonna start a new thread on your project? Mine's almost done, so I can enjoy the 1 year process all over again with yours..
 

BNielsen

I'm Awesome
Joined
Sep 6, 2018
Messages
2,667
Reaction score
4,181
Location
North Carolina
Nielsen you gonna start a new thread on your project? Mine's almost done, so I can enjoy the 1 year process all over again with yours..
Probably just going to update here; at least keep this thread active and maybe bump it up enough anyone with questions will seek this thread out before making their own post.
My aspirations of making this a mirror of the FSC thread are still hanging on. So I figured a bump here and there with progress will at least move it in that direction.

That being said I still haven't even touched the damn thing, I'm trying to scrounge up a workbench, get a new toolbox, hang some lights and somewhat insulate my building so I can work in there this winter and not suffer as much.
 

yevgenievich

I'm Awesome
Joined
Jan 21, 2021
Messages
940
Reaction score
1,512
Location
TX
Starting trying to get an idea on cam for the 454 refresh. Goal is to keep it below 6500rpm, 10.5:1 compression, afr 265 heads, proflo xt intake, 2200rpm stall. 411 ecu swap with coil on plug. Currently looking at the following (was recommended).

Cam#: BBC8.1, HR75375-76370-112
241/[email protected]"
.375"/.370" Lobe Lift
.637"/.629" Valve Lift
112 LSA

edit: going in to a 3600lb truck
 
Last edited:

Scottm

I'm Awesome
Joined
Aug 24, 2021
Messages
303
Reaction score
227
Location
AZ
Good for a street truck or boat, but a lot of lift and duration for a tow rig.
 

yevgenievich

I'm Awesome
Joined
Jan 21, 2021
Messages
940
Reaction score
1,512
Location
TX
Good for a street truck or boat, but a lot of lift and duration for a tow rig.
It is for a street truck, but trying to still have enough vacuum for brakes and keep idle in 700 - 750rpm range. Also stock retainers and lifters unlikely to work with over 600 lift

Edit:
This is the cam I am running in a tow vehicle
BBC8.1, HR73353-114
233/233 @.050"
.353"/.353" Lobe Lift
.600"/.600" Valve Lift
114 LSA
 
Last edited:

Scottm

I'm Awesome
Joined
Aug 24, 2021
Messages
303
Reaction score
227
Location
AZ
In my experience duration of 230 at .050 has a noticeably rough idle with reduced vacuum. With that great intake and heads, you can go more conservative on the cam and have a wide torque curve and good top end too. I would suggest 220-230 at 050 with a 110 lsa, should be good for 500 hp easy.
 

Piratehunter

I'm Awesome
Joined
Nov 3, 2019
Messages
303
Reaction score
564
Location
Colorado
I used the comp XR270HR. idles great with tune, in my truck it starts ramping up at 2000 rpm, real strong between 3000-4500, I don't get over 4000 often
 
Top