99 L29 454 build

Disclaimer: Links on this page pointing to Amazon, eBay and other sites may include affiliate code. If you click them and make a purchase, we may earn a small commission.

BeXtreme

I'm Awesome
Joined
Jan 13, 2020
Messages
401
Reaction score
417
Location
Salem, OR
Ecu will usually have a set psi for zero vacuum and then it knows what pressure you have as vacuum increases. At idle lower pressure is fine. Or for vacuum referenced fpr, it should keep the pressure constant with change in vacuum
If you don't have a vacuum referenced FPR, then the fuel pressure stays the same and the ECU will have different fuel flow rates vs manifold pressure in it to account for the different RELATIVE fuel pressure since the manifold pressure is changing.

If you have a vacuum referenced FPR, the ECU will have all the same values for flow rate vs manifold pressure, because the FPR will adjust the fuel pressure to keep the RELATIVE fuel pressure with respect to manifold pressure the same. Because the relative pressure does not change, the flow remains constant.

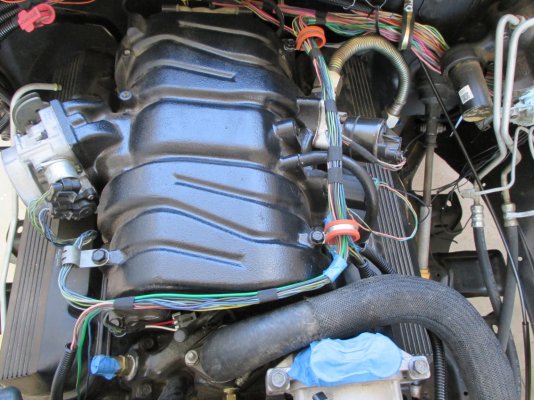
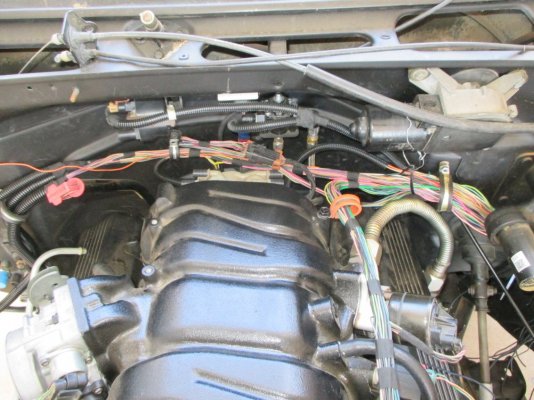
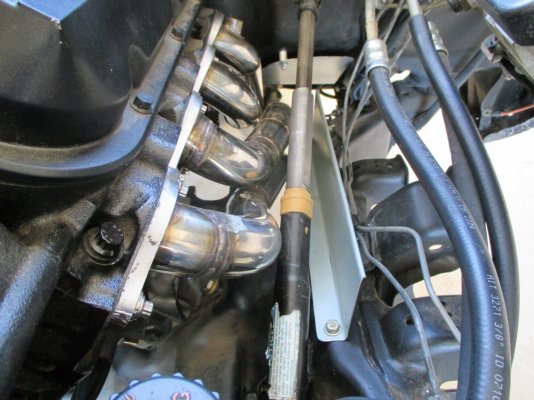
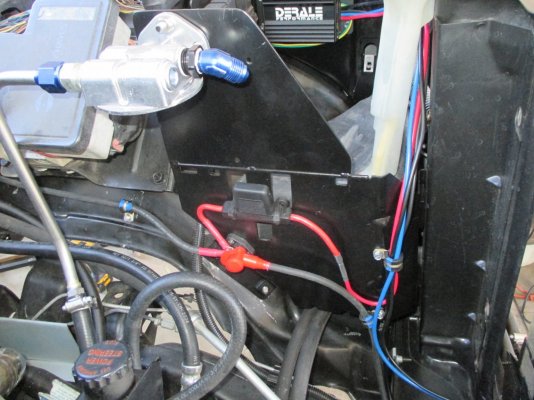
All L29 are factory vacuum referenced FPR. If you have deleted the regulator(or unplugged the vacuum reference), then you would need to change the factory data in the ECU to account for the different fuel flow vs manifold pressure.
 

BeXtreme

I'm Awesome
Joined
Jan 13, 2020
Messages
401
Reaction score
417
Location
Salem, OR
The difference in relative pressure can be substantial. A stock cam that is pulling 20 in-hg at idle equates to about 10psi of pressure. So if you have 62psi at idle, you would be flowing the equivalent amount of fuel to 72psi at full throttle. That's why the stock L29 runs about 50-52psi of fuel pressure at idle and then jumps up to about 60-62 psi when you unplug the FPR. So if you have an adjustable aftermarket FPR, just set it to about 52psi at idle, then unplug the vacuum reference line and see what it jumps up to. That's going to be pretty close to the pressure the engine will see at full throttle, and it should be right around the 58-60psi range.
 

Scottm

I'm Awesome
Joined
Aug 24, 2021
Messages
312
Reaction score
234
Location
AZ
Thanks extreme, it is a Holley adjustable fpr.

I'm still making progress, working on the weekends from 7 to 12 or so when it gets too hot. put in temp senders on the eng oil and trans fluid. Made heat shields for the driver floor and brake lines due to the new headers. Finished the wiring except for a Derale pwm fan controller which goes in tomorrow. I finally decided where to mount the remote oil filter. I extended the charcoal canister bracket by welding on an .090 steel plate. I put the oil filter on one side and the charcoal canister on the other side. That stock canister mount with the slide-in tabs sucked anyway, I could hear it rattling on dirt roads. I modified it's bracket to mount to the new bracket with number 10 screws. I made a little strut brace with 1/4 inch rod ends to make the new bracket solid. I get to keep the stock washer tank in the stock location too.
 

Attachments

  • IMG_1976.JPG
    IMG_1976.JPG
    345.4 KB · Views: 40
  • IMG_1974.JPG
    IMG_1974.JPG
    255.9 KB · Views: 38
  • IMG_1977.JPG
    IMG_1977.JPG
    316 KB · Views: 34
  • IMG_1981.JPG
    IMG_1981.JPG
    208.4 KB · Views: 37
  • IMG_1982.JPG
    IMG_1982.JPG
    273.5 KB · Views: 40

Scottm

I'm Awesome
Joined
Aug 24, 2021
Messages
312
Reaction score
234
Location
AZ
For a reminder, the wiring looked like this in may (edit - June 24th). Still makes me want to throw up when I see that. Basically every wire has been shortened, rerouted, new pigtails put on and bundled up more cleanly. I'm going to leave it unwrapped until the first start.
 

Attachments

  • IMG_1932.JPG
    IMG_1932.JPG
    312.4 KB · Views: 26
Last edited:

Scottm

I'm Awesome
Joined
Aug 24, 2021
Messages
312
Reaction score
234
Location
AZ
Got the oil lines figured out to the remote filter. Bent up a stainless tube with a 37 deg flare on one end and a hose barb brazed on the other end for the input to the filter. Brazed hose barbs on the stock oil cooler connections at the radiator. I used 400 psi sae 30R3 hose with lined hose clamps. I wanted to use crimp sleeves at each joint but the custom hose shop wouldn't do it, said the 30r3 hose is too thin.
 

Attachments

  • IMG_1988.JPG
    IMG_1988.JPG
    264.9 KB · Views: 21

Scottm

I'm Awesome
Joined
Aug 24, 2021
Messages
312
Reaction score
234
Location
AZ
Got the Derale fan controller in and wired. I redid the big wire that ran from the battery to the relay box over the top of the radiator. I ran 6 gauge welding cable under the radiator to a binding post on the canister bracket. Put the derale on a 50 amp maxi fuse off the binding post, and ran another length of 6ga cable from the binding post to the relay box.
 

Attachments

  • IMG_1992.JPG
    IMG_1992.JPG
    264.1 KB · Views: 16
  • IMG_1994.JPG
    IMG_1994.JPG
    284.7 KB · Views: 16

Scottm

I'm Awesome
Joined
Aug 24, 2021
Messages
312
Reaction score
234
Location
AZ
Getting really close to the first start.. Put the exhaust in last weekend, and for some reason the right side pipe came up almost a half inch short and had to cut it. Maybe because it is a different block and heads, maybe the new Energy poly engine mounts, maybe because I didn't have gaskets under the headers and torqued down, or a combination of everything. I don't have the patience at this point to fit in a perfectly fitting new section for butt welding in, so I just slipped an expanded sleeve over it.

It took a while but I figured out how to get the 7mm distributor boots on the 8mm wires. Two passes with this 5/16 carbide burr hogged out just enough to get the wires in with silicone grease. The white plastic sleeves couldn't be used, and the terminals didn't crimp back on the new wires very well, so I will have to be really careful taking the wires off the cap.

And after thinking about it for 6 months, I decided to put zerk fittings in the lower arms for the new poly bushings. The poly turns out to be easy to drill and groove for grease movement. I don't want to pull those lower arms ever again, and certainly not just for squeaky bushings.
 

Attachments

  • IMG_1996.JPG
    IMG_1996.JPG
    238.2 KB · Views: 8
  • IMG_1997.JPG
    IMG_1997.JPG
    264.5 KB · Views: 8
  • IMG_1998.JPG
    IMG_1998.JPG
    351.3 KB · Views: 8

Scottm

I'm Awesome
Joined
Aug 24, 2021
Messages
312
Reaction score
234
Location
AZ
Today I triple-checked the wire colors at every terminal on the ecm connectors, then plugged in the black bear-tuned 0411 for the first time. I ran some tests but didn't start it. I took the plugs out and put them into the plug boots and laid them on the headers. Turned the key to 'run' and spun the starter with a bump switch. The plugs were all sparking, so I put a timing light on wire 1. Sure enough number 1 was sparking at 5 deg btdc. The fuel pump was running and the fuel rail was steady at 60 psi. Also saw 40 psi of oil pressure from cranking! Nothing left to do but start it, but for some reason I'm really nervous about it..
 
Top