my 1994 silverado

Disclaimer: Links on this page pointing to Amazon, eBay and other sites may include affiliate code. If you click them and make a purchase, we may earn a small commission.

Mapearso

Newbie
Joined
Jan 30, 2016
Messages
4
Reaction score
5
Location
los aNGELES
May 5th I put my little sidekick Sadie Girl to sleep. She was 18 years old. Body was riddled with Arthritis she was in so much pain, and couldent walk very well. I fed her a mc Donald's chicken nuggets meal the night before and spent as much time as I could just being with her. I am sure i will see her again one day. That kinda kicked me in the gut pretty hard for a few months. I told my wife i dont want another dog, this was too hard for me. One of the hardest yet most compassionate things I have ever had to do.

You must be registered for see images attach


You must be registered for see images attach
Sorry for your loss. You had her 18 years which is a blessing. All dogs go to heaven
 

Moparmat2000

I'm Awesome
Joined
Feb 13, 2016
Messages
1,780
Reaction score
4,019
Location
Grand Tetons
I bought a bucket blaster and a sandblast hood from China freight last year. Blasted a bunch o **** with it. Makes one hell of a mess so it's definitely an outside gig. I pushed kids car outside on a 10x20 tarp, and commenced blasting. Worked great for 30 minutes, then I heard thunder. Hurried up and got it back inside, swept up the sand in the tarp to put in the bucket and went inside. Weatherman says rain 3 days straight. Right on my effing weekend.

However this cheapo blaster works great. Needs a constant 90psi minimum to keep up. Get a respirator and dust filters to keep from breathing the pulverized sand or crushed glass media you would use. Note the size of the tarp. This stuff gets everywhere.
 

Attachments

  • 20210930_123747.jpg
    20210930_123747.jpg
    347.1 KB · Views: 6
  • 20210930_135225.jpg
    20210930_135225.jpg
    295.6 KB · Views: 6

Moparmat2000

I'm Awesome
Joined
Feb 13, 2016
Messages
1,780
Reaction score
4,019
Location
Grand Tetons
I also did the subframe connectors upgrade over the summer. Cut out that thin walled booger welded 2x2 box steel, and put better anchored 2x3 box steel in. I also re routed the parking brake cable to run alongside the connector. Any unibody car or even subframe cars like Camaros and Novas benefit from this since it ties everything together better. The crossmember transition tie plates are 1/8" thick and will help transition a 90° load into the thinner crossmember and prevent stress cracking. The original ones I removed just butted against the front of the rear framerails. As you can see from the pix, the new connectors overlap the rear framerails by almost a foot. I used a 12" long drill bit to pilot drill through the crossmember for the hole where the re routed parking brake cable will be run.
 

Attachments

  • 20210702_113355.jpg
    20210702_113355.jpg
    166.7 KB · Views: 4
  • 20210702_130235.jpg
    20210702_130235.jpg
    194.3 KB · Views: 4
  • 20210702_130240.jpg
    20210702_130240.jpg
    151.9 KB · Views: 4
  • 20210702_170526.jpg
    20210702_170526.jpg
    223.1 KB · Views: 4
  • 20210715_200441.jpg
    20210715_200441.jpg
    174.9 KB · Views: 4

Moparmat2000

I'm Awesome
Joined
Feb 13, 2016
Messages
1,780
Reaction score
4,019
Location
Grand Tetons
I also made front and rear torque box reinforcements out of 14 gage steel sheet. These were used on 4 speed cars, big block cars, and convertibles to stiffen the unibody structure. I had templates from my 67, so I made another set. Sprayed the steel sheet with machinest dye, and used a scribe to get the lines. I use a 90° air operated die grinder with cut off wheel, and rotary files for shaping and radiuses. Took 4 hours for me to cut and bend these pieces. Then another hour with the sand blaster.
 

Attachments

  • 20210720_140106.jpg
    20210720_140106.jpg
    267.2 KB · Views: 4
  • 20210719_192627.jpg
    20210719_192627.jpg
    224.4 KB · Views: 4
  • 20210720_132242.jpg
    20210720_132242.jpg
    221 KB · Views: 4
  • 20210720_135849.jpg
    20210720_135849.jpg
    230.4 KB · Views: 3
  • 20210720_153524.jpg
    20210720_153524.jpg
    273.9 KB · Views: 3

Moparmat2000

I'm Awesome
Joined
Feb 13, 2016
Messages
1,780
Reaction score
4,019
Location
Grand Tetons
Another few pix of subframe connectors at the back overlapped on the framerails. They were plug welded and then seam welded all the way around. Also heres a pic of my 67 on the rotisserie. In this pic you can see where the torque boxes i made will go, and the subframe connectors. These areas are normally open with just thin steel gusseting. The front torque boxes help prevent twisting loads on the unibody to stiffen it up, and the rear ones stiffen it up in much the same way, as well as box in the forward mounting points for the rear leaf springs. That is why theres rectangular holes there. To be able to access the nuts for the forward spring mount.
 

Attachments

  • 20210625_153249.jpg
    20210625_153249.jpg
    143.1 KB · Views: 8
  • 20210626_174023.jpg
    20210626_174023.jpg
    129.7 KB · Views: 8
  • 20140901_185512.jpeg
    20140901_185512.jpeg
    191.5 KB · Views: 8
Last edited:

Moparmat2000

I'm Awesome
Joined
Feb 13, 2016
Messages
1,780
Reaction score
4,019
Location
Grand Tetons
I wish I could do this for a living. I am very picky though, I'd probably never make any money at it lol. Heres pix of china freight bucket blaster, and I got good weather yesterday so I went ahead and blasted more. I'm pretty happy with how it turned out. Using crushed glass media, $8 per 80 lb bag. 3M respirator with dust filters and a harbor freight sand blast hood over my head. RH inner fender had a bunch of surface rust scale on it. I worked from 11:30am to 5:00pm then called it a day. I have some spots I missed and will go back over it today to finish the RH inner fender and clean up those spots a little better. Then I will coat it with epoxy primer
 

Attachments

  • Screenshot_20211002-063737_Samsung Internet.jpg
    Screenshot_20211002-063737_Samsung Internet.jpg
    142.1 KB · Views: 6
  • 20211001_170529.jpg
    20211001_170529.jpg
    281.8 KB · Views: 6
  • 20211001_170534.jpg
    20211001_170534.jpg
    269.1 KB · Views: 6
  • 20211001_170654.jpg
    20211001_170654.jpg
    285.7 KB · Views: 7
  • Screenshot_20211002-054326_Samsung Internet.jpg
    Screenshot_20211002-054326_Samsung Internet.jpg
    88.8 KB · Views: 6

Moparmat2000

I'm Awesome
Joined
Feb 13, 2016
Messages
1,780
Reaction score
4,019
Location
Grand Tetons
Got epoxy primer on everything. This stuff is great. Rock hard, sands well, can scuff and apply polyester filler over the top of it. Kirker enduroprime. It's a 1-1 mix with the activator. Dries fairly slow but nice and hard, bites into the metal well.
 

Attachments

  • 20211002_171851.jpg
    20211002_171851.jpg
    208.2 KB · Views: 7
  • 20211006_151500.jpg
    20211006_151500.jpg
    206.2 KB · Views: 7
  • 20211008_091456.jpg
    20211008_091456.jpg
    153.1 KB · Views: 7
  • 20211008_115523.jpg
    20211008_115523.jpg
    171 KB · Views: 7
  • 20211008_115509.jpg
    20211008_115509.jpg
    204.4 KB · Views: 7

Moparmat2000

I'm Awesome
Joined
Feb 13, 2016
Messages
1,780
Reaction score
4,019
Location
Grand Tetons
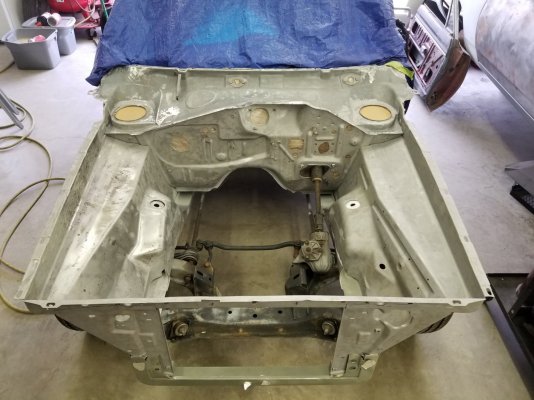
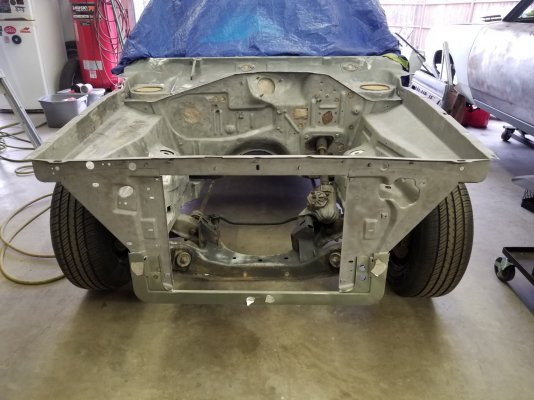
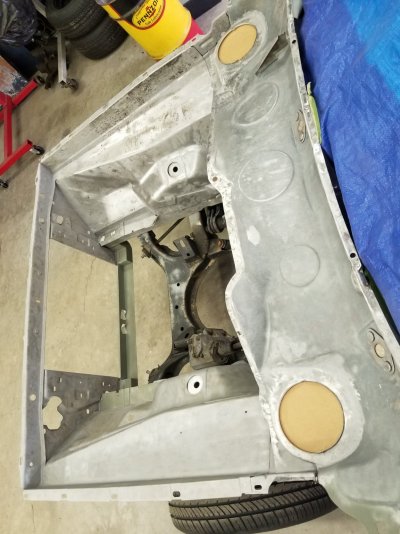
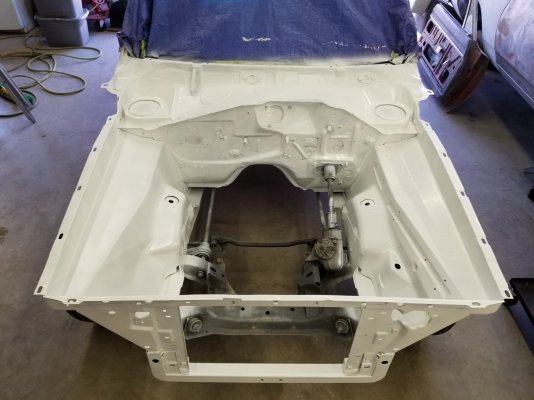
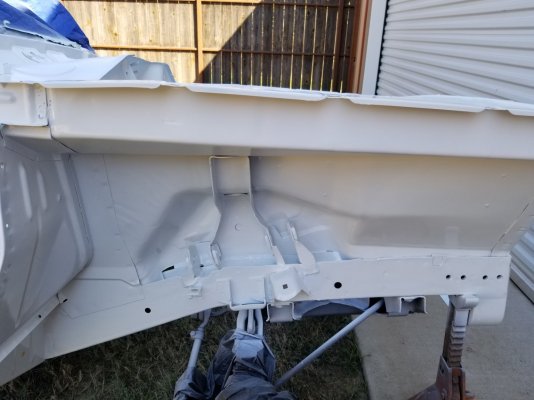
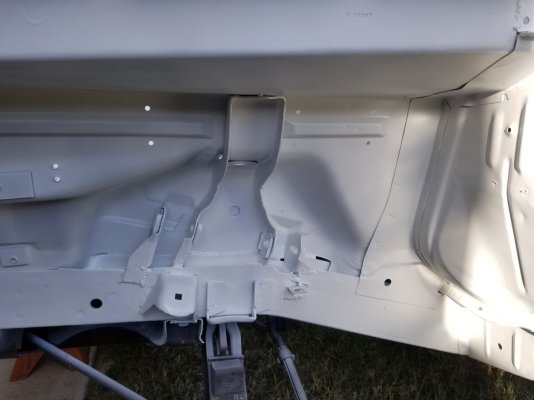
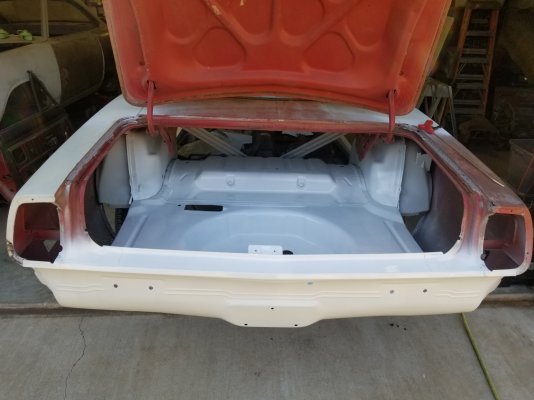
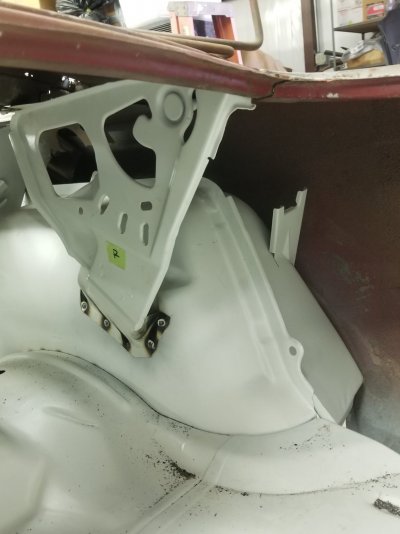
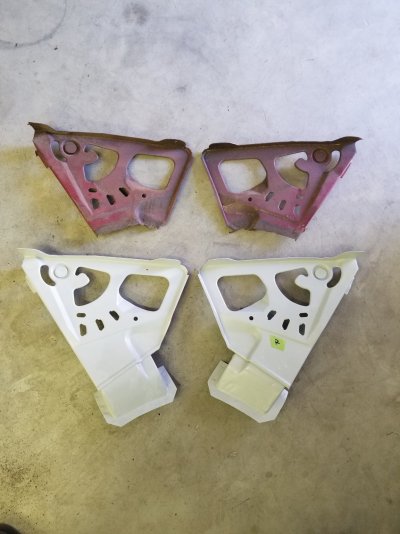
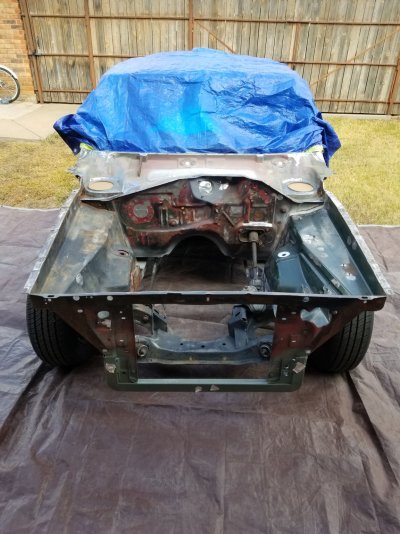
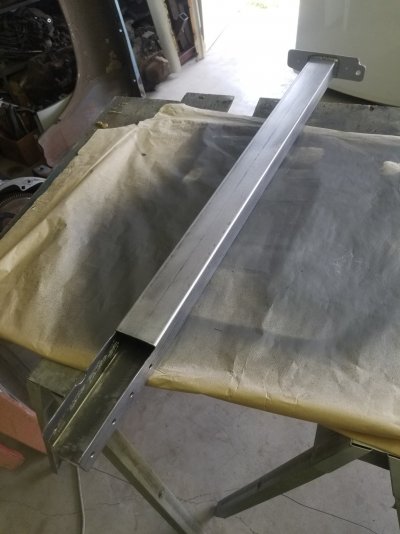
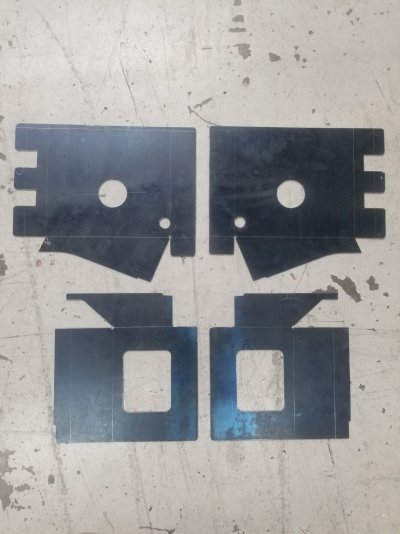
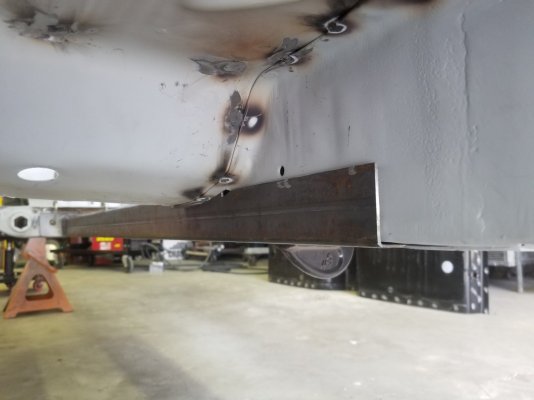
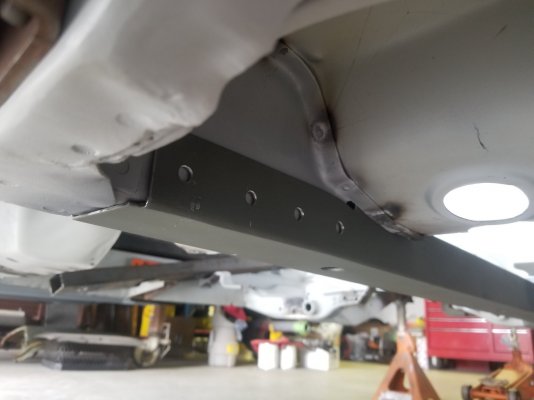
Since some of y'all enjoy watching bodywork, heres some more project pix. I hope you get ideas out of this for your projects. Welded in new trunk hinge supports. Old ones were hacked off at the bottom.

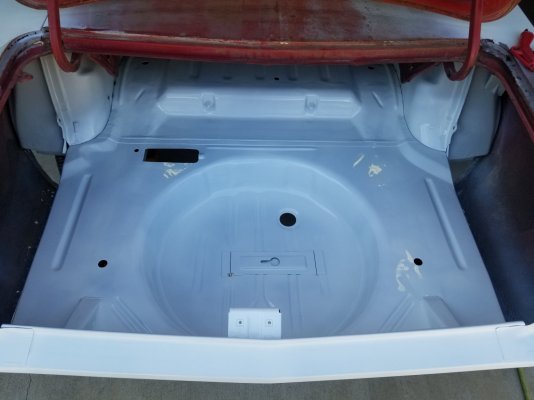
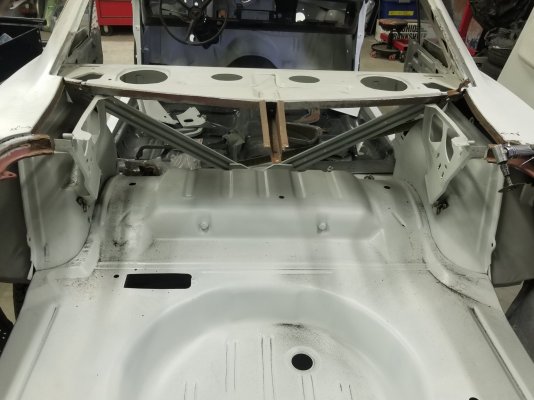
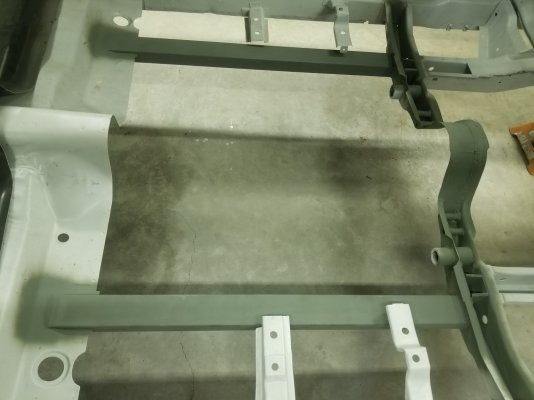
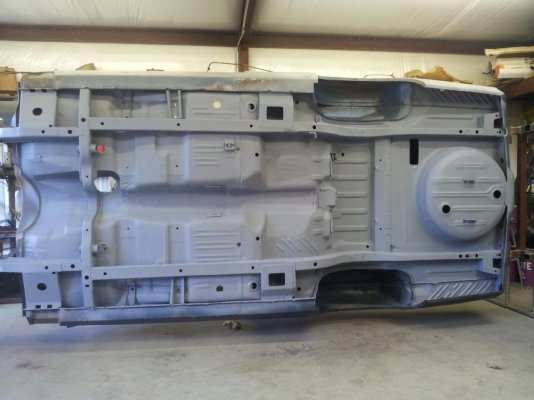
Note the gray painted temporary tube support in pic 1. That was to raise the height of the quarter to get the trunk weatherstrip rail to 17" as it sagged with the old trunk hinge supports cut off at the bottom, and allowed a gap where the trunk forward corners sat up higher at the front. I did this on both sides to set the height. Once the supports were welded in, I took these tubes out on either side and the height remained at 17". I took that measurement off the green 69 barracuda back half I drilled apart for these pieces and more.

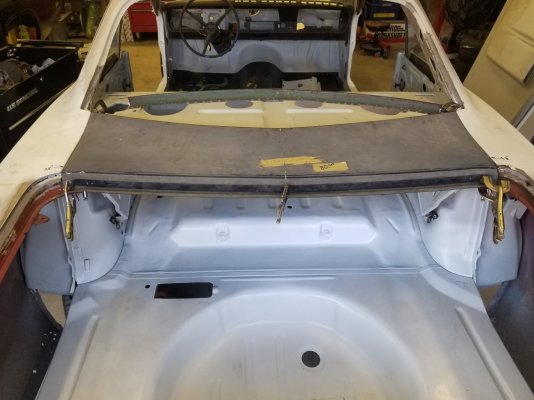
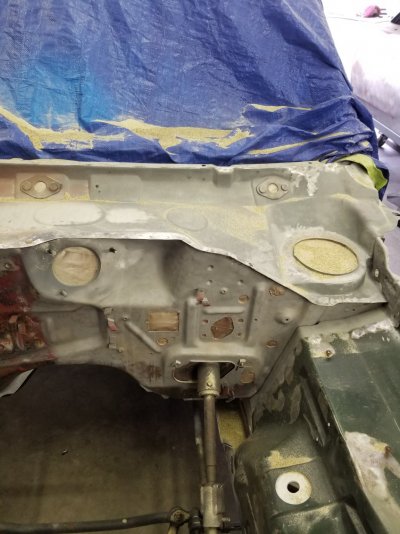
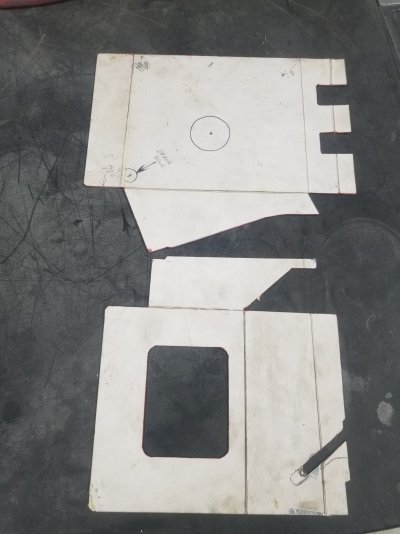
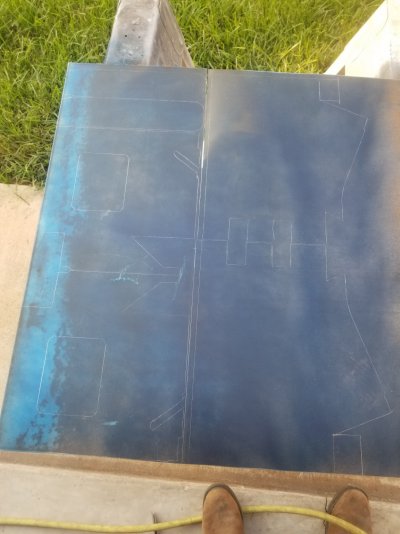
From there after getting the correct height established, I moved on to fitting the dutchman panel. This piece is normally $180 from AMD. I lucked out. Somebody had one for sale on the other forum I am on, they never used it. Looked like it made the rounds to a few swap meets. It had a sticker on it that said $80. The dude sold it to me for $50 4 years ago. It's been sitting in the corner of the shop with the sheetmetal for the rest of this thing. The original was severely rotted on all 4 corners.

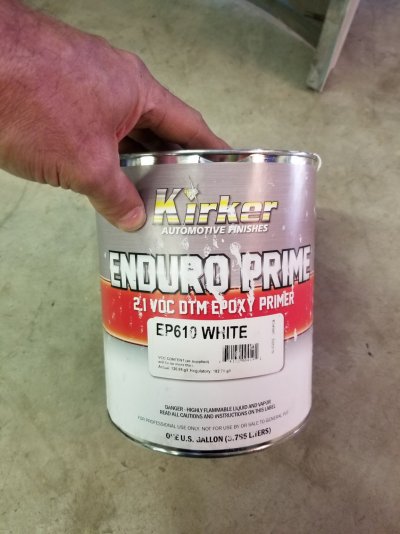
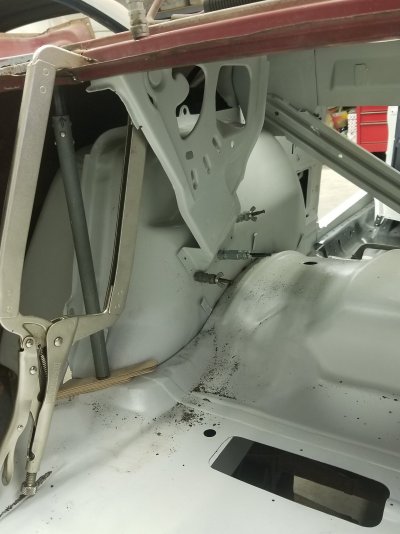
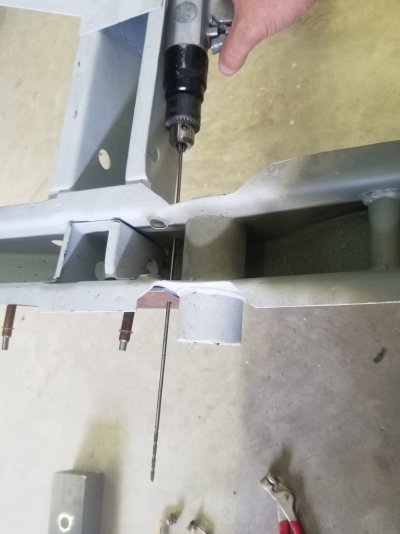
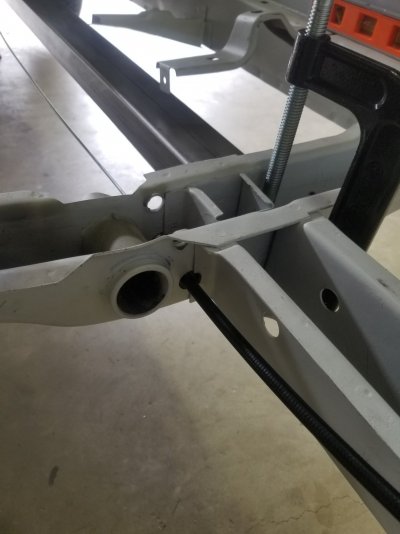
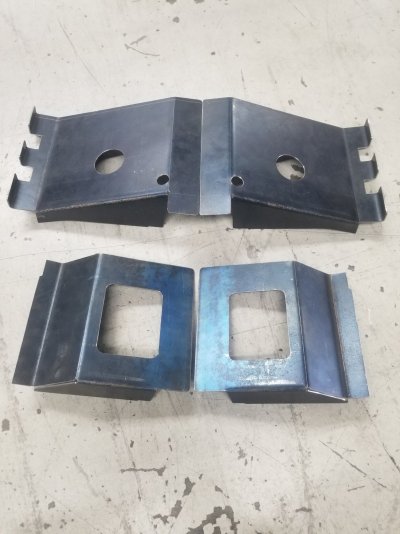
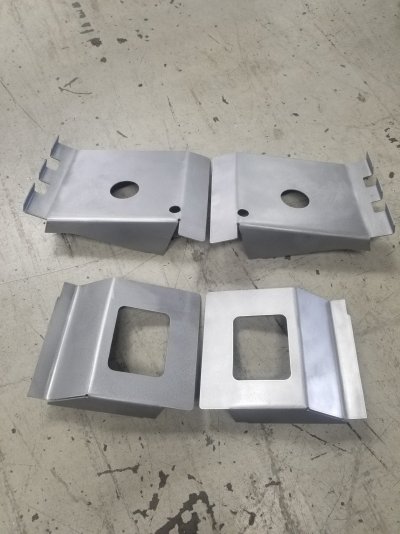
I made a lot of rust bunnies, however in the end, it's nice working on clean primered metal. The white primered hinge supports off the donor were sandblasted clean, then epoxy primered. It felt like I was installing new pieces.
 

Attachments

  • 20211014_150402.jpg
    20211014_150402.jpg
    217.4 KB · Views: 7
  • 20211014_150408.jpg
    20211014_150408.jpg
    167.3 KB · Views: 7
  • 20211014_160553.jpg
    20211014_160553.jpg
    225.4 KB · Views: 7
  • 20211014_175824.jpg
    20211014_175824.jpg
    218.9 KB · Views: 7
  • 20211009_120915.jpg
    20211009_120915.jpg
    247.7 KB · Views: 6
Last edited:
Top