my 1994 silverado

Disclaimer: Links on this page pointing to Amazon, eBay and other sites may include affiliate code. If you click them and make a purchase, we may earn a small commission.

Moparmat2000

I'm Awesome
Joined
Feb 13, 2016
Messages
1,780
Reaction score
4,019
Location
Grand Tetons
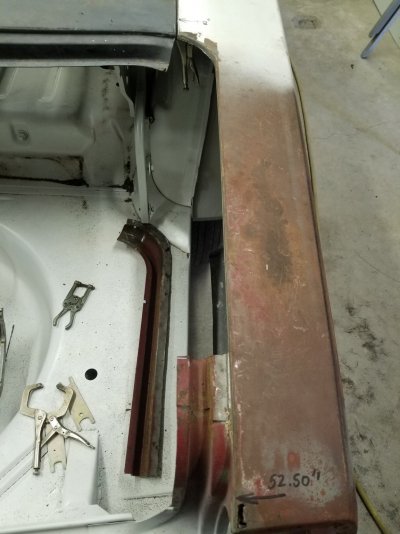
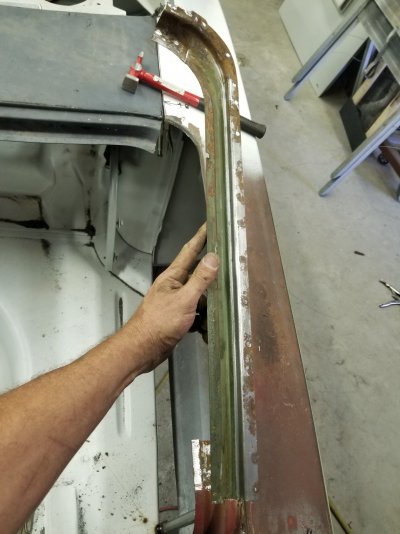
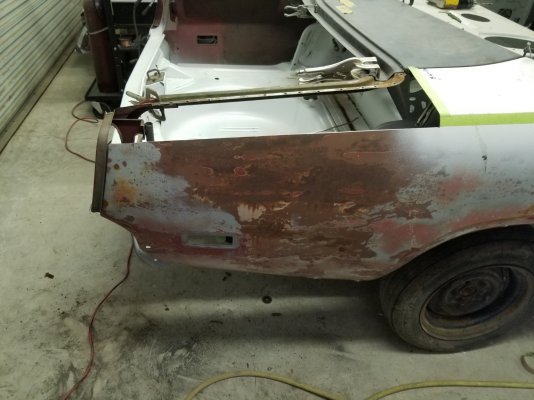
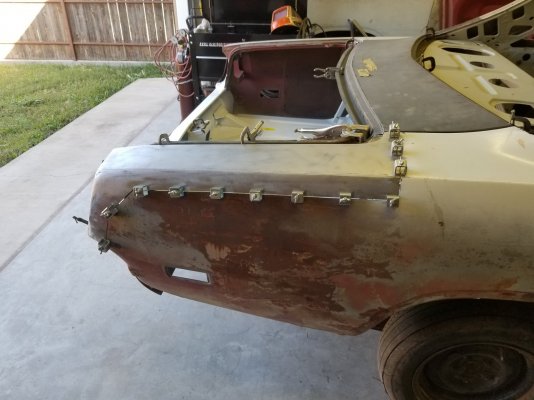
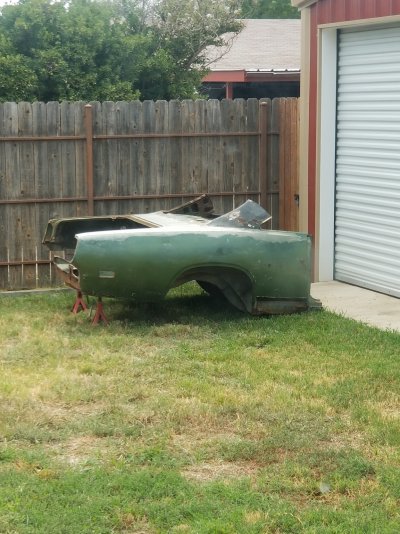
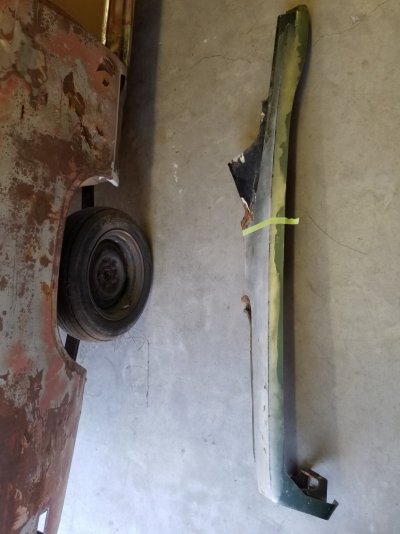
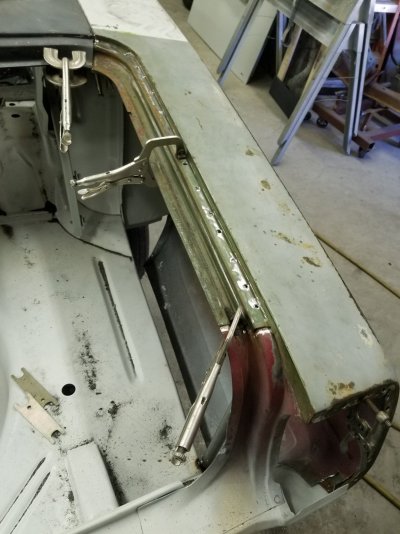
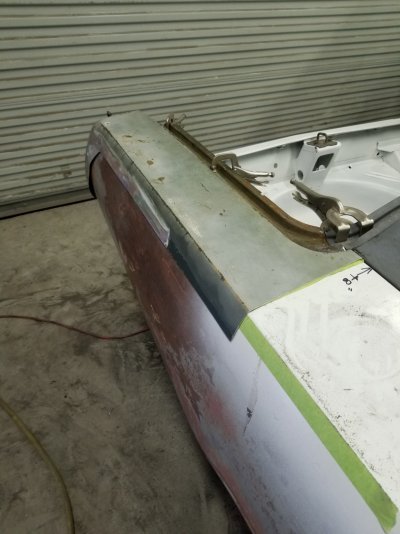
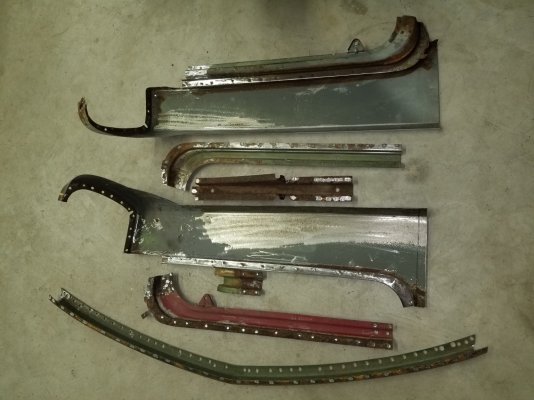
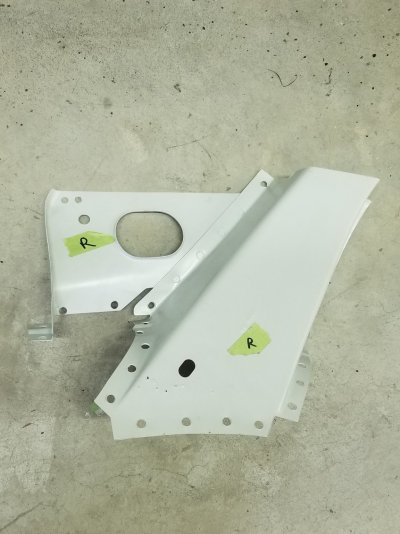
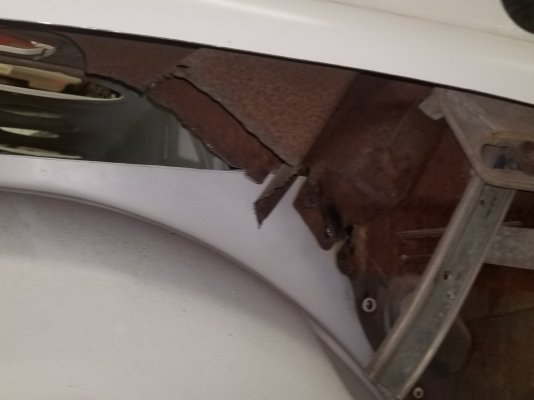
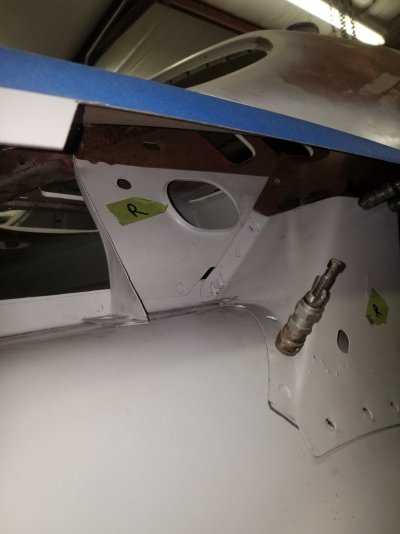
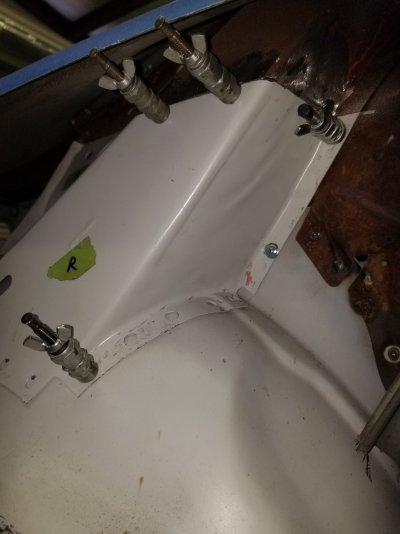
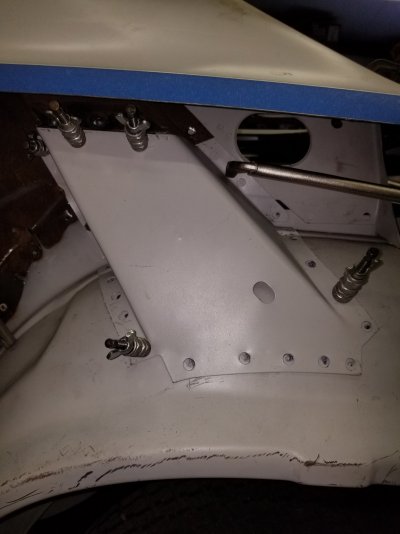
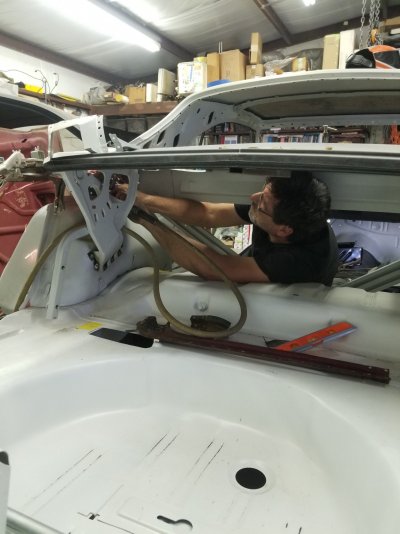
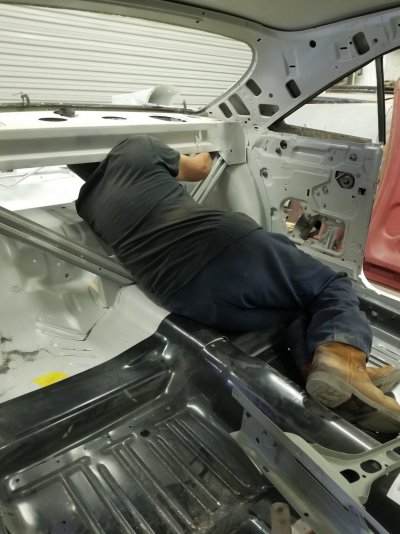
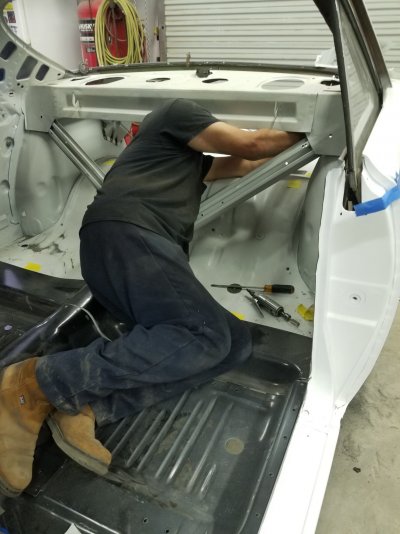
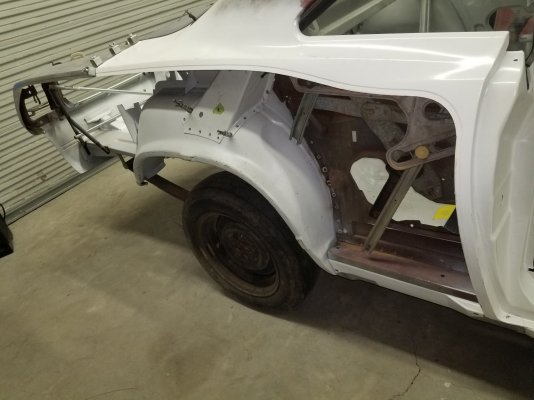
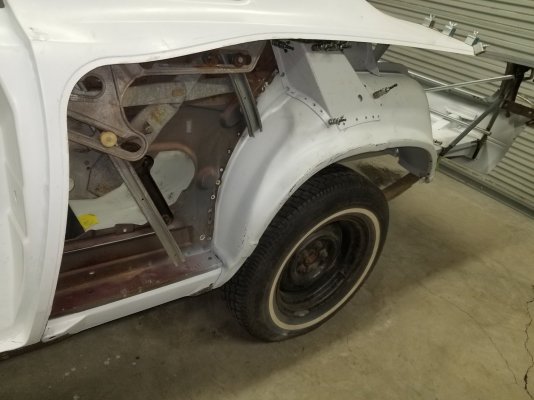
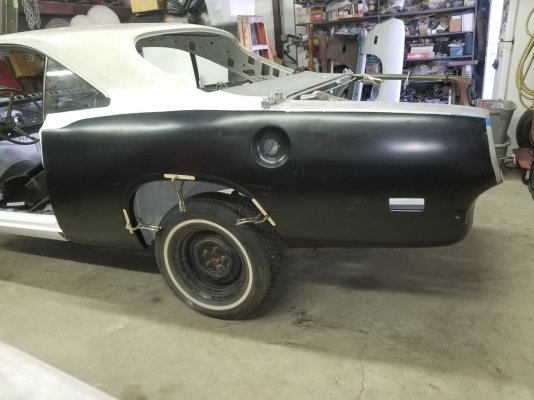
The severe rust through issues extended between the rain gutter and rear quarter upper flange at the trunk opening. There was perforation everywhere, and spots where rust was between both layers of steel trying to pop it apart. The green barracuda rear half I drilled apart gave me the tops of the quarter skins from the door opening back. The trunk jambs were what I was after. Light surface rust is all that was there on the donor. I decided to seam these in 1" forward of the trunk opening. Once everything is fitted on both sides, I will un clamp it, sandblast the pieces, and epoxy primer. Then I will reassemble it permanently.

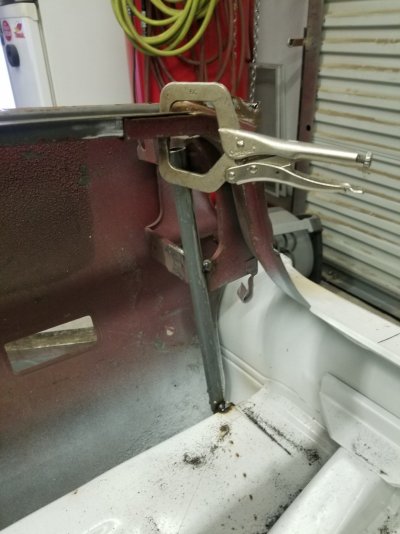
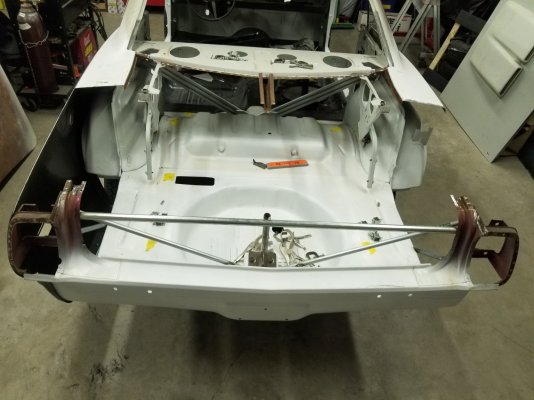
The clamps with the wingnuts are called buttweld clamps. I got these at harbor freight. Note the gray steel tube temp welded to hold the taillight frame structure in position while everything is apart. I will do the same for the LH side, then tie them together with a welded bar running straight across so I maintain the 52.5" spacing at the trunk opening.
 

Attachments

  • 20211015_133157.jpg
    20211015_133157.jpg
    242.8 KB · Views: 14
  • 20211015_141033.jpg
    20211015_141033.jpg
    226.5 KB · Views: 12
  • 20211015_142444.jpg
    20211015_142444.jpg
    219.5 KB · Views: 12
  • 20211015_142541.jpg
    20211015_142541.jpg
    237.5 KB · Views: 14
  • 20211015_160415.jpg
    20211015_160415.jpg
    229.7 KB · Views: 13
Last edited:
Moparmat2000

I'm Awesome
Joined
Feb 13, 2016
Messages
1,780
Reaction score
4,019
Location
Grand Tetons
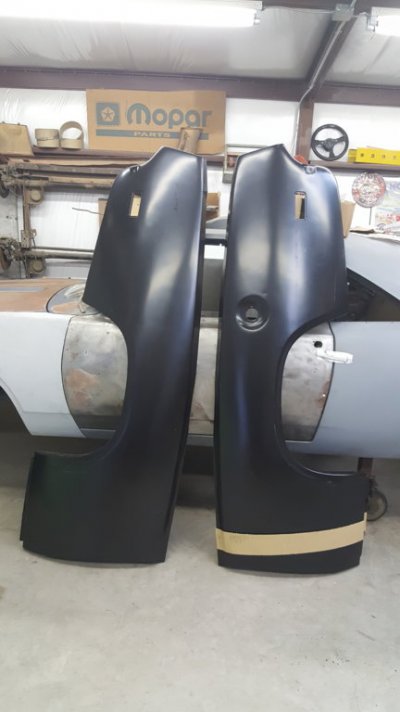
In the end, I will cut off and flange the lip on the rear quarters about 1-2" below the upper edge, and install the new repop quarter half skins. Also some pix to show I didnt cut up a decent car to fix this one lol. Pic #2 you can see the side of the quarter was socked in , hammered out, and filled with bondo. I cant wait to cut this off, and pitch it on the scrap trailer. All I can say is that either I am one of them people who really loves pain, or I love a challenge. I havent figured out which yet.
 

Attachments

  • 20200830_114729.jpg
    20200830_114729.jpg
    415 KB · Views: 11
  • 20211004_171759.jpg
    20211004_171759.jpg
    225.9 KB · Views: 11
  • 20211015_144150.jpg
    20211015_144150.jpg
    248.2 KB · Views: 10
  • 20211015_144140.jpg
    20211015_144140.jpg
    218 KB · Views: 9
  • 20180105_162751.jpg
    20180105_162751.jpg
    45.7 KB · Views: 10
Last edited:

Moparmat2000

I'm Awesome
Joined
Feb 13, 2016
Messages
1,780
Reaction score
4,019
Location
Grand Tetons
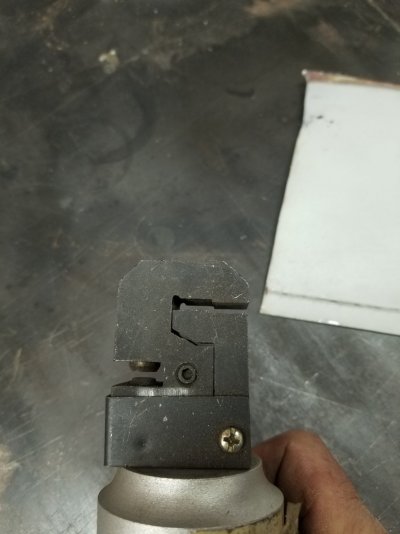
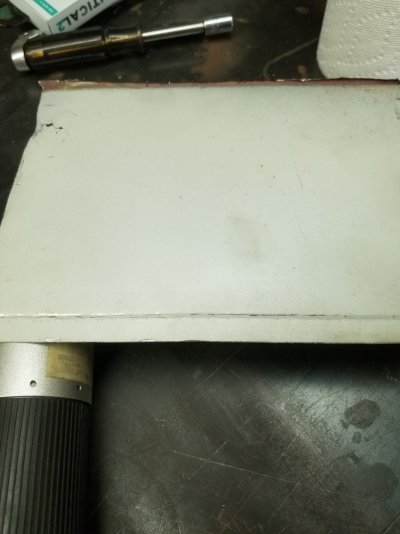
The mentioned panel flanger I will use to get a flush overlap on the panels. Picked that up at Harbor freight. It's one of their better tools. The die on the opposite side of the jaw is a hole puncher.
 

Attachments

  • 20211004_134115.jpg
    20211004_134115.jpg
    167.1 KB · Views: 4
  • 20211004_134109.jpg
    20211004_134109.jpg
    199.5 KB · Views: 4

kennythewelder

Officially Retired, B31-3 (6-G) certified welder.
Staff member
Super Moderator
Joined
Jul 14, 2014
Messages
6,521
Reaction score
9,166
Location
Louisiana
That's a funny looking 94 Silverado, Ha Ha. That car needs a big block for sure. There are to many pages to read through, is that what your plans are, or are you doing a modern drive train. A hellcat engine and trans would also be awesome, but that wouldn't be cheap. When I had my 73 Challenger, it had a 340 with a decent cam, a whyn high rise a Holley 650 dual pump, spread bore, ect, ect, and was a 14 second car. Decent driver back then.
You must be registered for see images attach
 

Moparmat2000

I'm Awesome
Joined
Feb 13, 2016
Messages
1,780
Reaction score
4,019
Location
Grand Tetons
Hi Kennythewelder , Nice Chally. I love E bodies. My buddy had a 72 challenger with the same rim and tire setup. I love them old Cragar SSTs. Cant afford them anymore. 300HP 318 with 340 guts. 42RH overdrive from a dakota, and a narrowed 3.73 geared 8.8 out of a ford explorer. It may eventually get a Holley Sniper setup on it since those seem to be working well for a lot of fellows plus under an air cleaner it appears stock, and they now make stock looking fuel tanks for these with a built in in tank pump setup for EFI. For now I am just trying to make it structurally sound before I start on any mud n sand type body work.

Yes the thread kinda morphed a bit, however I am also trying to show different autobody techniques that can be applied to anything you may want to fix. I have figured out and used these different techniques on many different cars and trucks. I suppose that was my preparation training for this thing. I am using every technique and skill i have learned with auto body repair to do this car. I have also learned new stuff along the way to further my skill set. Though i dont think i will ever do one in this bad a shape ever again.
 

Moparmat2000

I'm Awesome
Joined
Feb 13, 2016
Messages
1,780
Reaction score
4,019
Location
Grand Tetons
Well it done exploded lol. Actually not. These pieces in the first pic will take a trip to the sandblaster at work and get epoxy primered. I have the LH quarter skin sorta mocked up.

I plan on removing the quarter windows and regulators , and then pushing this thing back out on my next off days for more sandblasting in a few more areas now that I can get to them. Got some rust thru in some spots I also have to fix before I can start to reassemble it all.
 

Attachments

  • 20211018_195751.jpg
    20211018_195751.jpg
    279.1 KB · Views: 6
  • 20211018_200957.jpg
    20211018_200957.jpg
    226.3 KB · Views: 6
Last edited:

Moparmat2000

I'm Awesome
Joined
Feb 13, 2016
Messages
1,780
Reaction score
4,019
Location
Grand Tetons
The drag racer guy cut out the C pillar structural supports for his mini tub mod. I took the replacements from a 69 Cudaver coupe I drilled apart. They are mocked up and fitted. All they lack is welding in
 

Attachments

  • 20211016_143846.jpg
    20211016_143846.jpg
    273.7 KB · Views: 3
  • 20211016_143624.jpg
    20211016_143624.jpg
    132.2 KB · Views: 3
  • 20211017_140123.jpg
    20211017_140123.jpg
    140.1 KB · Views: 2
  • 20211017_140115.jpg
    20211017_140115.jpg
    169.8 KB · Views: 3
  • 20211017_164621.jpg
    20211017_164621.jpg
    174.2 KB · Views: 3

Moparmat2000

I'm Awesome
Joined
Feb 13, 2016
Messages
1,780
Reaction score
4,019
Location
Grand Tetons
Heres how it looks clamped together I will be trimming the new skins back to fit in the grooves I made with the panel flanger
 

Attachments

  • 20211017_192039.jpg
    20211017_192039.jpg
    207.9 KB · Views: 3
  • 20211017_183612.jpg
    20211017_183612.jpg
    210.9 KB · Views: 3
  • 20211018_135450.jpg
    20211018_135450.jpg
    233.5 KB · Views: 3
Top