My '95 RCLB C1500

Disclaimer: Links on this page pointing to Amazon, eBay and other sites may include affiliate code. If you click them and make a purchase, we may earn a small commission.

Canadian Rust Bucket

I'm Awesome
Joined
Jul 19, 2021
Messages
160
Reaction score
295
Location
Canada
You must be registered for see images attach

Started cutting away the rust on the bottom of the driver's door. I'm stuck fixing this one up, since the nicest part-out is nearly three hours away and at least $250 for the door. I have an 8' break for bending the sheet metal, so I shouldn't have too many issues making the replacement pieces.
You must be registered for see images attach

Found another squirrel nest behind the radio, turns out the rodent got in through the cowl vent, and chewed his way through my new blower motor and heater box. Got it patched up with some heavy plastic for the structure and foil tape to cover any leak potential.
You must be registered for see images attach

Pulled the ductwork and wiring out of the dash to replace some wires and clean it out really thoroughly. Cleaning up the rust and painting the metal while I'm in there.
You must be registered for see images attach

Picked up a roll of stainless mesh. Still playing around with how to install it, but the goal is to cover the whole cowl vent just underneath the plastic trim. No more squirrels in the cab, and hopefully no pine needles in the heater box either. It'll need cleaning fairly frequently, but might also keep my fenders in fighting shape longer, since the cowl drains dump a lot of garbage down inside the rear side of the front fender.
You must be registered for see images attach

Bonus: my new seat moved up on the timetable, since this one is missing a significant bunch of foam from the tunnel the squirrel dug. That's what I get for letting the truck sit, I guess. Lesson learned.
 

Canadian Rust Bucket

I'm Awesome
Joined
Jul 19, 2021
Messages
160
Reaction score
295
Location
Canada
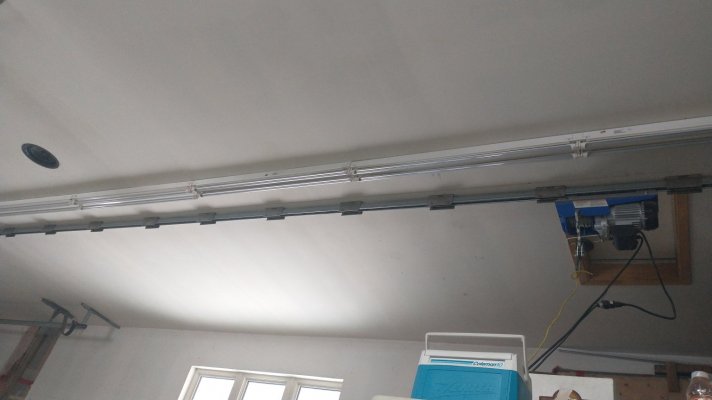
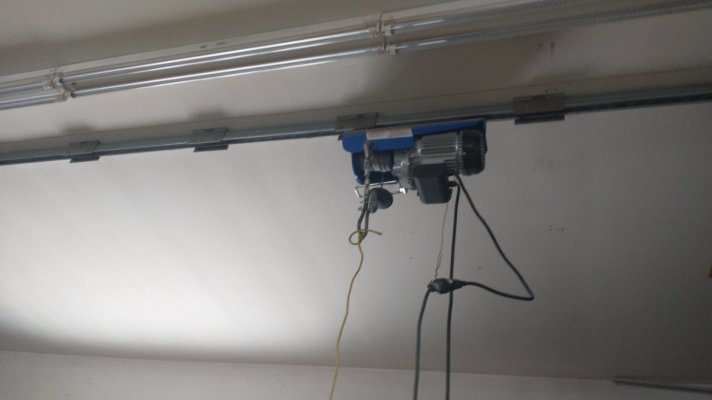
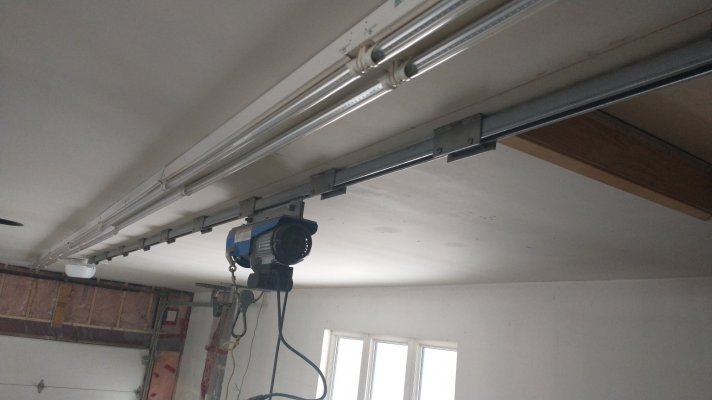
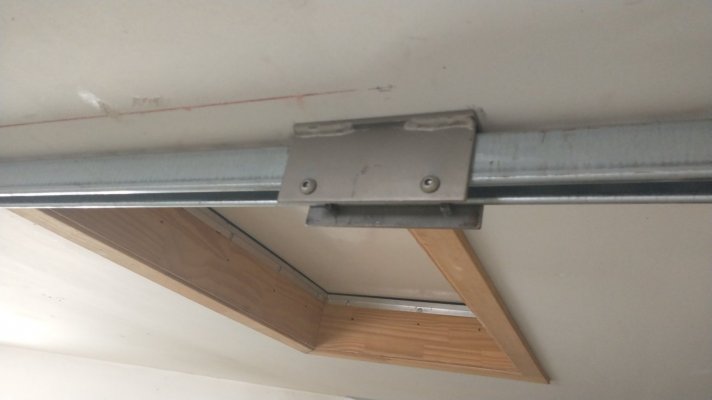
Great job on the build! Do you have any more pics of that overhead lifting track setup in the shop?
Here you go! It's just a cheap princess auto lift, but the real limiting factor on the hoist is the rafters.
 

Attachments

  • IMG_20240124_115048723.jpg
    IMG_20240124_115048723.jpg
    134 KB · Views: 3
  • IMG_20240124_115110125.jpg
    IMG_20240124_115110125.jpg
    116.9 KB · Views: 3
  • IMG_20240124_115136982.jpg
    IMG_20240124_115136982.jpg
    148 KB · Views: 3
  • IMG_20240124_115151283.jpg
    IMG_20240124_115151283.jpg
    94.1 KB · Views: 3

Canadian Rust Bucket

I'm Awesome
Joined
Jul 19, 2021
Messages
160
Reaction score
295
Location
Canada
You must be registered for see images attach

The wiring harness for my climate control board, 95 only, so corroded from squirrel pee that it quit working. And the replacement 6 pin pigtails I picked up from the parts store; the only ones they had.
You must be registered for see images attach

Soldered in place, and my controller now works as it should. Working defroster means one more check mark on the safety list. The rest of the dash can go back together now.
 

Canadian Rust Bucket

I'm Awesome
Joined
Jul 19, 2021
Messages
160
Reaction score
295
Location
Canada
Ran into some difficulty with the dash. I noticed the bulb test for the warning lights on the cluster wasn't working, and the right turn signal was on constantly. A few hours of electrical diagnosis later, and I have the problems licked. Between me putting in my LEDs backwards and a corroded multifunction switch, I had quite a bit of grief. The hazard button wasn't making solid contact and needed to be cleaned. Once that was done, I reinstalled the switch and it all works as it should.
You must be registered for see images attach

Took this picture partway through the process, after I tried flipping a few LEDs. Still not sure how I got only the warning lights backwards, but I'll take a simple fix over a complicated one any day.

Dash is fully back together, underhood fuse box remounted, and the truck is back up and running.
 

Canadian Rust Bucket

I'm Awesome
Joined
Jul 19, 2021
Messages
160
Reaction score
295
Location
Canada
I spent a bit of time on the web today searching junkyard inventories. Called an "auto recycler" not too far away, and they've got a bench seat in decent condition for only $100. A few rips in the seat, but since I'm having it reupholstered anyway that won't matter. So, God willing, my seat issue will shortly be solved. I might spend a bit of time trying to fix up the rodent damage to the centre cushion on the 60/40 split I have and sell it cheaply.
 

Canadian Rust Bucket

I'm Awesome
Joined
Jul 19, 2021
Messages
160
Reaction score
295
Location
Canada
You must be registered for see images attach

You must be registered for see images attach

The seat has a small rip and is a little gross but nothing a good steam clean won't solve. The foam is in good shape as far as I can tell and the slide mechanism still works fine. All in all, a steal of a purchase.
 

Canadian Rust Bucket

I'm Awesome
Joined
Jul 19, 2021
Messages
160
Reaction score
295
Location
Canada
You must be registered for see images attach

A pair of pliers took out the hog rings and then the upholstery basically peeled right off.
You must be registered for see images attach

I can't get all the discoloration out, but the seat halves are much cleaner now.
You must be registered for see images attach

One small problem: the frame sides are rusty, and the foam has let go. Based on my reading on the forum, I think a thorough rust removal and a generous application of contact cement will get these serviceable again. When I win the lotto I'll get a custom seat, but this one will do for now.
You must be registered for see images attach


As an added bonus, I've discovered the bench slide hardware is interchangeable with the 60/40 split bench, with the exception of the short leg in the middle. So I have two spare lever arms in good working order.
 

Canadian Rust Bucket

I'm Awesome
Joined
Jul 19, 2021
Messages
160
Reaction score
295
Location
Canada
You must be registered for see images attach

The seat back upholstery went together smoothly, just a helper and I slowly working the cushion into the vinyl. A couple of small dents appeared but I think they'll disappear just as quickly once I log some time in the seat. Still waiting on the bottom cushion to dry out from the cleaning before I try wrapping it up.
 
Top