Reinstalling Radio Button Springs - Is it possible?

Disclaimer: Links on this page pointing to Amazon, eBay and other sites may include affiliate code. If you click them and make a purchase, we may earn a small commission.

Lance 1992

Supporting Member
Supporting Member
Joined
Feb 1, 2024
Messages
31
Reaction score
51
Location
Texas
Have you ever seen a radio button spring? If you haven't, you are lucky. If you have seen one, you are an unfortunate soul who decided to take the radio tuner head apart for no real good reason and ended up with eleven tiny springs that help return the buttons to their positions after being pushed. The problem is, there are no holes, slots, connectors, or anything else to put the button in to to hold them in place while you reassemble the tuner head unit. There are eleven small springs for each of the "simple" buttons (1-6, RCL, Power, SET, AM/FM, AM ST) as opposed to the "rocker" buttons like Seek, Scan, Tune, Vol, Bal, and Fade. I also had three larger springs, one each on VOL, TUNE, and SEEK. Nothing on SCAN, BAL, or FADE.

How on earth do I put this back together? Try searching the Internet for radio button springs - zilch, nada, nothing. Any Delco manuals out there cover this?

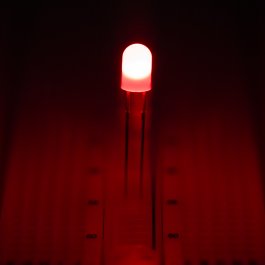
Here's a video of the situation that also includes changing the lights and cleaning the buttons:
xc_hide_links_from_guests_guests_error_hide_media

Here's a picture with the springs along with some blue scribbles approximately where each end of the springs rest after installation.
You must be registered for see images attach


Here's what it looked like when I opened it up:
You must be registered for see images attach


Any help on putting this back together again would be appreciated.
 

AK49BWL

GMT400 Forever!
Joined
Mar 21, 2015
Messages
1,805
Reaction score
2,804
Location
Longview, TX
There's plenty good reasons to pull the face off lol. I put LED bulbs into mine and cleaned every button in there. As far as I can remember, to reassemble you just put the springs in the face behind the buttons while it's facing downward, then put the circuit card on. That way the springs aren't falling out everywhere.

Also, the 93-94 models don't have springs ;)
 

Orpedcrow

I don’t know what I’m doing
Supporting Member
Joined
Aug 20, 2022
Messages
2,407
Reaction score
6,105
Location
East Texas
^^do that and
I bet a small dab of dielectric grease would help them stay put while you’re getting the board back on.
 

Lance 1992

Supporting Member
Supporting Member
Joined
Feb 1, 2024
Messages
31
Reaction score
51
Location
Texas
My technique has been exactly as Brandon suggested, but I'm not having any luck getting those tiny springs to balance on end. Orpedcrow's dielectric grease is a great idea, better than my hot glue idea...

I noticed in the picture above that a spring is in fact standing in the orange power button. I carefully put one in with tweezers and it worked! Another thirty minutes later and I still only have one spring installed and I'm going to have to lift up the plastic sheet to get a couple of spring that fell under it and topple my lone success.

Then I started thinking that even after I get all of the springs in, the clear plastic light conduits may fall off the rubber coated button face when I install it and ruin everything. This is what it looked like when I took it apart:
You must be registered for see images attach


I should install the clear plastic light conduits first. So I did that. Then I saw all of the holes through the plastic for the springs to be installed in. Now for folks like Brandon and others who have done this, that would be so obvious that you wouldn't even need to say it. I guess it was just the bad luck the way mine came apart that I didn't think of putting it back together another way. If the clear plastic light conduit was lettuce and you were making a hamburger, it's like putting your lettuce on top of the hamburger patty then put the bun on top instead of putting the lettuce on the bun and turning it over on top of the patty. I was going to continue the hamburger analogy by relating the springs to pickles, but hopefully you get the point. Could dielectric grease be a condiment?

Thank you AK49BWL/Brandon and Orpedcrow.

Brandon - Can you send me a link to the LEDs you used?

Here's what it should look like prior to reassembly with the light conduits in place and the springs in the holes:
You must be registered for see images attach
 

Orpedcrow

I don’t know what I’m doing
Supporting Member
Joined
Aug 20, 2022
Messages
2,407
Reaction score
6,105
Location
East Texas
Cool! Glad you got it sorted, we are usually our own enemies. Always over thinking and over looking the simple stuff. I do it constantly. Drives my boss absolutely nuts. :smokin:
 

Lance 1992

Supporting Member
Supporting Member
Joined
Feb 1, 2024
Messages
31
Reaction score
51
Location
Texas
It's a good example of why I still need to add the "I don't know what I'm doing" tag to my infomration.
 

AK49BWL

GMT400 Forever!
Joined
Mar 21, 2015
Messages
1,805
Reaction score
2,804
Location
Longview, TX
Thank you AK49BWL/Brandon and Orpedcrow.

Brandon - Can you send me a link to the LEDs you used?
Unfortunately not, as it appears they're no longer made... At least not by SuperBrightLEDs where I got them. These are the same style just in red - mine are blue, 360 degree 5mm component LEDs. Guess it's a good thing I bought a crapload of them when I could lol.

Took me a minute but I found a thread I started to show how I have blue behind all my stereo (and digital HVAC) components. https://www.gmt400.com/threads/blue-leds-in-a-94-stereo.49103/
 
Last edited:

AK49BWL

GMT400 Forever!
Joined
Mar 21, 2015
Messages
1,805
Reaction score
2,804
Location
Longview, TX
Oh that's right yours is the older version with only three bulbs... No solder required. And springs :rofl:
 
Top