1995 GMC RCSB 5.7 TBI
1- Yes I did read the service manual for my truck(listed above left)
2- Upon reading the service manual pertaining to the replacement of A/C compressor and it components, i.e. dryer/accumulator, condenser, and evaporator.
1- Manual says 8oz of PAG oil in a/c compressor, further reading says to drain all fluid from NEW compressor, drain fluid from old compressor and notice that amount and refill NEW compressor with that exact amount.
2- No where does it mention adding any to dryer/accumulator, condenser, or the evaporator.
I have bought a NEW compressor, tag on back states prefilled with 3.0oz of fluid, does not state to empty or add to it, (NAPA Professional Series) which is a 4 seasons, no other instruction other than to turn shaft 10 turns as to lubricant the internals of compressor.
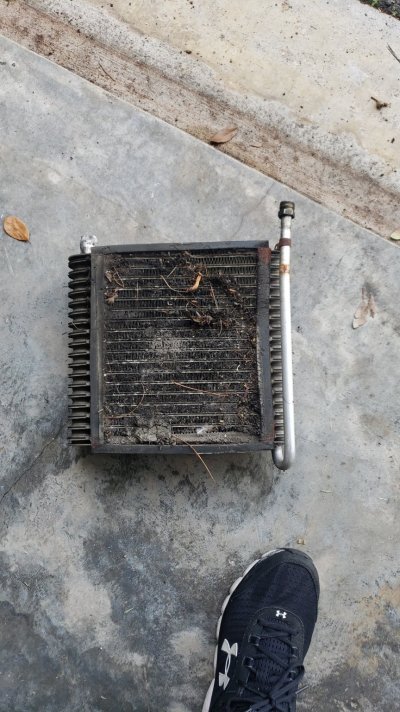
I bought the new Air conditioner Kit containing dryer/accumulator, O-ring kit, PAG oil 8oz bottle, and 1 orifice tube. 1 new a/c line kit that goes to the a/c compressor, 1 new A/C liquid line goes from inlet of evaporator to condenser. All parts for this where bought from NAPA and as of this post are correct and seem to "dry fit" very well.
Yes I could find some videos for this but I have a lot of $$ into these parts and I don't want to screw this up, this is the place to find assistance and help with this install, also when I removed the old compressor not one drop of PAG came out of it, I got about 2oz out of the original dryer, about 1.5oz from the condenser and when I flush the evaporator I did see signs of PAG oil but I don't know that amount as it was mixed with the A/C flush fluid.
I just need some help so I can get her back up and going.
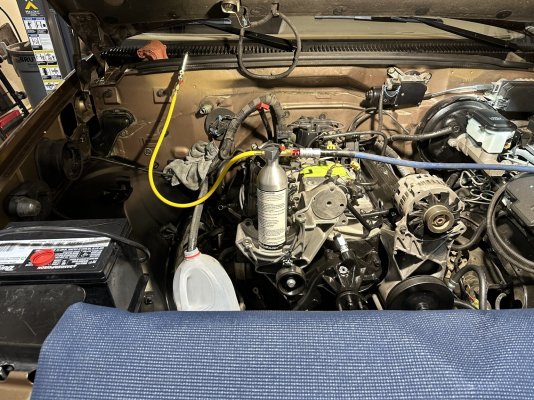
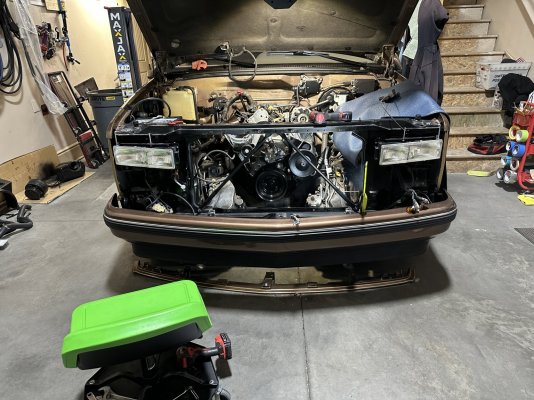
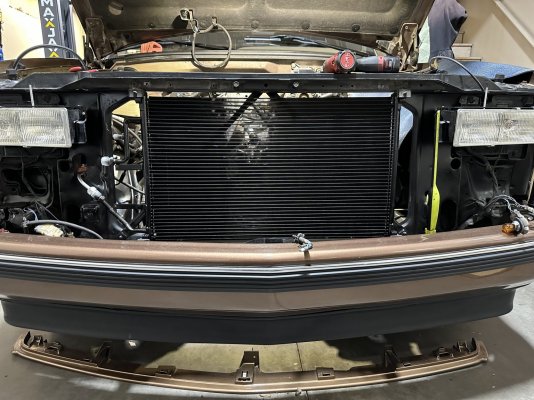
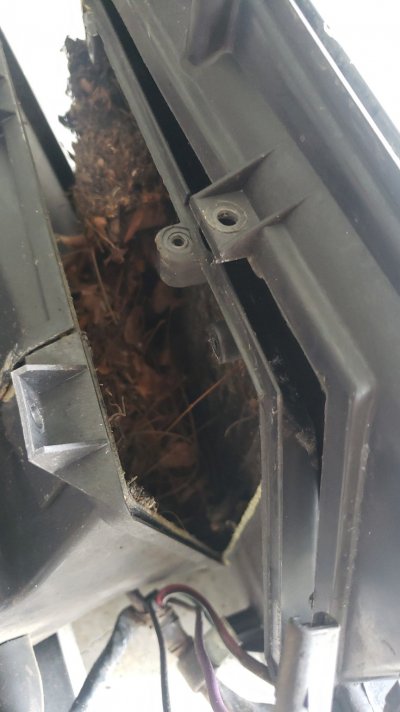
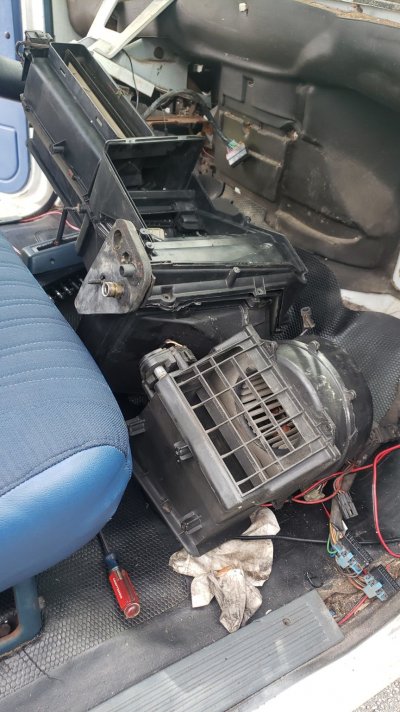
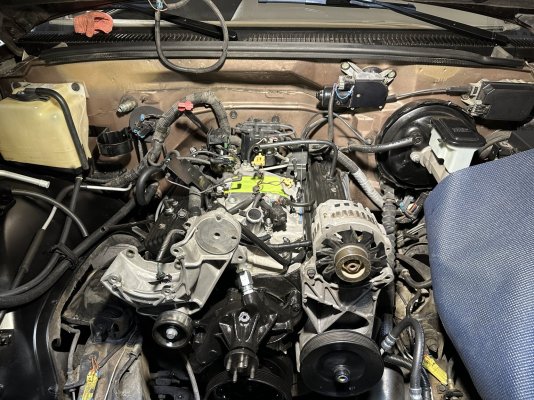
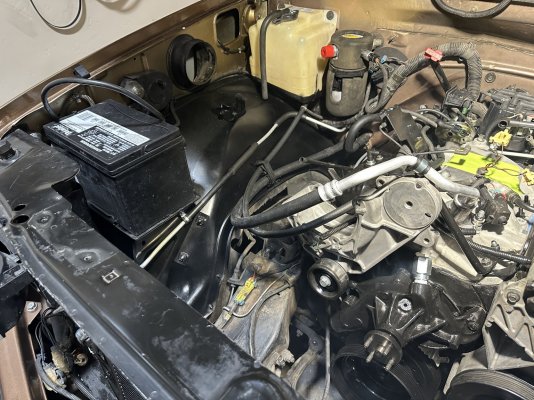
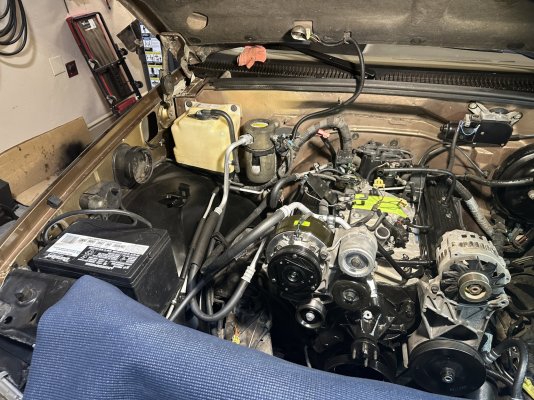
Heres some pics at the point I'm at. Thank you for any advice and or suggestions, it will be greatly appreciated!
1- Yes I did read the service manual for my truck(listed above left)
2- Upon reading the service manual pertaining to the replacement of A/C compressor and it components, i.e. dryer/accumulator, condenser, and evaporator.
1- Manual says 8oz of PAG oil in a/c compressor, further reading says to drain all fluid from NEW compressor, drain fluid from old compressor and notice that amount and refill NEW compressor with that exact amount.
2- No where does it mention adding any to dryer/accumulator, condenser, or the evaporator.
I have bought a NEW compressor, tag on back states prefilled with 3.0oz of fluid, does not state to empty or add to it, (NAPA Professional Series) which is a 4 seasons, no other instruction other than to turn shaft 10 turns as to lubricant the internals of compressor.
I bought the new Air conditioner Kit containing dryer/accumulator, O-ring kit, PAG oil 8oz bottle, and 1 orifice tube. 1 new a/c line kit that goes to the a/c compressor, 1 new A/C liquid line goes from inlet of evaporator to condenser. All parts for this where bought from NAPA and as of this post are correct and seem to "dry fit" very well.
Yes I could find some videos for this but I have a lot of $$ into these parts and I don't want to screw this up, this is the place to find assistance and help with this install, also when I removed the old compressor not one drop of PAG came out of it, I got about 2oz out of the original dryer, about 1.5oz from the condenser and when I flush the evaporator I did see signs of PAG oil but I don't know that amount as it was mixed with the A/C flush fluid.
I just need some help so I can get her back up and going.
Heres some pics at the point I'm at. Thank you for any advice and or suggestions, it will be greatly appreciated!