Hello All,
Thought I would start an all-encompassing 700R4 information thread since GMT400 trucks have these transmissions installed prior to 1993. Please feel free to add your own tips, tricks and anything else that you found helpful or ask questions as you need to and I’ll respond as soon as possible.
If you would like parts added to the below ‘Parts List’, post them in the thread and I’ll incorporate them into the list. Meanwhile, I’ll update this first post with additional information and links as I go.
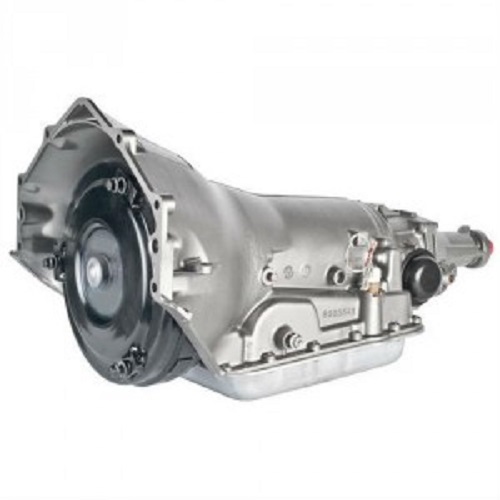
700R4 Production Run: 1982-1993
Applications: General Motors passenger cars, trucks, SUVs and Diesel
Predecessor Transmission: Turbo Hydra-matic 350 (TH350)
Successor Transmission: 4L60E
Designation Change: 700R4 changed to 4L60 in 1990, in line with GM's general codification overhaul for transmission designations.
Line Pressure Testing Instructions and Reference Ranges - Use to validate proper throttle valve cable set up/Adjustment!
Application Chart
An application chart is intended to inform what mechanical elements are working or not working inside a transmission while it’s in a given range and gear. Range is what is selected on the column shifter and includes Park, Neutral, Drive, etc while gear is what specific gear as defined by engine revolution to output shaft revolution ratio. Examples include 1st gear, 2nd gear, 3rd gear and so forth.
You can narrow down and in some cases, pin-point the source of drivability symptoms by simply looking at a range chart and comparing what the chart is telling you to your symptoms in terms of when/where in the shifting cycle they are happening.
Video Resources - 700R4 Playlist
Teardown and Inspection
Rebuild Series
Performance Tips and Tricks
700R4 and 4L60E Input Drum Differences
700R4 Vintages, Defining Characteristics and Parts Interchange
Rebuilding the 700R4 - Special Tools
700R4 Rebuild - Parts Selection
Machining, Reconditioning and Recommended Assembly Procedures
700R4 Check Ball Location and Descriptions
Source: ATSG Checkball Book, Vol 1
High Performance Upgrades and Options
Additional Resources:
Throttle Valve Cable set up and adjustment instructions
Thought I would start an all-encompassing 700R4 information thread since GMT400 trucks have these transmissions installed prior to 1993. Please feel free to add your own tips, tricks and anything else that you found helpful or ask questions as you need to and I’ll respond as soon as possible.
If you would like parts added to the below ‘Parts List’, post them in the thread and I’ll incorporate them into the list. Meanwhile, I’ll update this first post with additional information and links as I go.
700R4 Production Run: 1982-1993
Applications: General Motors passenger cars, trucks, SUVs and Diesel
Predecessor Transmission: Turbo Hydra-matic 350 (TH350)
Successor Transmission: 4L60E
Designation Change: 700R4 changed to 4L60 in 1990, in line with GM's general codification overhaul for transmission designations.
You must be registered for see images attach
You must be registered for see images attach
Line Pressure Testing Instructions and Reference Ranges - Use to validate proper throttle valve cable set up/Adjustment!
You must be registered for see images attach
Application Chart
An application chart is intended to inform what mechanical elements are working or not working inside a transmission while it’s in a given range and gear. Range is what is selected on the column shifter and includes Park, Neutral, Drive, etc while gear is what specific gear as defined by engine revolution to output shaft revolution ratio. Examples include 1st gear, 2nd gear, 3rd gear and so forth.
You can narrow down and in some cases, pin-point the source of drivability symptoms by simply looking at a range chart and comparing what the chart is telling you to your symptoms in terms of when/where in the shifting cycle they are happening.
You must be registered for see images attach
Video Resources - 700R4 Playlist
Teardown and Inspection
xc_hide_links_from_guests_guests_error_hide_media
Rebuild Series
xc_hide_links_from_guests_guests_error_hide_media
Performance Tips and Tricks
xc_hide_links_from_guests_guests_error_hide_media
700R4 and 4L60E Input Drum Differences
xc_hide_links_from_guests_guests_error_hide_media
700R4 Vintages, Defining Characteristics and Parts Interchange
| Years | Defining Characteristics | Interchange |
| 1982-E1984 | - 27-spline input shaft - 7-element forward roller clutch assembly (Jan 1-May 31 1982) - Narrow pump stator - First design forward drum - poorly designed 3-4 clutch bleed orifice (368 last three digits of casting no) | None - discard these parts if working on a 1982-E1984 unit and replace with L84-1986 pump/input drum assemblies |
| L1984-1986 | - Introduction of 30-spline input shaft - Introduction of wider pump stator to accommodate 2nd design input shaft - Updated forward drum housing - improved 3-4 apply circuit bleeder checkball capsule (152 last three digits of casting no) | Will retro to all prior years of 700R4 as a service pack (pump assembly and forward drum) and strongly recommended for any 1982-E1984 700R4 |
| 1982-E1987 | First generation valve body (has bore for mechanical TCC command / lock up )
| Will install on all years of 700R4 and recommended for anyone seeking 100% mechanical control of the torque converter clutch |
| L1987-1992 | - 2nd generation valve body - Takes only two check balls - Introduction of auxiliary valve body - Third design forward drum (097 last three digits of casting) no.) | 2nd design valve body Will NOT interchange onto a non-aux valve body case Third design drum will technically retro to any year 700R4 but forward feed orifice was widened from 3mm to 6mm so installing onto non-aux valve body applications may result in very harsh engagements into drive. |
| 1993 | - 3rd generation valve body (F-bodies and corvette only) - same general design/valve train layout however a third check ball was added to the valve body |
Rebuilding the 700R4 - Special Tools
| Tool | Applicable Parts/Location(s) in the Transmission | Function | Appx Cost | Source |
| ATSG manual | Everywhere | Provides detailed step by step procedures, tools, diagnosis and troubleshooting along with other information pertaining to the servicing and repair of the transmission | $30 | Amazon, eBay, trans parts suppliers |
| Ft Lb torque Wrench | Pump, Ext-housing to case | Torque fasteners to required specification | $50+ | eBay, Hardware stores, Amazon, Snap On, Cornwell, Matco, etc |
| Inch Lb torque Wrench | Valve body, aux valve body, 1-2 accumulator, TCC solenoid, speedo housing bracket | Torque fasteners to required specification | $50+ | eBay, Hardware stores, Amazon, Snap On, Cornwell, Matco, etc |
| Dial Indicator, magnetic base and vise grips | Pump/Input shaft | Used to measure front end play. Dial indicator is mounted onto a metal surface and plunger set vertically on the snout of the input shaft while vise grips are used to grip the input shaft so the builder can lift up on the shaft and measure dial indicator travel. | $100-$300 | eBay, Hardware stores, Amazon |
| Pump alignment tool | Pump assembly | Used to align the pump cover/stator and pump body during reassembly - can use a large hose clamp obtainable at most hardware stores | $20-$100 | Home Depot, ebay, Amazon |
| Internal/External Snap Ring Pliers - Straight | Clutch Drums & Low Reverse clutch snap rings | Snap On PJIOA or equivalent is used to remove and reinstall clutch return spring snap rings throughout the transmission | $25 | eBay, SnapOn |
| Internal/External Snap Ring Pliers - 90-degree | Output shaft snap ring and low reverse clutch | Snap On SRP1 or equivalent is used to remove the small snap ring at the output shaft-front planetary carrier junction; also used to remove the low reverse clutch return spring snap ring | $30 | eBay, SnapOn |
| Internal/External Snap Ring Pliers - Eye loop | Pump cover (Boost/PR valve and TCC Lock up valve) | Use small pair of internal/external snap ring pliers designed to engage ‘eye loop’ style snap rings such as those found at the boost/PR valve and TCC lock up valve in the pump cover | $30 | eBay, hardware stores, Amazon |
| Sealing Ring Expander and Sizer | Input shaft | Expander: Expands teflon sealing rings so they can fit over the input shaft Sizer: Resizes rings to proper diameter once each sealing ring is in its groove | $75-100 | Amazon, eBay, trans parts suppliers |
| Clutch spring compressor | Forward drum, reverse input drum, low reverse clutch (rear case) | Used to compress apply piston return spring assemblies so the corresponding snap ring can be installed If you will build transmissions occupationally, purchase a good foot press ($400-600) | $100-200 | Ebay, Amazon |
| Bushing Drivers | Various | These are used to remove and reinstall bushings in a transmission - look for the 4L60e-specific set on eBay A set can be expensive so an alternative is to take all bushed parts to a trans shop for R/R - cost is roughly $150 | $300-500 | eBay, hard parts suppliers, tool suppliers |
| Slide hammer / blind hole puller Kent Moore J-45548 | Pump stator bushings | Use to remove both stator bushings (price is for the kent moore tool) | $40-60 | eBay - commonly listed |
| 12+ Ton Shop Press | Various | Used in concert w/bushing drivers to install bushing (and occasionally remove them) Heavy arbor presses can also be used Hammering bushings into place is a last resort | $150+ | Harbor Freight |
| Lip Seal Installation Tool | Various | Used to work lip seals into sealing pockets or cavities without cutting/tearing the lip seals on apply pistons, etc | $5-10 | eBay, Amazon, WIIT Trans Supply |
| Air compressor w/air nozzle | Various | Use an air compressor w/a rubber-tipped nozzle to air check clutch pack apply in drums and the case as well as the 2-4 band servo apply to confirm those elements will function correctly upon the transmission’s return to service | $100+ | Hardware stores, Amazon |
| 700R4 Air Test Plate | Case Belly | Optional but recommended for transmission builders - used to air check a fully assembled case by mimicking the valve body’s presence on the case and using air as a proxy for apply fluid. Validates all sub-assemblies containing applied elements are working properly in the case | $100-$150 | eBay |
| Sonnax Governor Bore Air Check Tool | Governor Bore | Optional but recommended for transmission builders - used to detect leaks at the governor bore | $50 | eBay |
| Kent Moore J | Governor Bore | Use to ream the governor bore and install a governor bore sleeve that will restore sealing integrity of the governor bore for continued use of the case | $70+ | eBay |
700R4 Rebuild - Parts Selection
| Part | Location | Rationale | Part No (if app) |
| Detent Cable | TV hook-up (case) | Always install a new TV cable - pre-existing cable is likely worn and may not hold adjustment upon overhaul, resulting in unacceptable main TV pressures | |
| Transgo Jr shift kit | Valve Body | Factory main throttle valve sometimes sticks, causing inconsistent main TV pressure and drivability symptoms | SK700JR |
| Accumulator Pistons | Case / Aux Valve Body / 1-2 Acc Hsg | Always replace existing accumulator pistons with new counterparts | |
| Corvette Servo | Case (Servo bore) | Original ‘053’ servos are undersized, especially if the engine is modified. HP/Xtreme Heavy duty: Use Billet Servo Augment w/ rubber D-ring seals in place of teflon scarf cut seals if available ‘053’ refers to the three-digit code cast into the 2nd gear apply piston | |
| .472 boost valve / new reverse boost valve | Pump Cover | Factory .420 boost valve is worn; new boost valve kit will provide better line rise upon acceleration HP/Xtreme HD: Use Sonnax .500 boost valve kit | |
| 10 Vane Pump kit | Pump Body | Applies to 82-86 700R4s that came with seven-vane pumps from the factory 10 vane pumps provide greater stability at higher RPMs; 13 vane pump kits (rotor and corresponding slide) can also be installed but are usually not necessary | |
| 298mm input drum/pump stator - 30 spline input shaft | Input Shaft / Pump Cover | Applies to 82-E84 700R4s installed behind V8 engines Install a matching stator or stator-pump cover assembly from a L84-86 unit that pairs with the 30-spline input shaft-equipped drum (last 3 digits of casting are 152 for L84-86, 716 for 87-93 for all aux-valve body-equipped 700R4s/4L60s Note Pump bodies with last three digits of ‘732’ in the casting number will work on any pump cover across all years of 700R4 | |
| 4L60E reverse input Drum | Reverse Input Drum | Retro a 4L60E reverse input drum, aluminum apply piston, belleville cushion plate and 4L60E tubular steels from a 97+ 4L60E for more consistent hi-reverse apply if existing drum cannot be reconditioned | |
| ‘152’ Forward Drum (152 refers to the last three digits in drum’s casting number) | Forward Drum | Applies to 82-E84 700R4s installed behind V8 engines Early 27-spline input shafts are susceptible to failure; early drums do not have as efficient fluid bleed-off design for 3rd clutch piston when trans is in first or second gear | |
| Bonded steel/rubber apply pistons | Forward Drum | Factory aluminum pistons in 700R4s and pre-97 4L60Es crack (esp the forward piston) | |
| Updated forward clutch return spring assembly | Forward Drum | Required for 97+ bonded pistons | |
| #7 3-4 clutch apply ring | Forward Drum | The apply ring from a 4L60E is slightly shorter than the #4 or unmarked 700R4 factory equivalent. When paired with a combination of thinner apply and backing plates/support plate and 4L65E spec clutches and flat steels will allow for additional clutches and steels in the 3-4, providing for a stronger clutch than factory | |
| High energy frictions (3-4 clutch pack) | Forward Drum | Always use 4L60E high energy clutches for all rebuilds, at minimum (more specialized clutch discs should be considered if application calls extreme duty/spec frictions) | |
| 29-Element sprag assembly | Forward Drum | Applies to 82-87 700R4s Install the updated 29-element sprag from 87+ units for greater strength/reliability over the original 24 element sprag or, in the case of very early units, the 7-element roller clutch The entire sprag gear assembly must be updated if unit is pre-1988 If so equipped, replace existing sprag clutch with new Borg Warner counterpart | |
| Viton seal (input - output shaft junction) | Forward Drum | Install a 4L60E rubber/viton style seal in this location in the forward drum Never use the plastic input-output shaft junction seal that comes in numerous overhaul kits as they leak | |
| Bushing kit | Various | Replace all bushings in the transmission Install Sonnax 4L60E teflon coated bushings for the pump body, rear stator bushing and extension housing bushing if available | |
| Low reverse tubular steels | Low Reverse clutch pack |
Machining, Reconditioning and Recommended Assembly Procedures
| Procedure | Rationale |
| Pump Working Surfaces (Body and Cover) | Machine the pump cover flat to restore it’s working surface to factory new; remove .010” of material Machine pump body deck by .010 to restore surface to perfectly flat; machine rotor pocket to achieve .0015-.0025 rotor-deck surface clearance and .002.003 slide-to deck surface clearance Install new vanes, pump rings and teflon parts |
| Pressure Regulator Valve | Grind off the in-board most land all the way around flush to provide the transmission full-time line-to-lube at all throttle positions |
| Pump Drain Back | Drill pump drain back 5/16” to promote more efficient drain back of fluid to the sump (pan) Applies to 4L60Es as well |
| 4th Accumulator | Install your old accumulator piston upside down in the case bore with no rubber seal then install a new accumulator piston over top with a perimeter seal - this will provide for a positive, crisp 3-4 upshift This procedure is equivalent to installing a restrictor that comes in some shift kits High-stall: Block off 4th accumulator feed in case and leave piston/spring out entirely |
| Reverse Input Drum | Turn reverse input drum surface to remove any warpage - install wide Alto red 2-4 band (band is only a few dollars more than factory band) |
| Band Clearance | Set band clarence such that band moves about ⅛” movement of band along drum to promote longevity and shift quality |
| Separator Plate | - Drill separator plate hole sizes to .110-.115 for 2-3 feed and 2-3 exhaust for crisper upshifts to 3rd gear - Drill 3-4 feed hole to .110-.115 for crisper 3-4 upshift - Drill 1-2 feed hole based on servo piston type and spring used in 1-2 accumulator valve in valve body Increase above hole sizes incrementally based on increase in converter stall over stock rpm stall speed (1600-1800 RPMs) |
| Valve Body - Line Bias Valve | Block off line bias valve is high stall/high performance application - use a rod of the appropriate size |
| Valve body - MTV Upshift valve | Remove spring from MTV upshift valve for more optimal shift quality |
| Valve Body Swap - Vehicles that did not originally come with a 700R4 | Hot Rods / Resto Mods: Install an 82-86 valve body if your late (88+) 700R4 is intended to be used in a non-computer control application and you do not want to install an electro-hydraulic TCC lock up kit Install a Super Technologies or Transgo TCC Mechanical Lock up kit in the applicable location in the valve body Note: You cannot install a late 700R4 valve body onto an early non-auxarily valve body-equipped 700R4 case |
| Governor | Replace governor gear with new Governor valve not moving when actuating weights? Remove governor valve and polish bore w/bench buddy and WD40 to promote better function of the governor and prevent upshift/downshift issues upon overhaul |
Source: ATSG Checkball Book, Vol 1
You must be registered for see images attach
High Performance Upgrades and Options
| Component | Notes | Alternatives |
| Superior Technologies Governor Kit | Part no K-018; also services TH350, TH400 and similar | NA - this kit will change shift points to better match application |
| Transgo Reprogramming kit/ HD2 / SK-700 Senior | These kits are geared towards high performance or heavy duty | Superior Technologies B&M (not rec’d for stock apps) |
| Sonnax .500 boost valve | O-rings/4L60E uses a different kit, part number LB-4L60E | Transgo |
| Billet pump rotor | (10 and 13 vane versions available from CK Performance) | TCI |
| Sonnax Smart Shell | (recommended for anything beyond 350 HP) | TCI Beast Sun Shell |
| Sonnax Factory Forward Drum Reinforcement kit w/billet coast clutch piston | Good for up to 450 HP | Sonnax Smart Tech Input Drum assembly if HP is 450+ and/or racing |
| Raybestos Blue Plate or Alto Red friction module | Best when paired with Kolene coated or lindered steels; .105 and .085 (4L65E) thicknesses available | Raybestos Stage One or GPZ frictions; Alto high energy/kevlar-lined module |
| 3-4 Clutch: Borg Warner 4L65E spec clutch pack w/ factory 4L65E backing and apply plates | Raybestos ZPack not recommend for anything heavy duty or HP | Alto Max Pack high energy 8 or 9 frictions, machined plates and .030 snap ring) |
| Sonnax super hold servo for 2nd and 4th gear | Sonnax super hold 2nd gear kit comes with over-length apply pin that will require grinding | Superior Technologies Super Servo kit for 2nd and/or 4th gear (largest ratio servos on market) |
| GM OEM 5-pinion front and/or rear planetary carriers | Recommended for serious HD or racing | Only use OEM gear sets; aftermarket can fail prematurely |
| Sonnax six-pinion billet close-ratio front gear set | Changes factory ratio from 3.08 and 1.49, 1st and 2nd gear respectively to 2.80 and 1.54 | great for drag strip or circle track vehicles or applications making more than 550HP |
| Bolt-in 4L60E center support with billet inner race | Not needed unless power levels exceed 600 HP and RPMs exceed 5500 on a regular basis or usage pattern includes frequent, high RPM transitions from rev to drive | |
| Sonnax Smart Tech forward drum assembly | Recommended if HP exceeds 550 or RPMS exceed 5500 regularly. | Features heavy duty bolt-on 3-4 backing plate |
| Cope Racing “4L79” High Performance Forward Drum | Comes fully assembled, including a TH350 spec 8-clutch stack in the 3-4 clutch pack - input shaft must be pressed in | Recommended for all serious street strip, full race or very heavy duty towing/hauling |
| Sonnax billet output shaft | Use when power is 600+ HP and or full race | |
| Transgo High rate return spring kit | includes a 3rd clutch bleeder capsule that should be installed anytime RPMs expect to exceed 5000 on a regular basis | CK Performance high rate return springs |
| 4L70E induction hardened reaction shaft with bearing | Good for up to 500 HP | Sonnax billet steel reaction shaft with bearing (475 HP+) |
| 4L65/70E forward drum with induction-hardened input shaft | (1988+ units only) | Sonnax Smart Tech Drum, Cope Racing HP drum |
| Cup plug | Block off 4th accumulator in high-stall applications | Leave 4th accumulator bore empty; leave out 4th acc check ball. |
Additional Resources:
Throttle Valve Cable set up and adjustment instructions