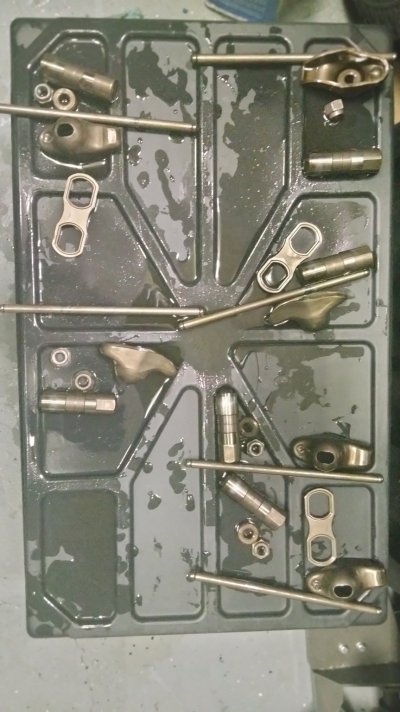
I'm a little versed in circuit board work and have even tackled some surface mount chips so I am seeing some stuff in there...lol
When I read this earlier I realized that you knew how to look at stuff *that* carefully, which
happens to also be the right level for inspecting after cleaning a set of close-tolerance hydraulic lifters.
Speaking of which, I found a nice exploded diagram of a lifter, with emphasis on how
important cleanliness is. (Not so much for you, but for others who are reading along)
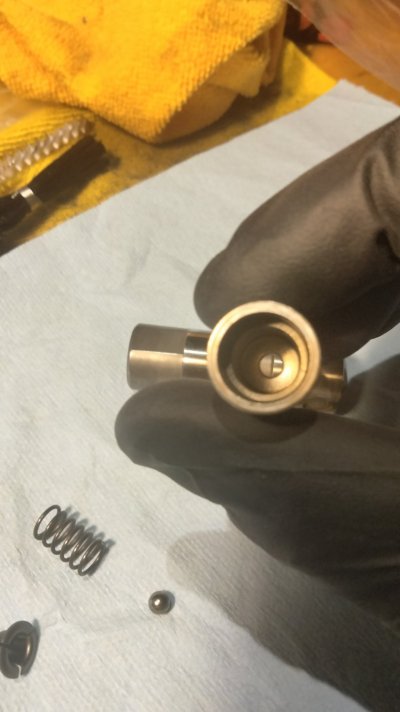
You must be registered for see images attach
(Note: The mention that someone's mom was able to eat off an engine made me happy, for this is also part of my motorhead belief system: Clean enuf to eat off of
Now the reason I'm showing this to you is that when you have one of the next lifters on
your to-do list disassembled, if you could take a similar photo and post that I think it would be
very helpful to all the GMT400 V6 & V8 owners. (Due to the internal differences between
the photo above vs what the Chevrolet V8s have in their lifters.)
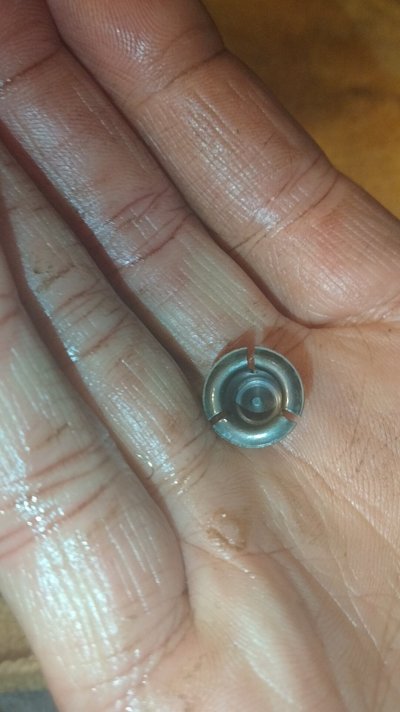
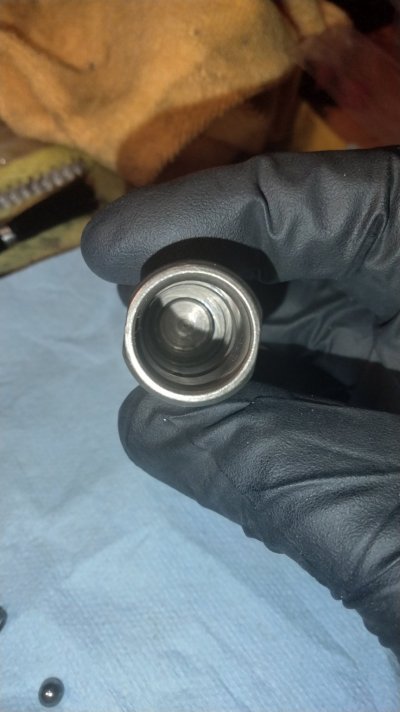
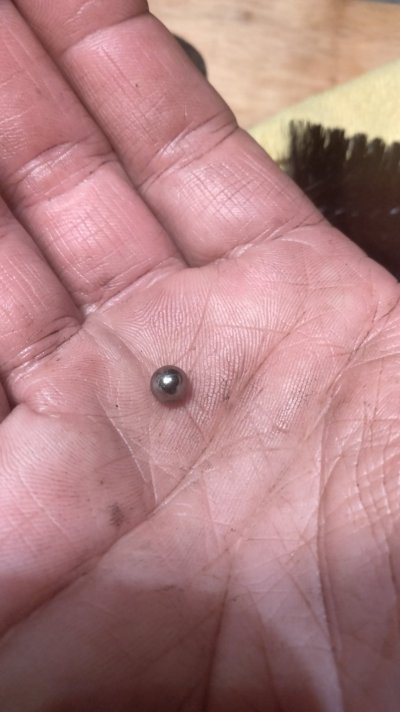
For instance, in the example above there is a flat check valve and the oil metering disc has
4 holes in it, whereas your lifter has a ball bearing for a check valve and the metering disc
is a raised stamping?
I think the fear of making sure everything stays with it's specific lifter slows things down... Just about every video out there shows guys just throwing everything in a bucket and coming back the next day and wiping everything down.. mixing all the internal parts....
True dat. The false theory that the internal parts are identical and can be intermingled is a huge
disservice to those who are not versed on how hydraulic lifters are assembled during initial manufacturing
using the 'select fit' methodology. They are the closest-tolerance items in the entire engine, and that's a fact. :0)
Schurkey said it succinctly when he recommended cleaning/servicing these lifters 'one at a time.'
16 lifters x 9 parts per each = 144 individual parts. There's only 1 correct way to put those all back
together, and that's simply the way they showed up on your workbench. And by doing it one at a
time, you are going to regain the precise 'feel' that a worn-in close tolerance lifter has. Like you observed,
"seeing as how they all can move...exactly the same."
Cleaning right away is pretty tough. varnish and carbon everywhere inside..Thanks for the lacquer thinner tip. Alcohol was ok. MEK was ok but it eats through gloves in a couple of minutes...Got tired of using it...
Surely there are specific tools to speed things up but I'm making do.. slowly...
It's incredible these things even work and for as long and hard as they do. Mind blowing to me... Too cool...
Agreed. I developed a lasting appreciation for just how fussy hydraulic lifters are was when I bought a 10 year old
'66 Olds with a 425ci Rocket engine for $350. The car had decent curb appeal...until you started the engine,
and all 16 lifters clattered so bad you would have thought that it had a 30/30 solid lifter Duntov cam in it. :0)
Initially I was just going to replace the noisy lifters with new ones, but one of my mentors told me that my
idea of new lifters on an old cam would be rolling the dice, with a really good chance of lifter failure. He said
that my best bet would be to remove the lifters one at a time, disassemble them, clean them in a carburetor
cleaner dunk tank, reassemble them, and put it all back together.
Guess what? It took me a whole weekend to do this. And sure enough the lifters were sticky coming apart due
to the accumulated varnish...but after it was all said and done it worked! So I guess that you can file this whole
exercise under the fact that I would not recommend doing something to your engine that I haven't already
personally done to one or more of my own engines. :0)
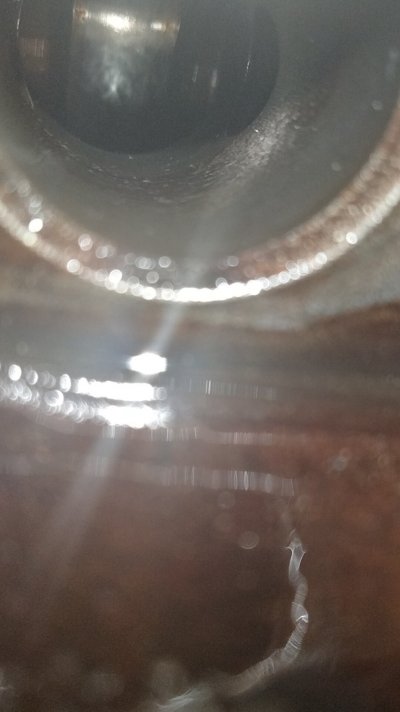
Yeah it was number 1 intake that's the rainbird...
...Everything is looking really good. Insides are pretty much back to close to new and working great. It's neat to see the rods push the plunger. Now all the talk of watching the plunger when setting zero lash makes sense seeing as how they all can move...exactly the same
Stay vigilant and look for trouble. While there are a huge number of flat tappet failures being discussed,
there are way fewer roller lifter/Vortec motor failures being discussed. But I did manage to find a bad roller
cam out of a 7.4L Vortec engine. For reference purposes, check this out:
You must be registered for see images attach
(credit: pelicanparts.com -- read thread here: (mashed BBC Vortec cam lobe failure)
Note the heavy varnishing evident. Best reason that was kicked around was there was an underlying issue not
allowing the valve to travel the full distance expressed by the cam lobe? (ie: wrong valve spring coil bind or other assembly error)
So although rare, it is possible to experience a roller cam failure.
****
Assuming you persevere through all 16 roller lifters, and all passes a visual inspection, what next?
You will read both pros & cons of pumping up the lifters before installation. Long story short, if you
were running huge lift and your valve to piston clearances were really tight, then you would install
the lifters empty, carefully set the cold preload to 1/2 turn, and *then* prelube the engine with a
special tool that temporarily replaces the distributor, and allows you to drive the oil pump while
rotating the engine 720° in order to fill the lifters up to the preload level. Even so, there's a
good chance that the engine runs clattery until all the excess air is worked out of all 16 lifters.
My recommendation is based on the fact that you are running a stock cam with stock lift, etc.
What I've always done is to get a metal coffee can and fill it pretty close to the height of the
lifter with your 5W-30 or 10W-30 oil. (ie: A least a little higher than the oil fill hole on the
side of the lifter.)
Using a #3 Phillips or equivalent pump the inner plunger with full strokes until no more air
bubbles comes out of the oil hole on the side. This may take at least 8-12 strokes. If the
lifter is working properly, it will go from easy strokes when empty to tightening up to little
or no movement when it's full of oil and hydraulic lock sets in. (A positive sign.)
Q: Why do it this way?
A: This allows you to verify that all 16 lifters will pump up the same, and also make it
easier for you to be able to perform the cold preload adjustment. If the lifter won't
pump up in the coffee can, you can take it back apart and figure out why the all-important
check ball isn't seating correctly? Or possibly the internal walls of the lifter are scratched/scuffed
to the point where the oil leakage past the plunger is way out of specification?
In any case, it's way better to find any problems now, instead of after putting it all back
together, firing up the engine...and that lifter won't shut up. :-(
By the way, assuming that you get all 16 lifters to pump up, when you go to install
them make sure and lube the rollers generously with engine oil. (Maybe a quick soak
so that the needle bearings get to start out fully lubricated.) Also be sure to lube
both ends of each pushrod, and also the rocker arm pivot socket and ball surfaces.
(Note: Bonus points for rolling each pushrod on a flat surface (piece of glass) and
listen for the tick tick tick of a bent pushrod. Assuming no bad pushrods are found,
lube them up as previously described and proceed with the cold lash adjustment.
And only after you are done should you give the rocker arm stud threads a quick
cross-check, comparing what you have now with what you documented earlier.
(Looking for gross errors, not fine adjustments.)
Apologies for the length, but it looks like you are making strong progress, and
just wanted to give you some stuff to think on while you are busy cleaning all
the precision internal bits.
With any luck, today should be a banner day for your Yukon.
Cheers --
Last edited:

 ), thoroughly clean and inspect the pushrods, if you haven't already, to ensure they can deliver oil properly to the rockers. (Sorry if you've done this and I missed it).
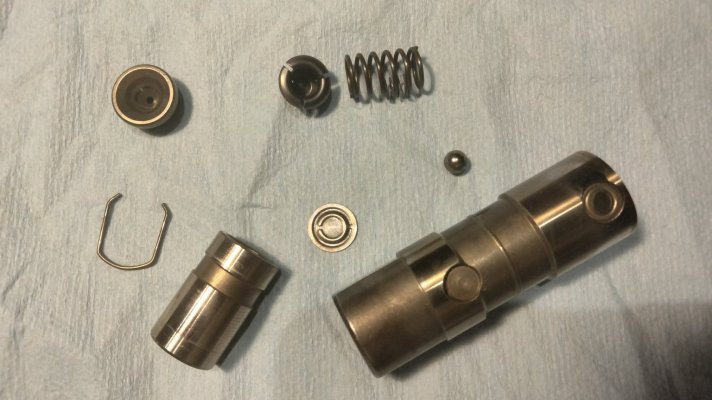
")