1991 C1500 in Florida

Disclaimer: Links on this page pointing to Amazon, eBay and other sites may include affiliate code. If you click them and make a purchase, we may earn a small commission.

FLGS400

I'm Awesome
Joined
Nov 12, 2023
Messages
263
Reaction score
846
Location
Tampa Florida
That sucks about the spindle interference. First I heard of that. But to be fair, never really looked into those ones, went with Belltechs knowing about the pushing the wheel out a bit "issue". Only issue I had with them was one hole not being tapped all the way through. Easy fix.

I believe "Eric the car guy" on YouTube used those when he lowered his. Maybe check out the video and see if he had an issue as well.

Thanks for the reference Drunkcanuk! I went back and watched the 4-parts to the front end rebuild. While he did not have that same issue, I noticed his spindles (same ones) rubbed the under side of the upper control arm on full suspension extension. Mine do too, though not as bad as his did. I'm going to do some clearance grinding next.

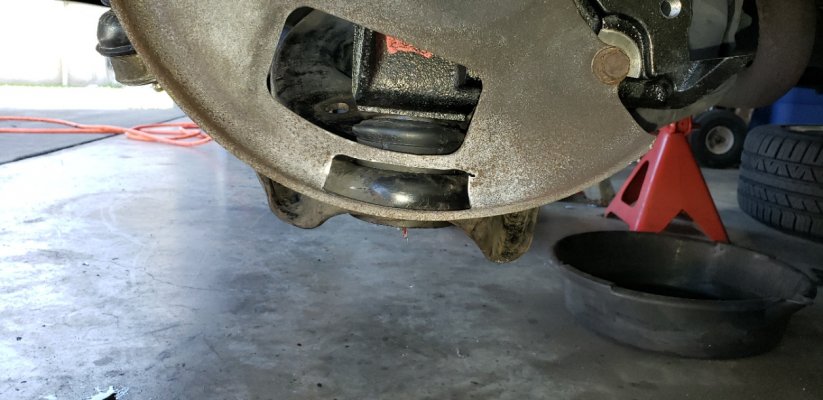
I did call McGaughy's this afternoon about the interference with the dust shield. Their technical person advised me to cut the shield to fit or leave it out entirely. So be it...
 

FLGS400

I'm Awesome
Joined
Nov 12, 2023
Messages
263
Reaction score
846
Location
Tampa Florida
Tonight I got the top of the spindle clearanced for the edge of the control arm, installed the new tie rod end, put the new bearings and seals in the new rotor for the right side, and test fit the rotor without the dust shield. Plenty of room between it and the end of the lower control arm. I took the rotor back off and measure the dust shield for where I had to cut it to clear the end of the control arm. By this time it was too late to make a bunch of noise cutting the dust shield. so I closed up shop.

Didn't take any pictures tonight, as it really doesn't look much different than the last photo I posted.
 

FLGS400

I'm Awesome
Joined
Nov 12, 2023
Messages
263
Reaction score
846
Location
Tampa Florida
Tonight I was able to get back on the truck for a few hours. Got the brake rotor dust shield clearanced and put back on, the new rotor and bearings installed permanently, the new shock absorber installed, new brake caliper and pads installed, and new brake hose installed, all on the right side. Gotta tighten up the metal brake line to the brake hose, grease the new tie rod end, and gravity bleed the right side, and I can move on to tearing into the left side. That should go faster, since I have a very good idea on what to expect now!

Here's some pics:
You must be registered for see images attach

You must be registered for see images attach


My better half is going to Colorado later this week to hang her best friend (since they were little kids). So, I should have plenty of time to work on the truck... so more to come!
 

FLGS400

I'm Awesome
Joined
Nov 12, 2023
Messages
263
Reaction score
846
Location
Tampa Florida
Wut? I didn’t know they still did that…

Yeah... unfortunately though, it's not exactly a pleasant visit. Her friends father passed away (in his 80's) after a long battle with cancer. He and my girl's dad were best friends, that's how the ladies met when they were little. He was also like dad2.0 to her, and was the last of their friend group to pass away.

Their an awesome family that I always enjoy visiting.
 

FLGS400

I'm Awesome
Joined
Nov 12, 2023
Messages
263
Reaction score
846
Location
Tampa Florida
Had some time tonight, so more got done on the truck. Tightened up the brake lines and lubed the new tie rod end on the right side and checked everything over. Got the driver side almost completely torn apart. Just have to get the lower ball joint out. Then I can clean everything up and start putting it back together. The shock on this side was more difficult. I eventually had to get up between the spring coils with some vice grips and spin the top nut off with my Dewalt impact...

Here's how I left it:
You must be registered for see images attach


And yes... that tie rod will be replaced too!
 

FLGS400

I'm Awesome
Joined
Nov 12, 2023
Messages
263
Reaction score
846
Location
Tampa Florida
Today, since I was working from home, I did a couple things to the truck at lunch time. I got the new left side drop spindle clearanced for the upper control arm by measuring what I ground off the right side. I figured it would be easier to do it on the work bench with the bigger grinder. Also got the left side brake dust shield cleaned up. I tried out the Dawn Powerwash that I read about in another thread, in the kitchen sink, with hot water. Worked really well, better than I expected!

Lined up the new spindle and spring for the left side, to install tomorrow. I'd really like to get it all back together and gravity bleed the front brakes.

Took the Buick for a drive tonight to meet a buddy for dinner, instead of working on the truck. It was nice and relaxing...

You must be registered for see images attach
 

FLGS400

I'm Awesome
Joined
Nov 12, 2023
Messages
263
Reaction score
846
Location
Tampa Florida
Today, i was able to get the left front all back together, including clearancing the dust shield and replacing the tie rod end. I'm currently taking a break for a little bit, but would like to get the sway bar back in and wheels back on it, so I can see if I need to roll the fender edges in the front.

Anyway, the last time I did this, I don't think I took any specific photos. If you're going to run the McGaughy 2" drop spindles, there are a couple extra modifications that you'll probably have to do. First is grind down about 1/2" of the top of the spindle casting, about a half inch back from the upper ball joint mounting pad end. On full downward extension, the edge of the upper control arm will rub here.
You must be registered for see images attach

You must be registered for see images attach

I ended up having to finish grind both sides with the spindle installed, using a Dremel and a carbide bur bit. By jacking the lower control arm up a few inches, it gave me enough room to get in there with the bit. Eventually it didn't rub. With the shock in it was even better, as it did not allow the suspension to drop as far.

The other mod is to cut a 1" wide by 3" long slot in the dust shields, just below the factory opening, to clear the tip of the lower control arm.

You must be registered for see images attach

You must be registered for see images attach


Hopefully there will be more to come later on tonight.
 

Attachments

  • Working 021024 1.jpg
    Working 021024 1.jpg
    350.3 KB · Views: 0
Top