

also what do you think of this for a rebuild kit?I have a suspicion that the engine is not overheating. The cooling system is being pressurized by combustion gasses.
But I've been wrong before.
Precision measuring equipment such as micrometers for measuring crankshaft rod and main journals (2" to 3" outside mic for crankshaft, bore gauge suitable for ~4" bores and a 4" to 5" outside mic to measure the bore gauge and the pistons, feeler gauges for crank end-play and rod side-clearance --or (more realistically) you need a machinist you can trust. You could double-check his work using a cheap strip of Plastigage.
A vibro-engraver to mark main caps and rod/rod caps so they go back together just the way they were. I used to use a hammer and number-stamp set, but that's fallen out of favor--the stampings were said to be a stress-riser from which cracks could propagate.
www.amazon.com/WEN-21D-Variable-Depth-Carbide-Tipped-Engraver/dp/B07ST7NP89/ref=sr_1_4?crid=265C3AY8BGPNI
xc_hide_links_from_guests_guests_error_hide_media
A bigass tub (20 gallon or more) of HOT soapy water to clean EVERYTHING. Rifle brushes to shove down oil galleries to scrub 'em out. Smaller round brushes to poke into the crankshaft oil holes.
CLEAN, lint-free rags to wipe the cylinder walls and other machined surfaces. Some ATF on that rag as cylinder-wall assembly lube, and to prevent rusting.
"Pipe plug" sockets to remove the oil gallery plugs, and to put them back when the block is clean. For ****'s sake, do not use a 1/4", 3/8", or 1/2" socket extension directly into pipe plugs with a female square wrenching surface. You'll break the extension at the drilling for the spring-ball socket retainer.
For the record, most machine shops will install those oil-gallery plugs, core plugs, etc. unless you tell them not to. I tell them not to, because I want to verify that there's no debris in those passages. Once the plugs are in, you don't have easy access to them for cleaning/inspection.
Most guys use a ring expander to install rings on pistons. I've been winding the rings on by hand with good success. A ring compressor to get the pistons shoved down the bores. I like the Lisle-brand "wrinkle band" compressor, and I despise the old style black-steel-with-a-ratcheting-clamp ring compressors. There are Asian knock-offs of the good Lisle wrinkle-band ring compressor. The knock-offs are NOT recommended! Other folks like other styles of ring compressor.
Good:
www.amazon.com/Lisle-21700-Wrinkle-Band-Compressor/dp/B0009OR93I/ref=sr_1_2?crid=14HIFYKDY9VNR
xc_hide_links_from_guests_guests_error_hide_media
Hateful:
www.amazon.com/Lisle-19500-Ring-Compressor/dp/B0002STSFS/ref=sr_1_1?crid=14HIFYKDY9VNR
xc_hide_links_from_guests_guests_error_hide_media
You'll need a QUALITY10075+ ft/lb torque wrench. Perhaps a 3/8" drive 10--75 ft/lbplus a 1/2" drive 30--150 ft/lb. Or a single, 3/8" drive 20--100 ft/lb unit, butsome of your torques are likely to be less than 20 ft/lbs. Took another look at the SBC torque specs, and I don't see anything higher than 74 ft/lbs. Newer engines use torque-angle fastener instructions, older engines are merely torqued.
You'll need a hammer and a block of wood to pound the "speedy sleeve" onto the hub of the torsional damper, where the oil seal has worn a groove into the steel of the hub.
Some guys make-do with vice-grips or improvised items. I like using an actual flywheel turning tool to spin the crank as the pistons/rods go in.
www.amazon.com/Powerbuilt-648455-Flywheel-Turning-Tool/dp/B001CZJ4J0/ref=sr_1_6?crid=U6Z288KID9YY
xc_hide_links_from_guests_guests_error_hide_media
An engine hoist, an engine stand, and some chain and two 3/8-16 bolts with washers, suitable for lifting and holding the engine. Another, longer bolt with washers and a nut, so the chain can be bolted around the hook of the engine hoist--the chain can't slide on the hook unbalancing the engine. The hoist and stand are almost certainly going to be Chinese, and barely-adequate. I will not own a 3-wheeled engine stand. They can and do tip over. 4 wheels, preferably widely-spaced. You'll need four ~5 1/2" or 6" long 3/8-16 bolts, some heavy washers, plus a dozen 1/2" nuts to use as spacers on that crappy engine stand. If you don't space the engine away from the stand, you'll never be able to get at the flywheel/flexplate.
You must be registered for see images attach
You must be registered for see images attach
And don't forget to buy a decent thread sealer (Loctite/Permatex 592 recommended) along with some assembly grease (Lubriplate 105, or Sta-Lube SL3331)
www.amazon.com/Lubriplate-L0034-094-Motor-Assembly-Grease/dp/B000HZJFE0/ref=sr_1_1?crid=LTMWSLKQOVUZ
xc_hide_links_from_guests_guests_error_hide_mediaor
www.amazon.com/Sta-Lube-SL3331-Extreme-Pressure-Assembly/dp/B000M8RYUE/ref=sr_1_22?crid=1MDH97MCNIER8
https://www.amazon.com/Sta-Lube-SL3.../dp/B000M8RYUE/ref=sr_1_22?crid=1MDH97MCNIER8
There's a hundred other options for assembly lube.
Gasket sealer--again, there's too many options to list, but DO NOT use RTV silicone as a gasket sealer. Use RTV Silicone INSTEAD of a gasket, not applied TO a gasket--except for a "dot" at the seam between two gaskets, or where a gasket and rubber seal meet.
Gasgacinch, and High Tack are my favorite gasket sealers, particularly Gasgacinch.
RTV sealer--specifically Permatex The Right Stuff black 90 minute version, (only because the 1-minute version is very expensive) but there's other options. Apply to the end rails (China Walls) of the block, sealing the underside of the intake manifold.
www.amazon.com/Permatex-25228-Gasket-Maker/dp/B07R4C3KJB/ref=sr_1_1?crid=TKFCPBEQHYWW
Loctite 242 "Blue medium strength" threadlocker, to seal the core plugs, and perhaps other fasteners.
www.amazon.com/Loctite-242-Threadlocker-Liquid-1-69oz/dp/B002P8LQ1C/ref=sr_1_3?crid=2NEKIYRND999B
Engine oil, coolant, air, oil, fuel filters; belts 'n' hoses, etc.
HIGH QUALITY flare-nut wrench to unscrew the fuel filter. I've seen 'em so rusted that I've had to splice in a new section of fuel tube because the original could not be loosened from the filter.
Most folks would want an oil-pump priming tool. The more engines I build, the less I give a spit about priming the oiling system. I've come to the conclusion that it's 90% wasted time, 9% religion/habit/obsession, and 1% peace-of-mind on any engine with a submerged oil pump like older Chevys. In any event, on Chevys, I've used an old Treasure Yard distributor with the teeth ground off the gear, and a machine screw secured on top to use as a handle. Photo is of a Pontiac distributor, but the concept is the same. I'd crank it BY HAND about one revolution per second (60-ish RPM) until I saw oil pressure on the gauge--about thirty seconds, maybe less. Any further "priming" is wasted effort.
You must be registered for see images attach
A timing light to adjust the distributor.
A scan tool to verify no codes before and after the engine work, and suitable sensor data, fuel trims, etc. after the engine is back in.
OK, gang--What'd I forget?
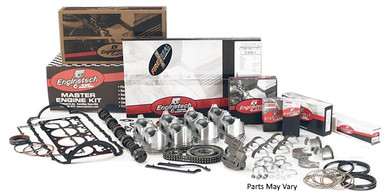
1994 Chevrolet C1500 5.7L Engine Master Rebuild Kit MKC350H -37
engine rebuild kit, Rebuild Kit, MKB181A, MKB181A -7, EngineTech, proenginerebuilders, engine rebuilder, 1994 Chevrolet C1500 5.7L Engine Master Rebuild Kit MKC350H -37
 proenginerebuilders.com