Hello 323kielr,
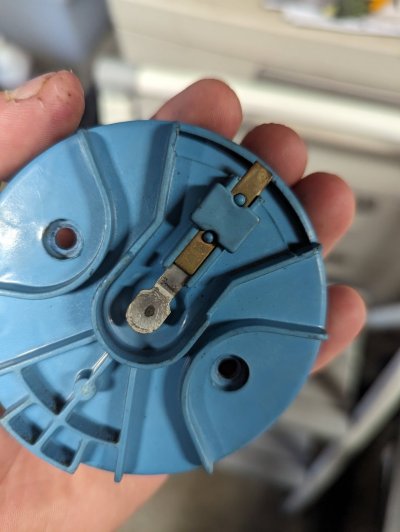
Would you happen to have taken a photo of the
underneath of the replaced rotor?
I remember being fooled by a taking a quick glance of the top side of a rotor
on a misfiring SBC, and it looked good. But on the underneath it was obvious where the
sparks had blown through and made an easier path to ground than the spark
plug electrodes. (NOTE: The whole path between the coil > center of the cap > rotor
{center to end} is stressed 8x as hard (or 8x as often) because
all sparks go through this path.)
Like
@L31MaxExpress' 2nd photo showing the spark blow-through on the underside of his cap:
My distributor is vacuum vented. No ozone/moisture corrosion creating environment. My failures have never been corrosion at all. It is the plastic breaking down and burning through. This is the way the last MSD cap and rotor failed as well as just about ebery other cap/rotor I have had on this van.
When this happened the engine stalled with a massive backfire from the exhaust. It happened at midnight on a city street. Lets just say the police response was about 2 minutes in my hometown. I tow strapped it the 3 blocks to the house.
You must be registered for see images attach
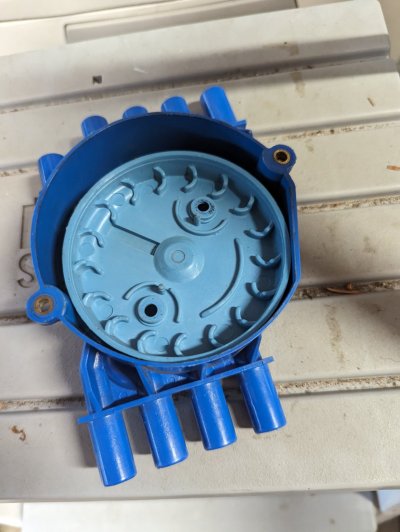
NOTE: The reason I ask is that I checked the photo of your cap & didn't see anything obvious?
I have seen worse run ok. Might re-adjust the rocker arms on that cylinder, if they are even slightest bit too tight in that cylinder compression will suffer.
No easy way to tell if any lasting damage happened, but if it sounds ok, it is probably ok.
I feel a 383 is awesome, but then again if you are not towing a new stock 350 will get you down the road engine wise for many years and the stock 350 is no slouch. Put an emissions legal set of shorty headers, the magnaflow replacement cats, magnaflow muffler and a Volant air intake on it to pep it up a bit. The SBC Vortecs make good power when you open up their breathing a bit.
If it was mine, I would seriously consider doing the following in order to make sure I get the
most I can out of the existing motor:
1) At the very least I would 2nd what
@L31MaxExpress said about resetting the lash
on the weak (#6) cylinder. Actually, I'd remove the valve covers, wrap the upper half of
the rocker arms with aluminum foil (to minimize the mess from the oil squirters) and
set/verify *all* of the rockers at a slow hot idle. (You know, loosen slowly until tick tick tick,
then tighten *just* until it quiets, move to the next, repeat 15 more times.) Shut off
the engine, and *then* set the preload on all 16 to your personal preference. (1/4 turn,
1/2 turn, etc.)
I've done this many times, and most of the time all the preloads were similar. But sometimes,
I would find 1 or 2 that were set way deeper than the others. (Sometimes during
initial assembly the lifter(s) that didn't really pump up are hard to set correctly cold.
Seen this several times over the years.)
IMPORTANT CROSS CHECK: Here's some valuable data that you can glean from checking
the thread count above the rocker arm nuts after setting the hot lash like this. In a
perfect world, let's say that ALL
16 rocker arm nuts have (
4) threads showing above
the nut. Perfect! But in Road Trip's world, I may have
14 rocker arm nuts showing
4 threads, the
15th rocker arm nut showing
2 threads above, and the
16th rocker
arm nut showing
6 threads above? What can we infer from this?
* 14 cam lobe / lifter / pushrod / rocker arm / valve / valve seat assemblies either no wear,
or similar wear. No worries.
* 1 rocker arm nut with only 2 threads showing? Think of wear that
takes up valvetrain clearance?
That's right, think of a wearing exhaust valve seat and/or burnt exhaust valve
receding into the head, thereby making the valve stem tip move UP?
* 1 rocker arm nut with 6 threads showing? Think of wear that creates
extra valvetrain clearance?
Think of a cam lobe that's starting to go away - we've seen those disappearing lobe pics
many times. (!)
Of course, this check by itself is only of limited value. BUT if you happened to have verified/photo'd/logged
that all the valvetrain was set to the same number of threads above all 16 nuts when you replaced
the heads a couple of years ago, well *now* we have something to compare today's observations
against.
You know, it takes longer to describe all this than to do it. It's just a cross-check, but I
have resorted to resetting the hydraulic lifter preload with a hot lash adjustment on a problem SBC,
and if I'm able to clear up the issue AND all 16 rockers now match up, height-wise, then I
tell the owner that the probability is that the problem shouldn't return.
On the other hand, if I adjust the valvetrain for
minimum noise, and afterwards I observe 1 or
more obvious outliers, I tell them the truth -- something is on the way out, the noise will return, and this issue
will need to be addressed sooner or later.
****
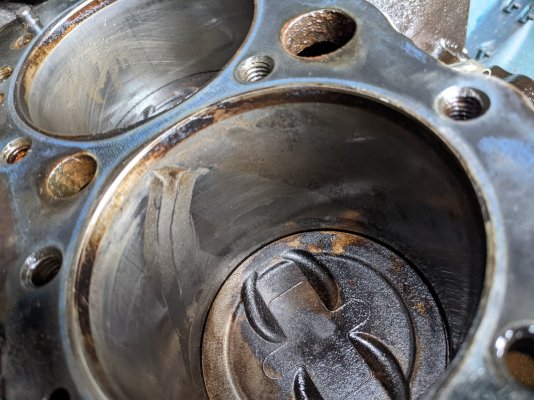
* 2) OK, the above was the doom & gloom part. The pitting in #6? Depends on how many miles can you
drive before the engine needs another quart of oil? If it's 750+ miles per quart, then the cats can
handle that. (per several manufacturers) IF it's worse than that, then I would defer replacing
the cats until you replace the motor. (I think you said that you are cat-free, so the real answer
is if the oil consumption is above
your threshold of pain, then I wouldn't worry about it.)
But do yourself a favor, get a small logbook from the $ store, keep it in the glovebox,
and keep track of how often you are adding oil -- that's valuable info.
3) I'm not looking to burn up your wallet, but you may want to consider putting this engine
back into closed-loop operation. (ie: getting the front O2 sensors back up and running.)
Obviously you are satisfied with the way your truck runs open loop, but with the price of gas
maybe the constant fine-tuning afforded by closed-loop operation will help to pay for the
cost of sorting that out? Anyone reading this, have you quantified the difference between
open loop vs. closed loop MPG on your GMT400?
If the factory default calibration is really close, the difference may not be all that noticeable...on
the other hand, maybe depending on where you live it's more like 2-3 MPG difference? If so,
this additional cost could add up over time?
****
Well, that was waaay longer than I wanted. But if you see anything on the underneath on the
replaced rotor that looks wrong, I'd love to see that. And if you find/do anything in
your valvetrain that would be of interest as well.
Congrats on the fix -- celebrate the win! And welcome to the forum...looks like you
have excellent taste in the color of your truck.
")
Cheers --