New-to-me truck first tune-up 5.7L vortec

Disclaimer: Links on this page pointing to Amazon, eBay and other sites may include affiliate code. If you click them and make a purchase, we may earn a small commission.

Grube

Newbie
Joined
Jan 12, 2024
Messages
40
Reaction score
112
Location
Kitimat
I’ve been having a slight misfire/pop on deceleration occasionally since I bought the truck. Doesn’t happen all the time, but often enough. I presumed there to be a plug or wire on the way out, so I picked up cap/rotor/wires/plugs and did the first tune up today.

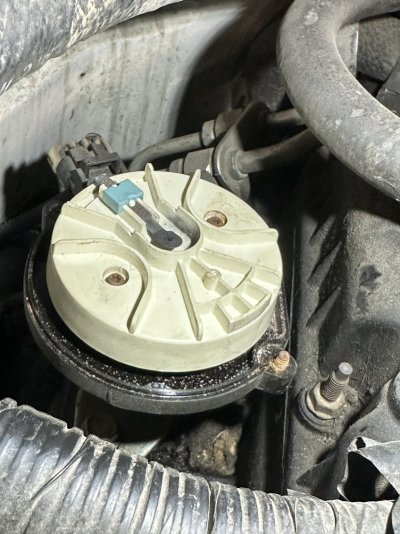
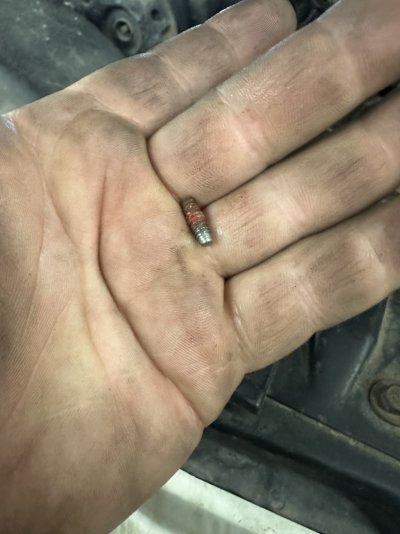
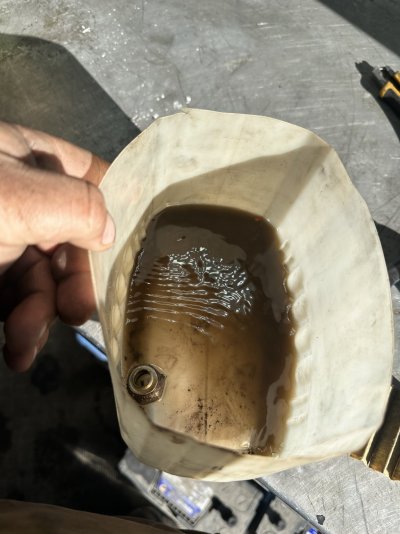
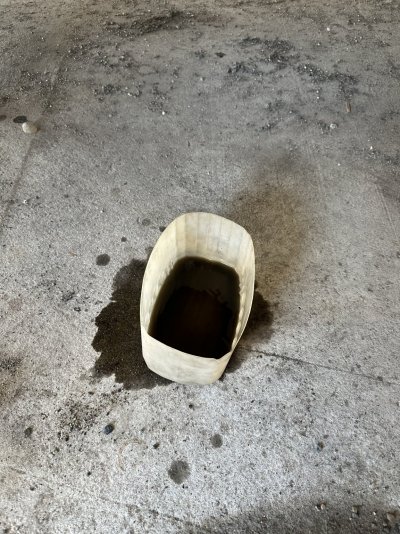
Immediately after pulling the air intake/Vortec box off I saw a gift from the previous owner. Dizzy cap had one broken screw, that couldn’t be helping. Moisture/corrosion on the aluminum contacts inside the cap too. Was able to remove broken screw with relative ease. Rest of the tune up went smooth, and did a lengthy test drive after and didn’t notice anymore misfire issues. Truck feels like it’s “woke up” a bit.

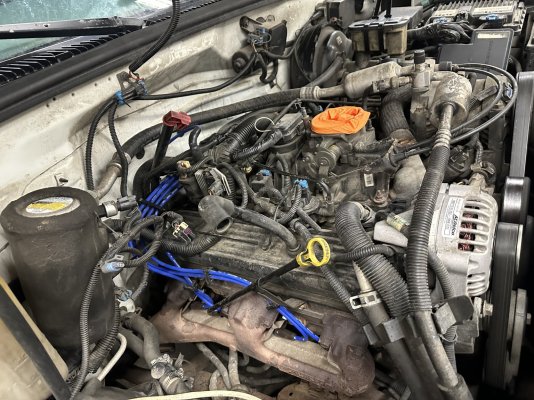
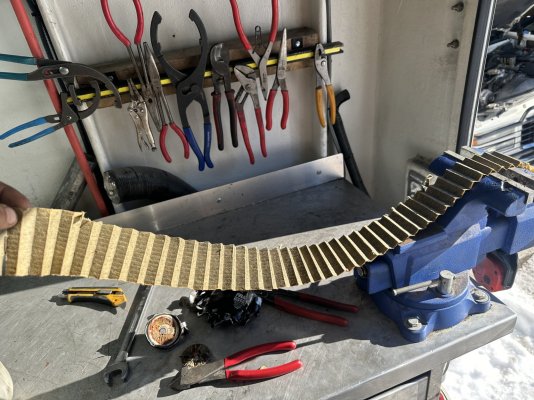
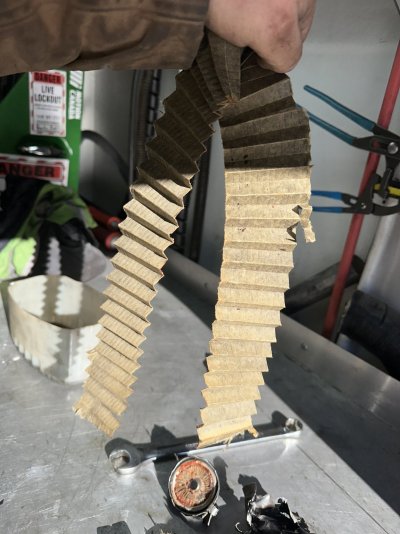
Found some cracked plastic wire loom in engine bay as well, so taped that up after verifying wire integrity as Ok.

All in all, good day under the hood. Some Pics attached (had more but there a limit of 5), plugs were gapped to .060. They all came out of the box at about .055
 

Attachments

  • IMG_1837.jpeg
    IMG_1837.jpeg
    439.2 KB · Views: 14
  • IMG_1840.jpeg
    IMG_1840.jpeg
    318.1 KB · Views: 15
  • IMG_1842.jpeg
    IMG_1842.jpeg
    206.7 KB · Views: 14
  • IMG_1843.jpeg
    IMG_1843.jpeg
    389.6 KB · Views: 13
  • IMG_1844.jpeg
    IMG_1844.jpeg
    431.2 KB · Views: 14

HotWheelsBurban

Gotta have 4 doors..... Rawhide, TOTY 2023!
Joined
Sep 18, 2019
Messages
9,860
Reaction score
18,050
Location
Houston, Texas
Cap, rotor and plugs are always a good idea on a new to you Vortec. Wires, too if they look pretty old or damaged. You also want to pay close attention to how the #5 and #7 are routed on the passenger side bank. Most misfires on a Vortec start out from these wires making contact with each other, or from the terminals in the cap arcing.
A new fuel filter is a good "tune up" item on these trucks too.
 

HotWheelsBurban

Gotta have 4 doors..... Rawhide, TOTY 2023!
Joined
Sep 18, 2019
Messages
9,860
Reaction score
18,050
Location
Houston, Texas
Congrats on the easy mis fix. I chased mine for 3 years.
Yep, I'm still sorta chasing it on my crew cab. Or will be, when we're driving it again (parked it before Christmas to work on the front brakes, and weather and work has kept me busy till yesterday. Then I got in the truck and the battery is DEAD! And my next two days off, I have prior commitments, so no truck fixing then until maybe Saturday afternoon.....ugh.
 

Grube

Newbie
Joined
Jan 12, 2024
Messages
40
Reaction score
112
Location
Kitimat
Congrats on the easy mis fix. I chased mine for 3 years.
*knock on wood* I’m hopeful it’s cleared up now lol.
Cap, rotor and plugs are always a good idea on a new to you Vortec. Wires, too if they look pretty old or damaged. You also want to pay close attention to how the #5 and #7 are routed on the passenger side bank. Most misfires on a Vortec start out from these wires making contact with each other, or from the terminals in the cap arcing.
A new fuel filter is a good "tune up" item on these trucks too.
I made sure all the wires weren’t criss-crossed and were routed as best I could. And made sure all the wires were firmly pressed onto the plugs. Hopeful for long term reliability now lol
 

Schurkey

Supporting Member
Supporting Member
Joined
Jan 14, 2018
Messages
11,225
Reaction score
14,189
Location
The Seasonally Frozen Wastelands
1. What kind of spark plugs are these? Some plugs are NOT TO HAVE THE GAP ADJUSTED.

2. Verify PCV, EGR, Evap canister purge in addition to that fuel filter and air filter as needed.

3. Make sure the knock sensors actually retard the timing. Often done by tapping the iron cylinder head with a small hammer. Listen for the RPM to slow down and then recover. Or watch the ignition timing with a timing light.

4. Plug wires "routed as best I could" doesn't tell us anything about the potential for cross-fire between #5 and #7. Keep those wires well away from each other. The official GM routing is fine.

5. Fuel pressure test, "priming" and running.

6. Connect a scan tool, verify ALL sensors and computer outputs, fuel trims, misfire counts.
 

Grube

Newbie
Joined
Jan 12, 2024
Messages
40
Reaction score
112
Location
Kitimat
1. What kind of spark plugs are these? Some plugs are NOT TO HAVE THE GAP ADJUSTED.

2. Verify PCV, EGR, Evap canister purge in addition to that fuel filter and air filter as needed.

3. Make sure the knock sensors actually retard the timing. Often done by tapping the iron cylinder head with a small hammer. Listen for the RPM to slow down and then recover. Or watch the ignition timing with a timing light.

4. Plug wires "routed as best I could" doesn't tell us anything about the potential for cross-fire between #5 and #7. Keep those wires well away from each other. The official GM routing is fine.

5. Fuel pressure test, "priming" and running.

6. Connect a scan tool, verify ALL sensors and computer outputs, fuel trims, misfire counts.
They are in the photo, NGK Platinum’s. They were easy to adjust, believe main concern about adjusting newer iridium plugs is damaging the electrode. Was able to gap the ground arm without damaging the electrodes, I’m sure it’s ok.

Air filter is ok, I haven’t tested egr/evap yet, and changing fuel filter is on my to-do list, just haven’t got to it quite yet.

Checking knock sensors is a good idea, I hadn’t thought of that. I Will definitely try that and see what happens, thank you for that idea.

”routed as best I could” I guess is a poor description on my part lol. I will clarify, They are not touching. However some of the GM wire routing clips are missing/broken, so I had to make do. Not ideal, I’m going to have to source some replacements. I also didn’t realize 5 & 7 were so well known to have issues, replacing the GM clips is gonna be an important thing to do.

I did hookup a scan tool only to verify no check engine light or active codes, but didn’t read live data off every sensor. I haven’t done a fuel pressure test either.

Definitely some good advice, once I get some more time to work on it I will check these items out
 

Grube

Newbie
Joined
Jan 12, 2024
Messages
40
Reaction score
112
Location
Kitimat
Well exactly a month later, and I finally did the fuel filter today. Cut it open to look at it, was pretty dirty, some flakes maybe varnish or something caught in it. Drain pan was clean before draining the contents of filter into it… so probably a good thing it’s finally done now lol.. the old one had the date written on it, Fram brand, put on in 2010 at unknown mileage.

Also cranked on the tbars a little bit to bring the front height a bit closer to the rear height. Brought it up 25mm (near to 1”), measured from ground to fender lip.

Still haven’t done a pressure test, but I got a gauge to check it last week. One of these days.
 

Attachments

  • IMG_2192.jpeg
    IMG_2192.jpeg
    353.8 KB · Views: 4
  • IMG_2193.jpeg
    IMG_2193.jpeg
    259.4 KB · Views: 5
  • IMG_2190.jpeg
    IMG_2190.jpeg
    220.9 KB · Views: 5
  • IMG_2187.jpeg
    IMG_2187.jpeg
    569.2 KB · Views: 4
  • IMG_2196.jpeg
    IMG_2196.jpeg
    409.8 KB · Views: 4
Top