Giving my ride some much needed attention.

Keep or Lose the VortecMAX badge.


  • Total voters
    22

Disclaimer: Links on this page pointing to Amazon, eBay and other sites may include affiliate code. If you click them and make a purchase, we may earn a small commission.

L31MaxExpress

I'm Awesome
Joined
Apr 21, 2018
Messages
6,090
Reaction score
7,933
Location
DFW, TX
Then I have this guy that has roughly Ramjet length runners but a massive plenum and uses a 58mm TPI or LT1 throttle body.

You must be registered for see images attach


You must be registered for see images attach


You must be registered for see images attach


You must be registered for see images attach
 

L31MaxExpress

I'm Awesome
Joined
Apr 21, 2018
Messages
6,090
Reaction score
7,933
Location
DFW, TX
Worked on cleaning more of the frame as well as painted the motor mounts as well as the engine mount pads this evening. After a couple of hours of drying time, I laid one of the motor mounts on the frame to get an idea of the difference. Thinki I may get some semi gloss black and respray them rather than the flat black. Literally took a chisel to the 1/4" layer of solidified grease on the frame. If I feel like messing with it tomorrow the firewall and inner fenders are about to be naked. I am literally cleaning this up only because I am tired of taking a grease bath everytime I have to do any minor thing around the engine. I am going to pull the trans cooler lines and put new silicone orings in the quick connects. Might even plumb the trans coolers in AN like I had with the 60E, not sure yet.

You must be registered for see images attach


You must be registered for see images attach
 
Last edited:

L31MaxExpress

I'm Awesome
Joined
Apr 21, 2018
Messages
6,090
Reaction score
7,933
Location
DFW, TX
Did a little more work tonight. Found something I had forgotten I had honestly. 3-4 years ago I had picked up a set of the newer split mirrors for a 2012 Express and never got around to installing them. Needed to pull the door panels anyway to repair them and change the blown door speakers and tweeter out. I now have the newer mirror on the older van and have it fully functioning. Upper portion is power and heated. Lower portion moves manually.

Gotta love when GM engineers make changes to something that should have been a bolt-on and go! Had to unpin the connector on my new mirror, then use a 9V battery to figure out which wires ran which motor on it. Then had to find and duplicate pinouts matching the OEM 97s function. Mirror is for a 2014 van and I put it on my 1997. Obviously not listed to fit my 97 but my previous Titan spoiled me to the dual mirror setup when towing. Same door pocket, same mounting setup, same sealing surface and seal, same connector, same number of wires, just a totally different pinout. Pinout corrected, new mirror is installed and it has been tested. Works 100% correctly, including the heater element for the heated mirror function. Looking back, the way idiots drive around here, should have ordered them with the built-in turn signals and wired that function into the van as well.

You must be registered for see images attach


You must be registered for see images attach


You must be registered for see images attach


You must be registered for see images attach


You must be registered for see images attach
 
Last edited:

L31MaxExpress

I'm Awesome
Joined
Apr 21, 2018
Messages
6,090
Reaction score
7,933
Location
DFW, TX
I know we have several other 96-2002 GMT600 van guys here as well. While I have not done the passenger side yet I am sure the harness is probably the same on the mirror side for both left and right mirror. Door panel has to come off but it is a good time to fix where they break with some decent epoxy to strengthen the door pockets and glue the broken tabs back on that have fallen to the botton of the door that makes them rattle going down the road. Also a good time to upgrade those blown out raspy sounding door speakers and replace the worn out/broken switches.

Here is the correct pinouts for LH side of the brand of mirror above. The 1st picture is the side of the connector with the index tab on it. The two black wires both go to a resistance heater for the heated mirror function and as long as one side gets 12 volts and the other side a ground it will heat regardless of which black wire gets pinned to which side of the connector. There are 2 grey wires, the one with the colored tracer goes to the flat side of the connector opposite side of the index tab.

You must be registered for see images attach


You must be registered for see images attach
 
Last edited:

L31MaxExpress

I'm Awesome
Joined
Apr 21, 2018
Messages
6,090
Reaction score
7,933
Location
DFW, TX
Received the $20 AEM GM EV6 injector harness today and fit it to the fuel rails on the marine intake. I picked up an assortment of the Deuschworks connectors on Amazon to build a matching end for the engine harness. Plan to install the leftover connector on the OEM spider connector just in case I ever need to quickly swap back to the stock intake in the future for emissions reasons. Nice to have near plug and play options should the need ever arise.

You must be registered for see images attach


You must be registered for see images attach
 

L31MaxExpress

I'm Awesome
Joined
Apr 21, 2018
Messages
6,090
Reaction score
7,933
Location
DFW, TX
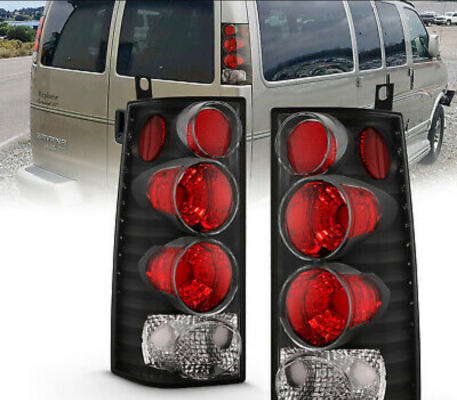
Still working 6 day work weeks at work but did order some more stuff yesterday. Doing a full exterior LED conversion and decided to update the bland OEM tail light look to something more modern looking.
 

Attachments

  • Screenshot_2021-06-19-14-52-57-1.png
    Screenshot_2021-06-19-14-52-57-1.png
    1,006.7 KB · Views: 5
  • 61SHQM7aRaL.jpg.jpeg
    61SHQM7aRaL.jpg.jpeg
    83.8 KB · Views: 5

L31MaxExpress

I'm Awesome
Joined
Apr 21, 2018
Messages
6,090
Reaction score
7,933
Location
DFW, TX
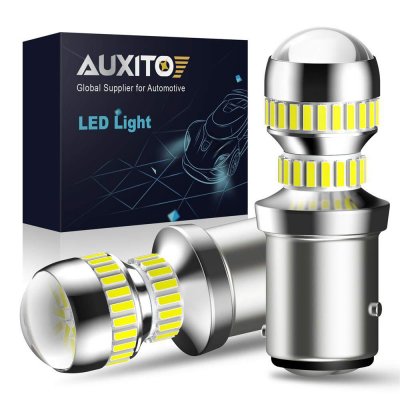
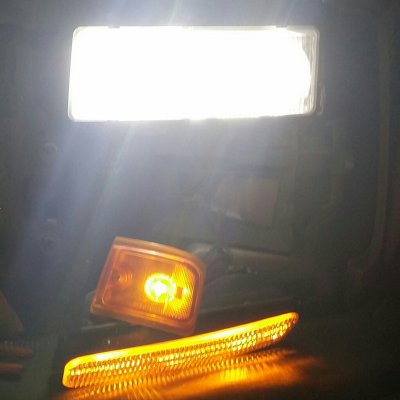
Spent a little of my off time swapping exterior lighting to LEDs. Ordered the wrong bulbs for the reverse lights and forgot the front turn signals had dual bulbs. Also ordered an LED replacement for the burned out underhood light. Tail lights should be here on the 24th. Also about to redo my previous 4Hi mod. 3 of the pictures are comparison pics, older silverstar bulbs on the left of the picture and LEDs on the right. Took me about 5 minutes to find and replace the flasher under the column with one meant for LEDs. One thing is for certain it is well lit now.
You must be registered for see images attach
 

L31MaxExpress

I'm Awesome
Joined
Apr 21, 2018
Messages
6,090
Reaction score
7,933
Location
DFW, TX
Managed to get some more work done today. Couple of before and afters. Tailights are installed. Also installed my Rockford Fostgate front speakers and tweeters. The main speakers installed right into the OEM brackets but I still have to mount the tweeters. I measured the rear overhead speakers and they are 5x7s. Then I discovered working on the tailights with the music playing that the rear doors have a 2nd pair of rear speakers down low on them behind a fabric covering on the door panels that I never realized were there. Guess I get to order 2 more pairs of Rockford Fostgates for the rear. I know the name is twisted but with the OEM door panel and factory speaker grille over it, nobody will see it.
You must be registered for see images attach
 

L31MaxExpress

I'm Awesome
Joined
Apr 21, 2018
Messages
6,090
Reaction score
7,933
Location
DFW, TX
Just thought I would throw this on here. 4 HI relay mod done. With the grille and core support off, took all of 10 minutes. Almost took longer for my soldering iron to warm up than to do the mod.
 

Attachments

  • 20210701_222659-1-1.jpg
    20210701_222659-1-1.jpg
    1.1 MB · Views: 6
Top