95 K1500 complete rebuild

Disclaimer: Links on this page pointing to Amazon, eBay and other sites may include affiliate code. If you click them and make a purchase, we may earn a small commission.

jcurtis

Newbie
Joined
Jan 16, 2023
Messages
16
Reaction score
29
Location
Georgia
My dad bought this back in 2004 I believe. He was killed in 2005 and I finally talked my mother into giving it to me, after years of neglect. So I dove in to my first resto project:

You must be registered for see images attach


You must be registered for see images attach
 

jcurtis

Newbie
Joined
Jan 16, 2023
Messages
16
Reaction score
29
Location
Georgia
You must be registered for see images attach


Currently starting the rebuild. Step 1 was the Rough Country 4" lift, which is where the project stands today:
You must be registered for see images attach
 

jcurtis

Newbie
Joined
Jan 16, 2023
Messages
16
Reaction score
29
Location
Georgia
Wow.... nothing like going all out the first time!
Stay encouraged, there will be times you want to give up, but don't . Come back here and we will give you the nudge and info you need to stay on track. Good luck and keep the pics coming.
Thanks man. I've always worked on cars but never a restoration. I got the differential on today. Reusing some stock parts but replacing most.
You must be registered for see images attach


I got one torsion bar out. But the other is kicking my ass. Any suggestions?
You must be registered for see images attach
 

Vanishing Point

I'm Awesome
Joined
Mar 4, 2018
Messages
105
Reaction score
126
Location
Glendora, CA 91740
After you use your favorite lubricant and soak the necessary area and if you have access to a oxygen/acetylene torch, apply heat to the surrounding outer area of the attached LCA. Then drive out the torsion bar with a good strong air hammer or punch with a BFH. Good Luck, and let us know if that works for you.
 

jcurtis

Newbie
Joined
Jan 16, 2023
Messages
16
Reaction score
29
Location
Georgia
Remember to mark direction and side on those torsion bars, it matters
Good advice! Thanks.

Made some more progress this weekend
 

Attachments

  • IMG_20230122_123209.jpg
    IMG_20230122_123209.jpg
    277.4 KB · Views: 44
  • IMG_20230121_131224.jpg
    IMG_20230121_131224.jpg
    347.4 KB · Views: 43
  • IMG_20230121_122728.jpg
    IMG_20230121_122728.jpg
    340.2 KB · Views: 43

offroadtahoe

I'm Awesome
Joined
Jul 23, 2021
Messages
148
Reaction score
153
Location
Houston,TX
Noticed you have a steering extension,does it have a body lift? i'd recommend using a Cunningham lower shaft and add 3" body lift to notes when ordering.unless that extension is welded they have tons of play!
+ and deletes rag joint with spline shaft u-joint
Do yall see any reason to replace steering parts while I'm in here if they're not problematic?
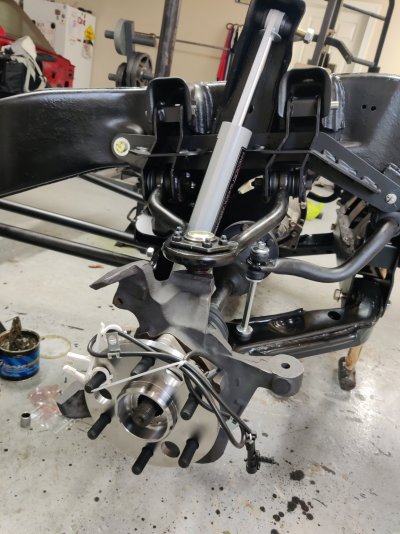
supersteer idler arm bracket SS170- they use a taper bearing,I replaced a 500 mile stock bracket with it and huge difference.does exactly what they advertise
cognito steering brace's 110-90245 - keeps idler/pitman solid,toe in check,


but a few of us have gone all out with,
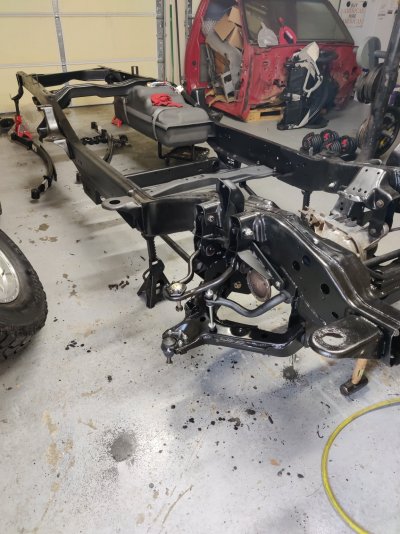
psc xd steering box
kryptonite pitman they also make a stronger centerlink,and tie rod's/sleeves
moog problem solver or proforged idler arm
mevotech ttx tie rods/cunningham tie rod sleeves
ttx upper/lower balljoint's
96+ wolffeng GM109SS Lower Steering Column Bearing upgrade
Cunningham upper or stock u-joint upper vs blob joint (in some trucks)
bds or rancho steering stablizer bracket kit

best steering stuff out there for 4x4 gmt400's
 
Top