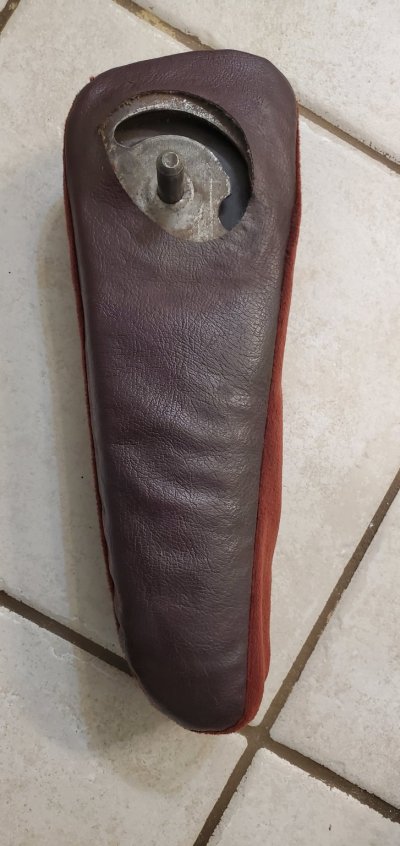
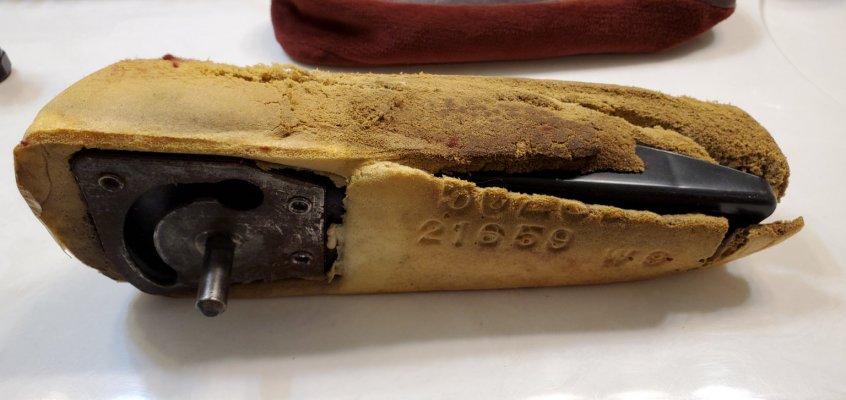
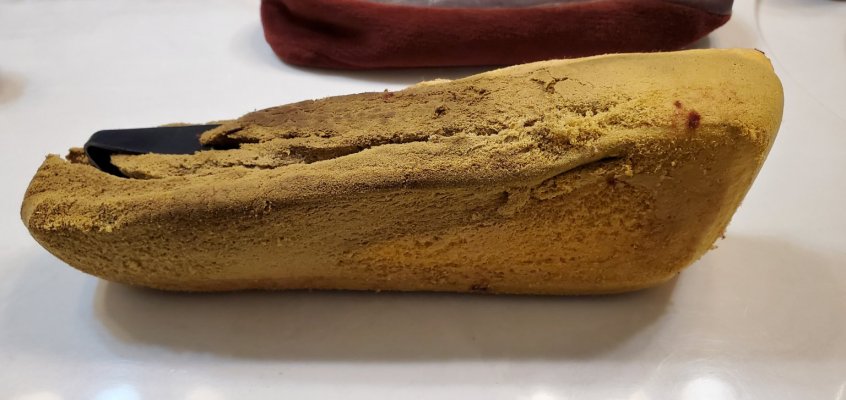
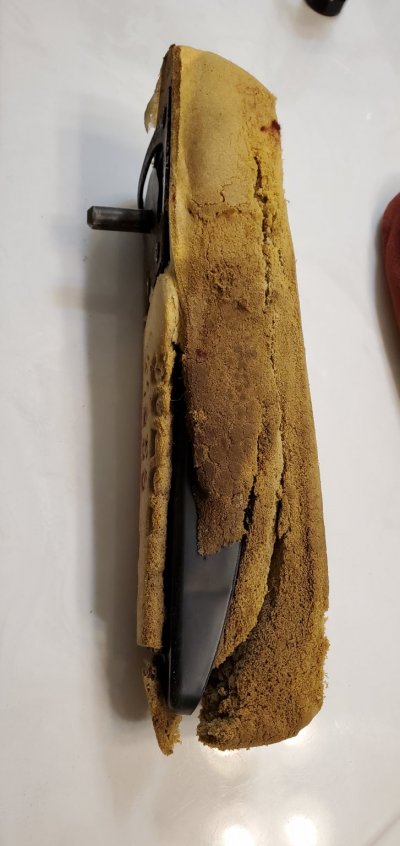
That foam is deader than dead!
Yea, my mistake. You can't get both the cover & the foam off of the frame at the same time.
The foam is glued to the inner metal frame.
The cover is not usually glued to the foam.
I'm guessing, but if it was glued to the foam, the only spot that would make sense to do that would be at the front end of the arm rest, so as to hold it in place & prevent it from rolling around & not remaining aligned on the foam as you pull it on.
But then, where the cover was stuck could be something sticky that was spilled on it sometime in the past 20-something years.
As foam gets old & breaks down, it too can also become gooey. Brown & sticky.
The certain spots where that can happen is where the armrest gets more use than the rest. Probably right where your elbow rests in the middle or right at the end that gets touched by hands. Oil & dirt from skin will cause the foam to break down sooner.
Use the cover as your template.
Pin it in place on the foam.
Trace closely around on the outside of the piping.
Cut the foam on the outside of that line.
It's better too big than too small. You can always make it smaller. Pretty hard to make it bigger.
Use 'Automotive Weatherstrip Adhesive' to glue the foam to the frame.
Two colors. Black or yellow. Same formula. But for some reason, black is more expensive. WTF?
On this job, I'd prefer the yellow, anyways.
You must be registered for see images attach
Apply a thin layer to both parts & let it dry to the touch. Putty knife or small bondo spreader works. I've used a thin piece of stiff cardboard too. ...'cause I'm cheap!
Align them up & stick them together. Foam on the bench, frame in your hand. This prevents the foam from being distorted outa shape as the parts are going together.
Start at one end with the frame & with little to no pressure rock it down into place onto the foam.
Don't compress the frame onto the foam quite yet.
Make sure it is all aligned & in the right spot.
The glue being dry will allow for some adjustment. Even still, it will stick somewhat. Be careful if it does need re-aligning. Pulling it apart will leave foam chunks behind on the frame where even the slightest pressure was applied.
If not removed, those can telegraph lumps through to the finished cover, or divots if those chunks are removed.
Once you're happy with everything, compress the h3ll out of it. Weight it down. The glue gets stronger over time.
If you've let the glue dry enough, the grip is going to be tenacious. It's a one-shot deal. After the glue has been compressed, the only way to get it apart is to shred the foam off of the frame.
...and you'll be starting all over again.