Build of my ‘88 RCSB C1500 owned for 20 years

Disclaimer: Links on this page pointing to Amazon, eBay and other sites may include affiliate code. If you click them and make a purchase, we may earn a small commission.

HotWheelsBurban

Gotta have 4 doors..... Rawhide, TOTY 2023!
Joined
Sep 18, 2019
Messages
9,845
Reaction score
18,020
Location
Houston, Texas
Those are special times for sure. He had a trucking service that only served oil/gas exploration so anytime something broke (rarely I must add) out in the boonies at a location it was just work.
Yeah, I figure he's watching when I'm in the yards too. Probably would have surprised him that I got the crew cab, he wanted a square body one for years. He wanted to put a camper shell on it, to have the covered 8' bed space.
 

Garage Hack

OBS Enthusiast
Joined
Jul 12, 2018
Messages
72
Reaction score
58
Location
So Cal
Nice build and write-up. Can you confirm that 383 you put in there is a traditional SBC? I have an LS3 ordered for mine and am looking at accessory drive kits including the Holley Mid-mount for LS motors. Your thread is the only one that came up while searching.
 

alignman88

I'm Awesome
Joined
Aug 28, 2020
Messages
178
Reaction score
450
Location
St. Louis
Nice build and write-up. Can you confirm that 383 you put in there is a traditional SBC? I have an LS3 ordered for mine and am looking at accessory drive kits including the Holley Mid-mount for LS motors. Your thread is the only one that came up while searching.
It is a traditional SBC 383 but is bored .060 over equating to 388”. The parts contained in the Holley mid mount are easily sourced should there be a failure on the road. I believe the power steering pump, 150 amp alternator and AC compressor are all C7 Corvette type and the water pump that bolts into the “bracket” that holds everything is a GM LT1 impeller and seal come in a GM bag with PN. Definitely not cheap, but the value is evident in person. Fit and finish is excellent, go ahead and treat yourself you’ll be glad ya did.
 

Garage Hack

OBS Enthusiast
Joined
Jul 12, 2018
Messages
72
Reaction score
58
Location
So Cal
It is a traditional SBC 383 but is bored .060 over equating to 388”. The parts contained in the Holley mid mount are easily sourced should there be a failure on the road. I believe the power steering pump, 150 amp alternator and AC compressor are all C7 Corvette type and the water pump that bolts into the “bracket” that holds everything is a GM LT1 impeller and seal come in a GM bag with PN. Definitely not cheap, but the value is evident in person. Fit and finish is excellent, go ahead and treat yourself you’ll be glad ya did.
Awesome, thanks for that info. I appreciate it.
 

alignman88

I'm Awesome
Joined
Aug 28, 2020
Messages
178
Reaction score
450
Location
St. Louis
I couldn’t find an upper radiator mount/cover that looked the way I wanted since I changed the radiator to an AlloyWorks dual fan 4 row unit and centered the radiator in the core support. Now the entire cooling area is matching the core support opening and isn’t triggering my ‘tism when I look at it lol.

A little drawing and poster board template making and I was off to my metal supply place. $17 for a 48”x 13” 12 gauge drop and it was cut and grind time. Once I had it fitted properly I took it back to the metals supplier and they bent the 90 degree angle ($20 minimum charge) to keep the radiator and its new Prothane mounts captured.

Already had the right paint and ARP 12 point fasteners (tapped the OE 6mm inserts to 1/4-20) so the way I see it for $37.00 I hid the ugly core support and have a properly mounted radiator.
 

Attachments

  • 16AF4D67-A66A-46A5-815D-00BD95F51504.jpeg
    16AF4D67-A66A-46A5-815D-00BD95F51504.jpeg
    330.7 KB · Views: 27
  • 4E287054-AAF7-462D-B3CA-22EDB971207E.jpeg
    4E287054-AAF7-462D-B3CA-22EDB971207E.jpeg
    290.1 KB · Views: 27
  • 11694DEB-D33A-4F25-8472-3FCD72D4A026.jpeg
    11694DEB-D33A-4F25-8472-3FCD72D4A026.jpeg
    283 KB · Views: 27
  • 147C207C-2E5C-4282-B6CC-6CBB024A0C3E.jpeg
    147C207C-2E5C-4282-B6CC-6CBB024A0C3E.jpeg
    267.4 KB · Views: 28

FullBlowncustoms

I'm Awesome
Joined
Sep 7, 2023
Messages
342
Reaction score
543
Location
Upstate NY Finger Lakes Region
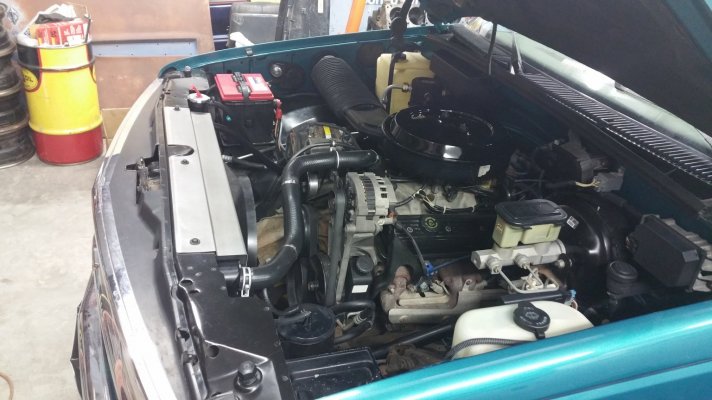
Sprayed the firewall and I fenders today. Stayed with the original bright silver truck came with as a two tone silver/metallic black. Planned to use PPG as that’s what I am familiar with but WOW paint prices are crazy high! Just a quart of color and reducer was $235.00 and still would need the clear/activator. No way for this rednecks engine bay. Local paint shop has their “house brand” called Shop-Line. Quart of color, quart of JR506 reducer (1 to 1 mix), a quart of JC630 clear and pint of JH6370 activator (4 to 1 mix) only totaled $190.00.

I was skeptical that it would lay out as slick as the PPG but man was I wrong! I’m very pleased with the results and knew it would be good by halfway through first color coat. 4 coats of color and 3 coats of clear.

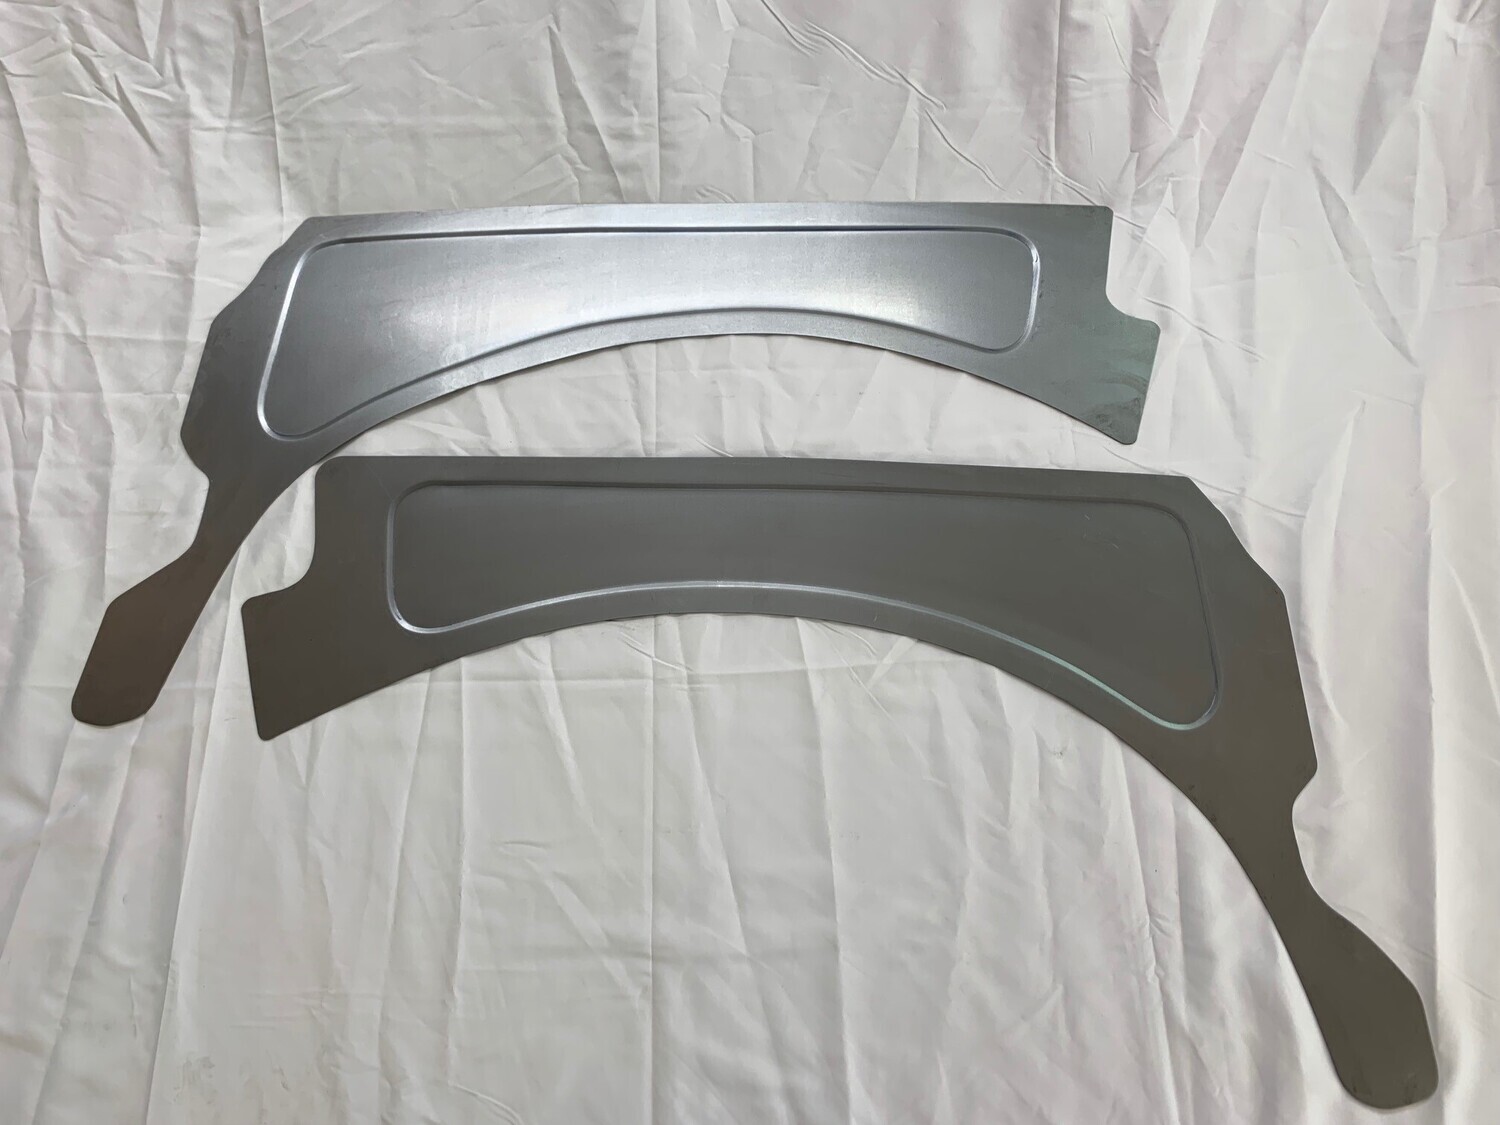
Was starting to make some panels to cover up all the holes in the fenders, but the old googler taught me that Slosh Tubz sells a pair of nice metal panels for our ‘88-98 trucks and not too bad priced at $150. Those will definitely be on the list before it’s rolling again. Here’s the link:

Underside of hood and the flat part of hinges that bolt to them still to be done. After market hood that’s been on there 20+ years was rusting between the pinch welded layers and the hinge was rusted because of the cheap old hood. Soaking the hinge in EvaporRust to get rid of that crud, and may not go back with the hood. I’ve been considering a fiberglass hood to go along with the other front end weight reductions from stock with aluminum heads and QA1 suspension. Anyone own or recommend a nice fiberglass hood? Thinking a 2” cowl would be cool.

Pictures don’t show well on a fine metallic

silver but here’s a pic of this step done, and the products I used.
Crazy prices now, and any red paint codes are even way more $$$
 

Moparmat2000

I'm Awesome
Joined
Feb 13, 2016
Messages
1,780
Reaction score
4,019
Location
Grand Tetons
I couldn’t find an upper radiator mount/cover that looked the way I wanted since I changed the radiator to an AlloyWorks dual fan 4 row unit and centered the radiator in the core support. Now the entire cooling area is matching the core support opening and isn’t triggering my ‘tism when I look at it lol.

A little drawing and poster board template making and I was off to my metal supply place. $17 for a 48”x 13” 12 gauge drop and it was cut and grind time. Once I had it fitted properly I took it back to the metals supplier and they bent the 90 degree angle ($20 minimum charge) to keep the radiator and its new Prothane mounts captured.

Already had the right paint and ARP 12 point fasteners (tapped the OE 6mm inserts to 1/4-20) so the way I see it for $37.00 I hid the ugly core support and have a properly mounted radiator.
I had to do something similar when I put an electric fan on my 94 and ditched the factory shroud. I used a piece of .050" stainless steel
 

Attachments

  • 20151121_204342.jpg
    20151121_204342.jpg
    220.4 KB · Views: 21
Top