OK, I ordered from truckpartsuperstore.ca . Great to deal with. I got the kit and over the past few days prepped everything. Today I cut out the original muffler and tailpipe and installed the Flowmaster.
Prep: I cleaned the muffler with mineral spirits and dried it. Then I scuffed the surface (Flowmaster's flat black paint) with 400 grit emery cloth. Then cleaned it again with mineral spirits and dried it. Then I sprayed 3 thin coats of VHT Flameproof header paint (Frank Enstein's suggestion) - first 2 coats about 15-20 minutes apart, third coat the next morning.
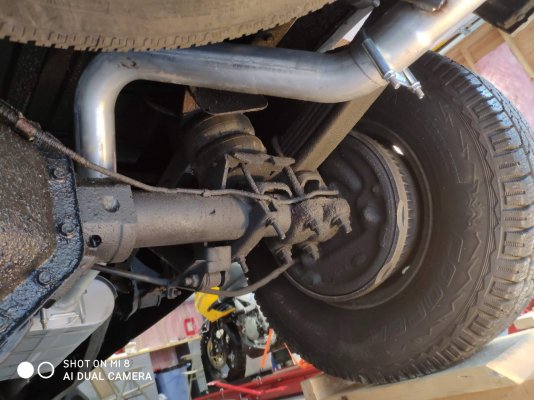
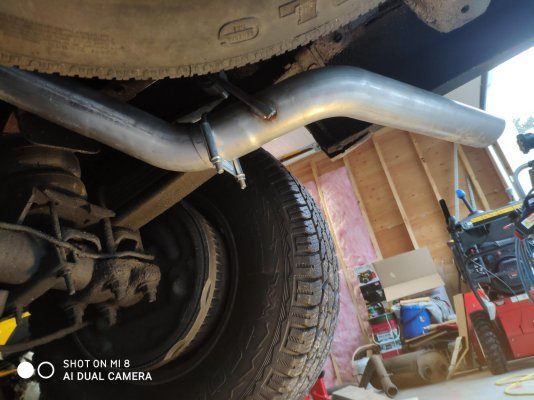
I had to file the outside of the end of the tailpipe that fit INSIDE the muffler outlet. It was a fraction of a millimeter too big. Yeah the tailpipe goes inside the muffler outlet, BUT there is a bit of a shoulder inside there that the tailpipe butts up to so it is unrestricted.
This morning I cut off the muffler with a 7" cutoff disk on my mini grinder. I had to finish the outboard inlet pipe with a hacksaw about an inch (outlet first with a jack stand holding the muffler up). I used a G-Clamp to push the hanger rods out of the rubber hangers (flush on the first side) and a pry bar to pull them out the other side of the rubber.
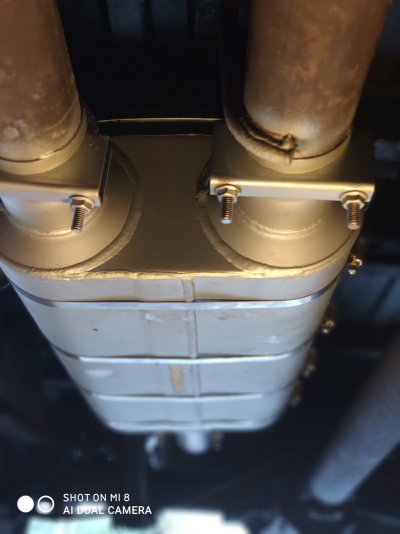
Install: After grinding around the outside of the cut off inlet pipes I coated the outside of them with Permatex muffler cement as well as the front half of the Flowmaster tailpipe. I also sprayed some silicone lube on the hangers welded on the new tailpipe pieces. I had already put copper anti-seize on the clamp threads and had them positioned and snugged on the muffler inlets & outlet. The inlets were a real snug fit over the factory inlet pipes. No hammering required, but considerable wiggling and pushing. Great fit. It looks like Flowmaster squeezed the 3" inlets down to match the 2.75" OD of the factory pipes. Well done!
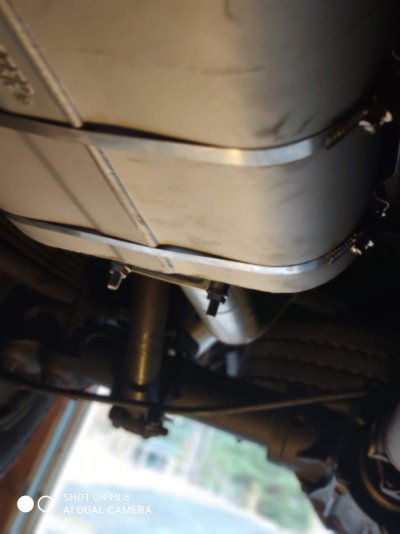
I didn't tighten any clamps until I had the pipes in the muffler. I used the supplied clamps. After I had the front tailpipe on and positioned for good clearance I tightened the inlet clamps. Then I put on the rear tailpipe - again with muffler cement. When I had them lined up I tightened the muffler outlet clamp. Then I lined up the rear tailpipe and held it in place on a jack stand and tightened that up. No leaks.
The muffler does sit a degree or 2 clockwise rotated (looking forward from the rear) when installed. This is normal and not noticeable. The stock one did, too, and nobody ever noticed.
The VHT process is to let it idle for 10 minutes, cool for 20, idle for 20, cool for another 20, then drive normally for a half hour. I went with idling for 15 minutes while checking the muffler temp, but it wouldn't go above 108*F, then cooling for 20, then idling for 20 and cooling for 20. Then I went for a half hour drive mostly at 50 km/h (30 mph) in second gear. I wanted to get the muffler temp up without it cooling from the airflow of driving faster. Then I let it idle for another 15-20 minutes while I had a beer with the guys.
Frank Enstein said to let it idle until the paint started to smoke the first time, but it just wouldn't get hot enough to smoke. Hopefully what I did was sufficient to cure the paint. This paint is more like powder than paint and NEEDS to be cured.
Oh yeah, I did spray over the scratches around the clamps after the first 15 minutes of idling.
It is a bit louder than stock, but deeper. Sounds nice, mellow. There is a slight drone at about 1600-1700 RPM under gentle acceleration. Not noticeable when cruising at that RPM. I'm sure it's louder on harder acceleration, but I can't judge how loud from inside the cab. Maybe next time it's warm and dry I'll open the windows for a listen. I gotta say, even the stock muffler and airbox was pretty loud under full throttle acceleration. I'm sure this is going to be a bit louder again. I do need to get on it to see if I can feel any difference over the stock one since I have the Black Bear basic tune. The freer flow is supposed to compliment that.
Last thing - tomorrow I going to put on the heatshield that came with the kit. The original muffler had one so maybe there's a reason even though I couldn't get the muffler hot today. Maybe in the middle of July it'll get hot.
Thanks for everyone's help.
Glenn


")