'88/89 Glass Quads' Achilles Heel- The Adjusters!

Disclaimer: Links on this page pointing to Amazon, eBay and other sites may include affiliate code. If you click them and make a purchase, we may earn a small commission.

DennisT

I'm Awesome
Joined
Oct 25, 2021
Messages
129
Reaction score
104
Location
E Washington state
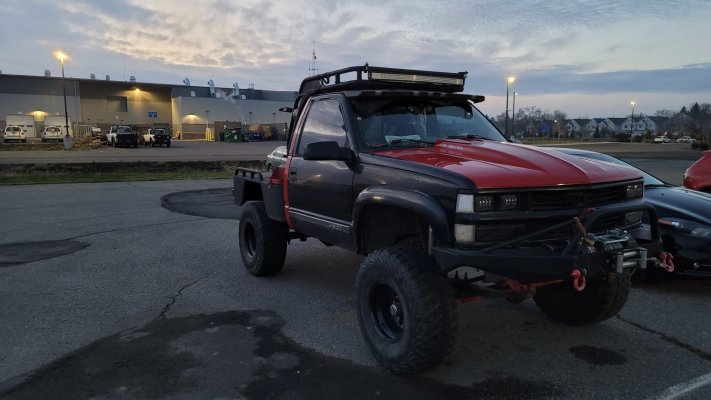
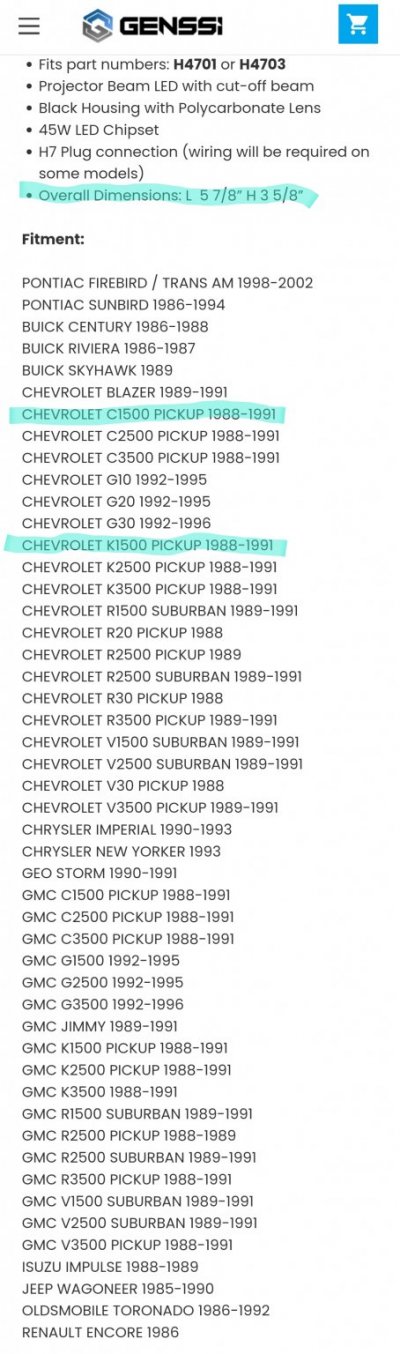
This is an extension of my post of Dec. 29th., on '89 glass Quad need adj. info and stuck screws. That thread became multi-layered but very helpful to me. As I continue to work my way through the process of getting a set of these old mini 1988/89 glass sealed beams installed on my 1996 GMC K1500, I thought it best to focus on what I now think is the, "Achilles Heel," of these d$*&nd things - the Adjusters. Hence, more of a single-subject thread. All the other conversion details appear straight forward, and, again, yes, I'll be installing HD direct 12V wiring and 4HI. I scrounged a set of these quad lamps and mounting brackets, complete, from wrecking yard. Later got a single bracket/lamp assembly. So I have a set-and-a-half to work from. ALL of them have adjuster problems, even though I've been gentle with them. It took me a while and help from this forum to realize they only adjust from the top; not from the front torx screws that square-lock into the bucket edges. To accomplish top adjusting, GM in their wisdom created a right-angle drive that resides to the rear of the screw that appears in the front. Most of you voice trouble with these little gear boxes. Some day I'll get a spare gear box and open it up to see what makes it tick. One of the better suggestions in my old thread was from Frank Enstein, who urged me to disassemble the entire unit. When I did, having removed tension on the screws, I found I could turn the adjuster on top for a couple of them. However, doing that also turned the screw facing out front, which, when captured by the square cut-out in the bucket would not have been able to move at all, as it would be, "captured." Worst of all, turning the top vertical screw, turns the horizontal screw......BUT, the horizontal screw does NOT move in or out of the gear box. So in it's present state, it is incapable of adjusting the headlight! So I think something inside the box is broken. I'm anxious to get my hands on one of these adjusters that actually works properly. I've never had that experience. I'm going to attempt to post several photos in the hope all this will help others in the future. Meanwhile, as I'm still am an
You must be registered for see images attach
, "adjuster Novice," perhaps some of you can help perfect this humble document/thread into something useful long term in this forum. Thanks for your patience, Dennis
 

DennisT

I'm Awesome
Joined
Oct 25, 2021
Messages
129
Reaction score
104
Location
E Washington state
(I admire you guys that build beautiful photo enriched, perfect posts -- I'm in this 2 hours and still fumbling....)
Photos - try again:
You must be registered for see images attach
 

DennisT

I'm Awesome
Joined
Oct 25, 2021
Messages
129
Reaction score
104
Location
E Washington state
Note: the last adjuster
You must be registered for see images attach
photo shows a molded in number which is: 279 over 8118, for the short shaft. Long shaft adjuster is 289 over 8119. Partially stripped lamp housing/bracket is the Right Hand bracket. Now I need to find a hand full of these danged adjusters.....!! Ha.
 

Scubaru25

Newbie
Joined
Feb 27, 2022
Messages
6
Reaction score
6
Location
99207
I'm going through a similar struggle with these. Installed them along with the 4 hi mod in my 96 last summer and decided to aim them down a bit but no matter how much I turn the adjusters they just don't move. Can't seem to find part numbers or any info for that matter on the 88-89 setup. They do look good though. Here's a link for the lights they are crazy bright and dot approved. https://genssi.com/h4701-h4703-sealed-beam-led-replacement-headlights-2-pack/
 

Attachments

  • 20211121_162345.jpg
    20211121_162345.jpg
    209.2 KB · Views: 14

DennisT

I'm Awesome
Joined
Oct 25, 2021
Messages
129
Reaction score
104
Location
E Washington state
S....25, very interesting regarding the lights you found and the link you provided. I clicked on the link, found the lights quickly and was surprised. To me the ad seemed to be selling 4x6-inch lamps. If so, and if you used them, how did you get them into the '88/'89 sealed beam buckets???? When fighting these conversions myself, the only lamps that would fit 88/89 were what was called 150mm lamps. Smaller than 4x6.
Adjusters: a headache. Period. I spent several weeks on that. My truck was/still is inside waiting out the winter. So I could afford the time spent. I worked really, really hard trying to identify those adjusters, and the result was my post above with the photos. I finally found a couple on ebay. Here are some thoughts: If I were to bring home an '88 headlight housing complete with buckets, adjusters, etc., from a wrecking yard today I would sit down, get comfortable, and get out my hex-driver, sized to fit the, "top," vertical, adjuster shaft. Next I would get my thin, plastic compatible oil and put a drop on each threaded end and the area where the vertical adjuster shaft enters that little, "gear box." Then i would gently try adjusting. Back when I began, the wrecking yard units i had to deal with had 80% of the adjusters that would not easily turn, if at all. After soaking with additional drops of that oil, over several days, I began to get motion. Fast forward....I got 60% of my stuff working and had to replace the rest with other used or ebay adjusters. The, "short shaft," adjusters seem to be far more difficult to find/buy than the long shaft. Early on, I completely removed an adjuster and turned it's vertical shaft, whereby I discovered it merely rotated the second shaft. They don't adjust that way. The threaded shafts don't move in or out in that method of, "testing." When the adjuster is mounted and connected to the bucket, the square notch in the bucket prevents it's mating shaft from turning. THEN the gearbox behaves differently, and if all is working correctly, (as in...not broken), one can observe the threaded parts moving in and out and the bucket itself moves. That's why, now, the first thing I would do is lube, and try moving the vertical adjuster while everything is connected. But I would not force it. Once they began to work, I rotated in and out a little, lubed, rotated again, lubed, etc., etc., on and on. I've had at least 3 adjusters that never did, "come loose," and begin to work. Some eventually begin to work smoothly, some not so easy. I bought one NOS, on ebay, and it was balky right out of the package. I lubed that one a lot too before installing. Others on this forum have encountered what they describe as, "stripped," gearboxes. I've yet to find that. I've yet to understand how those little gearboxes work. Someday I'd like to cut a bad one apart and see how it works. They're weird. Let us know how you do with all this. Lastly, I'm still confused on what those lamps you are using are.......
 

HotWheelsBurban

Gotta have 4 doors..... Rawhide, TOTY 2023!
Joined
Sep 18, 2019
Messages
9,774
Reaction score
17,830
Location
Houston, Texas
I think a lot of this plastic stuff doesn't come from the factory with much if any lubricant. The replacement door handle assemblies I got were dry as a desert, had to spray them repeatedly with silicone spray lube and white lithium grease. Front ones are better now, almost like new(cause they get used most) but the back doors still stick.
 

Scubaru25

Newbie
Joined
Feb 27, 2022
Messages
6
Reaction score
6
Location
99207
S....25, very interesting regarding the lights you found and the link you provided. I clicked on the link, found the lights quickly and was surprised. To me the ad seemed to be selling 4x6-inch lamps. If so, and if you used them, how did you get them into the '88/'89 sealed beam buckets???? When fighting these conversions myself, the only lamps that would fit 88/89 were what was called 150mm lamps. Smaller than 4x6.
Adjusters: a headache. Period. I spent several weeks on that. My truck was/still is inside waiting out the winter. So I could afford the time spent. I worked really, really hard trying to identify those adjusters, and the result was my post above with the photos. I finally found a couple on ebay. Here are some thoughts: If I were to bring home an '88 headlight housing complete with buckets, adjusters, etc., from a wrecking yard today I would sit down, get comfortable, and get out my hex-driver, sized to fit the, "top," vertical, adjuster shaft. Next I would get my thin, plastic compatible oil and put a drop on each threaded end and the area where the vertical adjuster shaft enters that little, "gear box." Then i would gently try adjusting. Back when I began, the wrecking yard units i had to deal with had 80% of the adjusters that would not easily turn, if at all. After soaking with additional drops of that oil, over several days, I began to get motion. Fast forward....I got 60% of my stuff working and had to replace the rest with other used or ebay adjusters. The, "short shaft," adjusters seem to be far more difficult to find/buy than the long shaft. Early on, I completely removed an adjuster and turned it's vertical shaft, whereby I discovered it merely rotated the second shaft. They don't adjust that way. The threaded shafts don't move in or out in that method of, "testing." When the adjuster is mounted and connected to the bucket, the square notch in the bucket prevents it's mating shaft from turning. THEN the gearbox behaves differently, and if all is working correctly, (as in...not broken), one can observe the threaded parts moving in and out and the bucket itself moves. That's why, now, the first thing I would do is lube, and try moving the vertical adjuster while everything is connected. But I would not force it. Once they began to work, I rotated in and out a little, lubed, rotated again, lubed, etc., etc., on and on. I've had at least 3 adjusters that never did, "come loose," and begin to work. Some eventually begin to work smoothly, some not so easy. I bought one NOS, on ebay, and it was balky right out of the package. I lubed that one a lot too before installing. Others on this forum have encountered what they describe as, "stripped," gearboxes. I've yet to find that. I've yet to understand how those little gearboxes work. Someday I'd like to cut a bad one apart and see how it works. They're weird. Let us know how you do with all this. Lastly, I'm still confused on what those lamps you are using are.......
Thanks for the detailed response. When work slows down in the spring I'll tear into them and see if I can't get them working. All the adjusters turn freely and don't feel bound up at all so it's interesting. Any chance you could tell me which adjusters are the vertical and which horizontal? As far as the lights I used they are the ones from the link I provided. They are indeed smaller than 4x6 and designed for the quad beam Firebirds that share the same lights as the quad beam 88-89 trucks. I'll add some more pics
 

Attachments

  • Screenshot_20220228-194832_Chrome.jpg
    Screenshot_20220228-194832_Chrome.jpg
    153 KB · Views: 25
  • 20211122_160627.jpg
    20211122_160627.jpg
    229 KB · Views: 25
  • 20211121_162359.jpg
    20211121_162359.jpg
    180 KB · Views: 25

DennisT

I'm Awesome
Joined
Oct 25, 2021
Messages
129
Reaction score
104
Location
E Washington state
Sure: walk up to truck and open hood. Stand on battery side, which is passenger side, in front of headlights. Now you're looking down at four adjusters. First on your left, outboard adjacent to fender, will be slanted. (Only one of the four is slanted) That is low beam up and down. Next one to the right of that is your low beam left or right; call it adjuster No. 2. Next, moving toward center of truck will be high beam up and down. No. 3. Last inboard adjuster then will be high beam left or right. That takes care of your right side, (passenger side), set of two headlights.
I'll look at your link to headlights again. I need to keep up on this stuff, although I'm not ready for LED's just yet. I'm using the LMC glass enclosures with replaceable bulbs.
Thanks, Dennis
 

HotWheelsBurban

Gotta have 4 doors..... Rawhide, TOTY 2023!
Joined
Sep 18, 2019
Messages
9,774
Reaction score
17,830
Location
Houston, Texas
Thanks for the detailed response. When work slows down in the spring I'll tear into them and see if I can't get them working. All the adjusters turn freely and don't feel bound up at all so it's interesting. Any chance you could tell me which adjusters are the vertical and which horizontal? As far as the lights I used they are the ones from the link I provided. They are indeed smaller than 4x6 and designed for the quad beam Firebirds that share the same lights as the quad beam 88-89 trucks. I'll add some more pics
Wow, there's a lot of vehicles that use those lights. I remember the Pontiacs that had the little quads but wasn't aware they were the same lights. We never had to replace the headlights on our 90 R2500 square body Burb, but I remember Dad looking for them in the parts stores.
I miss that truck, but I bet the headlight adjustment parts are really hard to find for them now....
 
Top