Solved: Botched steering gear seal replacement

Disclaimer: Links on this page pointing to Amazon, eBay and other sites may include affiliate code. If you click them and make a purchase, we may earn a small commission.

BVRPLZR

Newbie
Joined
Nov 25, 2022
Messages
26
Reaction score
44
Location
Maine
Hi all

I have an 88 G20 van and I noticed a significant PS fluid leak the other day that was coming from the top of the steering gear box.
I was able to determine that it was leaking around the stub shaft so I figured I'd get a reseal kit and see if I could replace the leaky seals.

I fought to separate the steering input shaft from the stub shaft for quite a while (rusty new england car) and then got the dust seal/washer (243, diagram at bottom of post) out with a pick.

The second seal (242) doesn't want to come out so I figured ok, I'll take the adjuster plug (240) out and maybe it'll be easier to get at the seal.

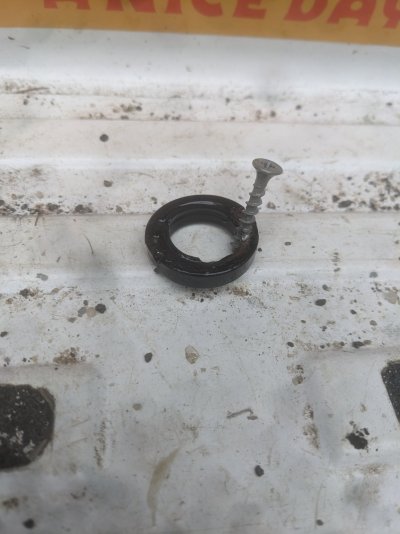
In order to get the adjuster plug out, I need to remove a lock ring (245) from the top of the adjuster plug. This is where the panic started to set in.

You must be registered for see images attach


I was able to get a pry bar hooked into one of the little notches in the lock ring and tried to beat it off with a hammer. All I ended up doing was driving the tip of the pry bar into the metal of the lock ring without budging it a millimeter. I'm not sure that thing is ever going to spin again.

I'm looking for any advice as to how to proceed.
It seems like I should probably take the steering box out of the vehicle and get it on a bench, but even then I'm not sure that lock ring is going to budge.

You must be registered for see images attach
 
Last edited:

Orpedcrow

I don’t know what I’m doing
Supporting Member
Joined
Aug 20, 2022
Messages
2,408
Reaction score
6,107
Location
East Texas
FIRE!! fire fixes everything lol. No but really, I’d put it in a vice, go through a couple heat cycles on the lock ring. Probably going to need a big axle nut socket to apply even force around the nut instead of concentrated for on a corner.


Also consider time and money
You must be registered for see images attach
 

Vanishing Point

I'm Awesome
Joined
Mar 4, 2018
Messages
105
Reaction score
126
Location
Glendora, CA 91740
I'm not too familiar with the G20 Line of Power Steering Boxes but if things don't seem to work out for you and your financially able, your next best bet might either be the local bone yard or Remanufacture unit (Lares). Or one of these mentioned below, I know they are a little pricey. I myself would try and locate a Blue Top Brand but are very hard to find, Good luck!

Welcome Guest
Shop By VehicleMy AccountNeed Help?
1-844-487-2787
MON-FRI 9AM-6PM EST
0

Search

- Year - ---- 1988
- Make - ---- Chevrolet
- Model - ---- G20
- Fuel - ---- -- Gas
GearSelect - ---- Automatic
Buy With Confidence
You must be registered for see images attach
Fast & Easy Exchanges
No Hassle | Just Help
You must be registered for see images attach
Price Match Guarantee
We Match All Legitimate Prices
You must be registered for see images attach
Same Day FREE Shipping
Order by 2PM EST (Exclusions Apply)
You must be registered for see images attach
In-House Experts
We Know Diesel Trucks & Equipment
You must be registered for see images attach

You must be registered for see images attach

Click on image to zoom

REDHEAD 85-05 CHEVY ASTRO / GMC SAFARI VANS STEERING GEAR | 2863 | 1985-2005 CHEVY ASTRO / GMC SAFARI VANS​


SKU: 2863
$100 Core Charge
Cores with broken shafts or cases will receive partial or no core refund.

$326.00
Starting at $30/mo with Affirm

CUSTOMIZE YOUR ITEM​


2 Extra (4 Total) Pre-Tapped Ports & Plugs for Aftermarket Hydraulic Steering Ram?
- -
* required

You are responsible for delivery charges of your core gearbox to Redhead. Below you may select pre-paid ground and we'll provide a shipping label or you can bypass the pre-paid label and ship your core return to Redhead with the carrier of your choice.
- -
* required

Add refundable $100 core charge
- -
* required

Qty:
FREE SHIPPING
Add To CartAdd To Wishlist
Item InquiryTell A Friend

LIMITED WARRANTY POLICY​


PART #2863. Fits all 2WD Astro and Safari vans. If you have a 4WD van, please order our part number 2865.

FEATURES:​

  • 12 Month Warranty
  • Built in the USA
  • Housings are machined out and replaced with needle bearings
  • Shafts are flame sprayed or replaced as needed
  • New control valves installed on some applications
  • Worm and piston assembly are custom fit with special ordered, precise oversized ball bearings
  • Sector shafts are installed on a lathe to confirm they are straight and true
  • Sealing surface is polished to avoid any leaks

CORE RETURN:​

Please return core to: RedHead Steering Gears 4302 B ST NW AUBURN, WA 98001
  • Please drain core of fluid and replace port plugs
  • Use plastic bag that we sent your new gearbox in (if it’s still intact) or whatever is needed to keep box from leaking
  • Re-use packing materials to ensure the box is returned to us without hassle from the courier
  • Also, if possible, tape or re-tape the outside of the box to help strengthen it
Note:
If these steps aren’t properly performed, the gearbox may end up in hazmat and/or be returned to sender by courier.
  • Have a question? Ask the Pros
  • Email UsGet answers from the pros
  • 1-844-487-2787Mon-Fri 9am-6pm EST
 

BVRPLZR

Newbie
Joined
Nov 25, 2022
Messages
26
Reaction score
44
Location
Maine
Thanks for the replies everyone! If the steering box every truly needs to be replaced I think I'll go with a blue top.

But I ended up walking away from it and came up with a plan that worked!

I was looking at the new seal and noticed that it looked like a scaled down version of the front main seal so I figured I'd try the same technique I used to remove that when I was rebuilding this engine.

I drilled two small holes on either side of the seal (it was thin metal covered in rubber) and then I twisted in a sheetrock screw a few threads. Then I was able to fit a claw hammer around the head of the screw and I was able to tug it out that way, going back and forth between the screws until it popped out.

Hammered the new seal into place with a 7/8 socket and a few extensions.

Leak solved!
 

Attachments

  • PXL_20230708_210402799.jpg
    PXL_20230708_210402799.jpg
    201.3 KB · Views: 5
Top