

I figured i should start my build thread since iv been doing a lot of work to my truck lately and to help keep track.
The truck is parked as of 10.10.15 due to winter weather so im updating the build thread on what Ive accomplished over the summer and trying to add info/pics to be as detailed and to the point as i can. I will be ordering more goodies over the winter and will resume in the spring/summer. I have lots planed for this truck so there will be much much more to come this spring.
History:
This is my 1991 K2500 (6 lug, 14bolt sf with 305<ouch>). This was my first truck that i bought when i was 16 (14 years ago now). The 305 has 189,000 miles on it and going strong and the 700r4 has been rebuilt and replaced a few times. despite owning/buying several trucks over the years Ive always kept my first truck. It was my DD in high-school and has taken me from Alaska to Phoenix for 2 years of tech school and back, -60F to 120F the truck has always been dependable.
You must be registered for see images attach
The truck has been sitting for over 5+ years now and its time to fix it back up and do the things i always wanted to do in high school but couldn't afford.
You must be registered for see images attach
You must be registered for see images attach
Start:
- Cleaned exterior
- changed oil/check fluids
- clean out cab
- remove racing seats
- install oem seats
- remove +clean carpet and add insulation
- repaint interior (temporary)
You must be registered for see images attach
You must be registered for see images attach
You must be registered for see images attach
You must be registered for see images attach
You must be registered for see images attach
You must be registered for see images attach
You must be registered for see images attach
You must be registered for see images attach
You must be registered for see images attach
The interior is a warzone. between being painted several times in my high school days, to the racing seats i should have never messed with it. (now im fixing it all)
The rear seat is gone because i built a table/platform for my sub setup i use to have. Unfortunately i don't have any pics of my truck in its prime just after its been neglected for so long. sound system was stolen in phoenix along with my deck and tach.
Interior to do list:
- Gmt800 seats
- Charcoal grey interior color
- Charcoal grey carpet w/good floor mats(weathertech)
- reinstall triple pillar pod with cobalt series gauges and cobalt Tach
- R&R windshield with 4" brow tint + re-tint all other glass
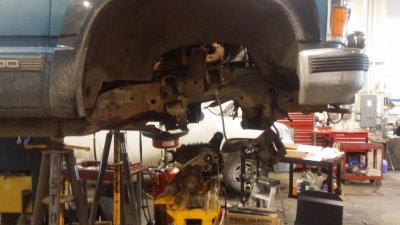
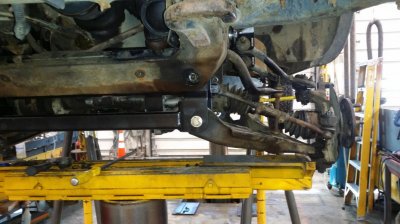
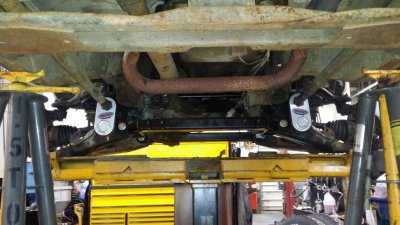
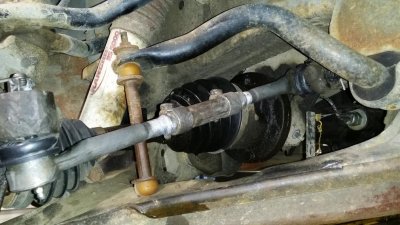
Front end work:
I brought the truck into work to shake the front end down/inspect everything and make a list of needed repairs and fixed it.
- Ball joints have very minor play. Ive replaced the uppers before and the lowers are still the factory riveted in ball joints ...Not bad for 189k miles
- R&R inner and outer tie rods
- R&R steering gear box. Ive adjusted the old one and it just needed replacement.
- make a temporary exhaust. i cut off my dual exhaust/removed the cat
- rebuild steering column/fix turn signal lever/cancel cam
- R&R wiper motor
You must be registered for see images attach
You must be registered for see images attach
You must be registered for see images attach
You must be registered for see images attach
You must be registered for see images attach
You must be registered for see images attach
You must be registered for see images attach
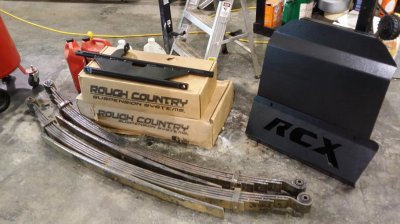
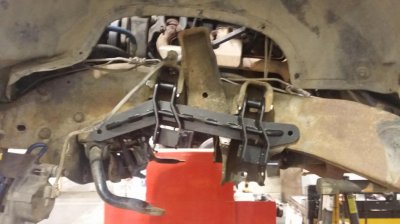
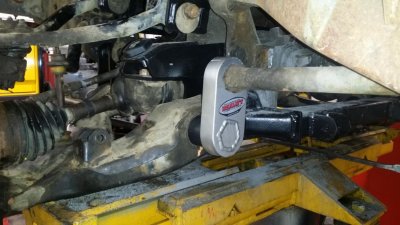
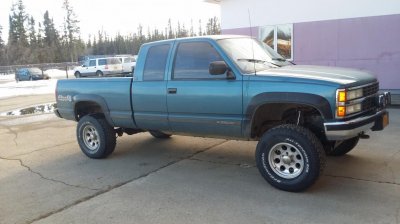
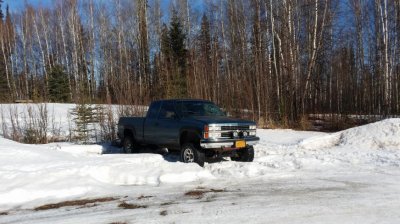
Lift kit:
- 6" RCX suspension lift
- Real Lift torsion bar relocators
- new 5+1 leaf springs
This is how the truck sits now. I left out the rear AAL and need to de-crank the bars a little just while im running the 285/75R16's. ill be running 35's at the least next summer so at that point ill add in the AAL and adjust the torsion bars to the level i want.
Attachments
-
 20150328_120506.jpg98.6 KB · Views: 391
 -
 20150129_154528.jpg97.9 KB · Views: 383
 -
 20150328_155841.jpg91.4 KB · Views: 380
 -
 20150328_175949.jpg89.9 KB · Views: 377
 -
 20150329_121356.jpg98 KB · Views: 379
 -
 20150329_113219.jpg99.4 KB · Views: 380
 -
 20150329_121419.jpg100.8 KB · Views: 380
 -
 20150329_190010.jpg96.3 KB · Views: 383
 -
 20150330_114726.jpg98.2 KB · Views: 379
 -
 20141003_204955.jpg100.6 KB · Views: 57
Last edited: